Stripo modules. What are they capable of? All features explained
Create exceptional emailsSummarize
Learn everything you need to know about Stripo modules to make a modular email design a part of your newsletter creation process. We’ll show you each feature our modules are a part of, how they work, so you can have a full picture of how modules can benefit your email design process.
In our articles, we often discuss modules, their usefulness, how they save time, and how they make email marketers' lives easier. We also show here and there how certain features related to modules work. However, it's high time that all the guides for modules were collected in one complete article. We will tell you about all the features related to modules in Stripo and also show in detail how they work.
What are Stripo modules?
Before we start describing the features in detail, it's worth going from afar, namely, talking about what modules are. At their core, modules are universal elements of an email template, like containers, structures, stripes, and others that help reduce the time it takes to create an email. Modules allow you to save stripes, structures, and containers to modify and reuse them over and over.
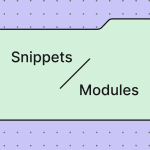
This is a general concept called modules. We could end here, but there is one important detail that is worth mentioning. In terms of features, all functionality can be divided into snippets (basic modules) and modules themselves (we know this word has already been used many times in the article, but now all the pieces of the puzzle will come together).
Snippets combine the most basic functionality of modules, which supports the “save and reuse” philosophy. Meanwhile, modules are a more advanced version of snippets, which allows you to update modules, work with data, and make modules part of email generation using AI.
We discussed snippets and modules in more detail and the benefits of each in our separate article.
Basic features
Let’s start with the basics and cover the main features of snippets. Their main goal is to make the email design process easier and faster. Before modules, creating emails involved a full pipeline of mockuping, designing, wireframing, and creating the email itself. Besides that, each email must be thoroughly tested. Even if you create a new email which is slightly different from the previous one, it still must go through the whole process.
Basic features of the module include a more straightforward approach. You create all the needed modules once using the pipeline above and save them to the library. Once it’s done, all you need to do is assemble emails using these modules like assembling a LEGO house from the bricks. Each module is already tested, includes your design code and the types of content you need for any occasion. It saves time and makes the email design process much faster.
These features are the easiest ones to handle, and mastering them will help you streamline your email design process.
Saving the email element as a module to a library
The first thing you can do with modules is actually save any element of the email you want as a module:
- to save your element, you need to click on it;
- after that, hover over the three-dot button to reveal the actions you can do with the element;
- click on the Save as Module button;
- on the left side of the screen, you’ll see a new menu where you can tweak your module basics before saving it;
- you can set the name of your module and description by typing both in the respective fields;
- you can also set a category to which you can tie your module (categories help to structure your module library, making it neat and organized);
- in this menu, you can also add tags and set the ID of your module (tags are useful when searching modules in the library, while ID is needed when transferring modules between projects);
Important note: The module ID sets automatically once you enter this menu, however, you can change it to any ID you like.
- to save the module, just click on the Save button;
- you’ll see this message once the module is saved;
And that’s pretty much it. Your first module is saved.
Important note: We showed you everything you can tweak before saving the module. In the meantime, you can skip all these steps, just name your module and click on the Save button. All the rest of the tweaks are optional.
Module library
All modules you save go straight to the library. The library itself is divided into three sections: My modules, Template modules, and General modules. Let’s quickly discuss each section.
- to enter the library, click on the Structures and Modules button;
- you’ll immediately see a general modules tab by default (this tab holds all the general modules created by our designers);
- you can search modules by typing their IDs, #tags, or names in the corresponding field;
- narrowing down the search is possible by using the filters button (search modules by categories or tags);
- pick how you want to display searched modules (grid-like or like a list);
Important note: Modules search features are the same for all tabs, so we won't dwell on them further.
- my modules tab stores all the custom modules you save in Stripo (the module we saved in the previous article section is also stored here);
- template modules store all the modules from which your current opened template is made.
Module library is a straightforward feature with all the needed functions to create a structured library of modules for any type of email newsletters and occasions. The structuring process is up to you.
Using and editing modules
Now it’s time to use your modules in the editor. Like any other block in the Stripo editor, you can drag and drop it in the template. Simply open the modules library, choose the needed module, click on it, and drag it to any place in the template.
Editing modules is the same process as adjusting any other element of your template. You can edit the blocks within your module, as all default settings for each block are configurable.
For example, let’s tweak the font of our product description:
- click on the Text block within the module to open its settings;
- first, we apply left-side alignment;
- next, we change the font by highlighting the text, clicking on the Styles option, and picking Lora font in the Web tab of the Font Family settings (to match the font of our button below).
And that’s it. We edited our module. You can change any element the same way: banner, button, image, and so on. But what if you want to save your changes made to this module?
Module update
There’s always room for improvement and changes, so you can update your modules anytime you need. For example, you need to change the module design without changing its structure completely (let’s say, your corporate colors changed). This is the case when the update feature is your helper. You can make all tweaks you need and update your module in the library. There’s no need to save another module with a changed design, cluttering your library.
To update your module, make necessary changes in this module (in our example, we changed the color of the button) and click on the Update Module button (it appears in the same spot where Save as Module usually is).
The side menu will appear, which looks the same as the menu you see when saving the module. You can also make all the needed tweaks here (changing module name, tags, categories, etc.), the same way as you do when saving the module. The main difference is that now you need to click the Update button.
Once clicked, you’ll see this message, showing you that your module was successfully updated.
Advanced features
It’s about time to dive into more complicated features that lie in the modules territory. But fear not, they are not THAT complicated. Yet, the boost they bring to the email design process is immeasurable.
Modules and teamwork
Marketing units often have big teams of marketers, and there’s a big chanсe of a few specialists work on the emails. Creating the same modules for each marketer is tiresome. Besides that, when a few marketers work on the same emails with the same modules, there is always a risk of mistakes and imperfections.
For example, your designer decided to make one of the email blocks smaller, but did not take into account that the content in this block was created for previous sizes and shortened it. Or, on the contrary, the marketer decided to expand the text and at the same time add an additional block that violates the originally intended design. The features below are aimed at solving these problems.
Sharing module
Your modules are useful not only to you but also to your colleagues. They can also come in handy in other projects. That’s why you can copy your modules to other projects or share them with your colleagues or clients:
- first, hover over any module in the library to see a three-dot button and click on it;
- once clicked, you’ll see a pop-up menu with the Copy to Project and Share to Project buttons;
- clicking on any option will open a side menu where you can choose to which projects your module will be copied or shared;
Important note: The main difference between copying and sharing module lies in further editing permissions. Copied modules can be edited and deleted by users in that project, while shared modules can’t be edited or deleted.
Locked data and locked design (coming soon)
We are expanding the advanced features of our modules, and right now we are actively working on the option to lock data and lock design. These features are big lifesavers when you're working with data in modules.
When you push the data into the module, it can mess up your design (for example, the product description is too big for the block). It also goes the opposite way, since making design changes can unintentionally affect the data (for example, during banner redesign, the texts can change). These problems are the main targets of the feature we are developing now.
And here’s how it will work:
- the “locked” design offers the ability to lock the module design in place, allowing the marketer to update data within the module without affecting the design;
- the data, in turn, is “locked” inside the module, giving you a green light to experiment with the design without worrying that important data will be lost.
We can’t say exactly when these features will be released, but you can be sure that if you stay tuned to our news and updates, you’ll be the first one to know.
Synchronized modules
We’ve mentioned above how you can update modules and save them. However, imagine the situation. Your module is used across 10 or 20 email templates. Updating each module in each template manually is tiresome, to say the least.
Remember when Twitter changed its name and logo to X? This was a “lovely day” for marketers all over the world who had to change the logo and social media links in all their emails, templates, and campaigns. The bravest ones did it manually across all their template libraries.
Synchronized modules fix this problem as they allow you to update the module once, and all email templates that include this module will be updated automatically. Instead of repeating the same update sequence 20 times, you do it once. The rest is up to Stripo:
- to set up the feature, you need to save your module as synchronized by clicking on the corresponding switch during the saving process;
- once saved, your module will have an orange border and a special mark Sync Off, showing that the synchronized feature is applied, but currently not activated;
- to activate the feature, click on the module and then on the Synchronized module switch.
After that, all changes you apply to this module will be applied to any email templates with this module in your library. If you change the color of the button, the same color will appear in other emails. Well, you got the idea.
Modules and smart elements
First, let’s figure out what smart elements actually are. When we're creating modules, we usually add all the data manually. For example, you create a product card. You need to add a product photo, its title, description, and price. With one module, it won’t take much time, but when it comes to several emails with dozens of product cards, adding all the data manually is a sure way down the routine road that can lead to imperfections and mistakes.
Smart elements are your go-to tool, as they allow you to pull the data from the source directly into the module. We’ll show you how this feature works using a product card as an example. We’ve prepared one card for the guitar shop in advance.
- to use this feature, click on the module and go to the “Data” tab;
- click on the “Connect Website Page” button to activate the smart feature.
Once done, your module is now converted into a smart structure. It is also able to recognize Text blocks as Title, Description, and Price, which are the main parts of any product card. They are also vital to receive the associated data from the source.
Now, let’s take some information from the website page as we need a different guitar to place in this product card. This entails changing the title, description, price, and photo, which, if done manually, is time-consuming. However, using smart elements, you can simply paste your product page link in the designated field, and the smart element will obtain the associated data and place it in the corresponding fields.
Here’s our product page. We copy its link and paste it into the smart element.
- copied links must be pasted into this field;
- to pull the data from the page, click on the “Get” button.
Now, we’ve got our new image, title, and product description. However, the price is still the same as on our previous product card.
This is the catch with smart modules. Since they search for the relevant parameters and, consequently, pull the associated data, sometimes, they are unable to obtain them because parameters such as price on the website can have a custom ID that differs from the standard ones.
To fix this, you need to manually enter the direction rule for our smart element to find the price on your website. To do this, click on the button with a crosshair sign to open the Direction Rule settings.
- you’ll see the Selector and Attribute input fields (that’s where our parameters will be entered);
- after that, go to the web page of the product and press the F12 button to open the page code;
- click on the arrow button and then hover over the product price. The line that is now highlighted in the code is your price selector;
- copy it by right-clicking on it and selecting “Copy” and then clicking on “Copy selector”;
- next, paste this selector into the “Selector” field;
- save the changes by clicking on the “Check Rule and Save” button.
Now, when you repeat the data retrieval process, the price should be the same as the one shown on your web page.
Important note: Any module can be turned into a smart one as you can set the needed direction rules to any field and pull the needed data into the module. A product card is just the most common example of using data in modules, so we took it as an example to show you how the whole feature works.
Improving smart modules with GenAI
Sometimes, the text you add manually to the module or the one you pull from the source into the module is not as impactful as you want it to be. Of course, you can rewrite it by yourself. However, this requires flexing your creativity muscles and will take your precious time. How about delegating this task to GenAI?
GenAI will not only rewrite it faster, but also create an impactful copy that generates clicks. We made our own study and figured out that using GenAI in creating copy increases CTOR by 41.34%.
For example, you have a smart module with a text like this. Technically, it describes everything a recipient will need, as well as adding some praise to the shown product. However, the whole text looks a bit dry. So now it’s time to fix it.
- click on the whole structure to open its settings (it’s important to select the whole structure for GenAI to better grasp the complete context and generate better texts);
- next, click on the button with a magic wand to modify your smart structure using GenAI;
- in a matter of seconds, your text will be updated to an enhanced version created by GenAI.
The new text definitely adds emotion to this smart module. However, if you don’t like it, you can regenerate the text by repeating the whole sequence to receive the needed copy.
GenAI and modules
GenAI is developing rapidly, and today, creating emails using its capabilities is not a fantasy but a reality. That’s a process of creating emails that we are steadily moving to. No more creating emails manually. No more long design brainstorms to come up with how your email should look or how this CTA should sound. We delegate this routine task to GenAI to have more time for strategic thinking.
However, GenAI does not create emails out of thin air. Modules are the cornerstone of generating emails. They serve as the necessary context for GenAI, allowing it to precisely direct its creative abilities. Modules clearly show GenAI what content, in what order, and in what layout the email should be, after which the magic of generation takes over.
That’s what our AI Assistant is all about. It’s a full-fledged tool for generating emails, and modules are at the core of the whole feature. You type the prompt in the dedicated field to give GenAI a description of what you want it to generate.
The whole process is divided into three stages. At first, our AI Assistant provides you with an email sequence based on your prompt and additional options. You can add a title and description for each email in your sequence, or proceed to the next step.
The next step is to create a basic layout for your future AI-generated email. Each layout is split into modules with generated content that you can customize, change each module's position, and so on.
The last step presents you with a full-fledged AI-generated email where design and content are set in place as puzzle pieces. You can tweak the color palette, make basic edits to essential content, see the code of the email, and tweak it. Once you are done, you can save this email to your library and use it for email campaigns.
Important note: AI Assistant is in the Beta stage, so some features may not work as intended. This tool is in active development, and more features will be added to make it the most robust AI email generator for you.
Interactive module generator
Interactive module generator is our separate product that has its place in the Stripo ecosystem. The main goal of this generator is to provide marketers with an easy way to create interactive mechanics they can implement in their emails.
Interactive emails are hard to build as they require technical knowledge and time. Besides that, making interactive elements compatible with the most popular (and not so popular) email clients is a big headache, as not all clients can render interactive elements properly.
That’s why we created an Interactive module generator. It is packed with a big collection of various interactive mechanics like:
- Questionnaire;
- Wheel of Fortune;
- Puzzle quiz;
- Scratcher;
- Name match;
- Memory match;
- Find a pair;
- Image quiz;
- NPS survey;
- Poll;
- Product review.
The list of these mechanics is regularly updated with new ones. Each game can be created using a straightforward UI where all you need to do is insert the needed data into the fields, and your interactive module is ready.
You can also tweak the looks of each interactive module through Appearance settings, so each module will perfectly fit into your emails.
Each game you create can be saved as a module in Stripo. Just click on the Save button once the game is created.
Important note: To use this feature, you must have a Stripo account and be logged into it.
Each game you save as a module will immediately appear in your library.
After that, you can use it to create emails, save it as a module to your custom module library, and so on.
We also provide our tech-savvy users with a choice to download code separately via the email we send them.
In general, each game you create with the Interactive module generator consists of:
- an AMP version of your email that works in Gmail, Yahoo, and FairEmail;
- an interactive fallback that works on all devices and with all email clients that support HTML5 and CSS3 (it also works in Apple Mail and Samsung Email);
- a text fallback version that works with email clients that do not support HTML5 or CSS3, such as some Outlook apps.
As a result, you receive a fully working interactive mechanic with all the needed versions for all possible email clients. With the Interactive module generator, every recipient can experience interactive email content with ease.
Every game in this generator is supported with a separate article that shows how you can use these games in regular emails, as well as step-by-step instructions on creating them using our Interactive module generator.
Wrapping up
These features are the core of our modules, which allow marketers to reduce routine and make the email design process easier and more comfortable. The saving feature allows you to reuse your created email elements over and over in other campaigns. Sharing allows you to give your modules to your colleagues or clients. The synchronized feature removes the routine of updating dozens of modules manually, while smart modules open the door to pulling data directly into modules.
And that's not even mentioning the Interactive module generator, which allows marketers of all levels to upgrade their emails with interactive elements without knowing any code and with maximum compatibility with many email clients.
Modules are the real lifesavers that allocate your time to strategic thinking, while taking the routine from your daily work schedule.
Jorge Ripol Torrubia
10 months ago
Anton Diduh
10 months ago