How to design a perfect appointment confirmation email


This article will explain what an appointment confirmation email is and how to craft one effortlessly. We will review samples, as well as email design tips on improving appointment reminders and setting up a follow-up flow.
A verified appointment is a kept one, and appointment confirmation emails can act as your warranty in this regard. Why all the fuss? Around 47% of businesses say cancellations cost them up to $2,500 in lost revenue per month, and for some, the total reaches $7,500. Appointment confirmation messages can reduce no-shows and cancellation rates by focusing attention on appointments and letting people manage them.
If you struggle to craft email confirmations, look no further. This guide will discuss the most affected industries — healthcare and beauty — to determine what makes an effective appointment confirmation email. With these tips, you can save your profits and improve the customer experience.
What is an appointment confirmation email?
An appointment confirmation email reminds people of an upcoming consultation or procedure. However, it is not only a notice but also a way to reduce anxiety. If you wonder how these are connected, the numbers will eliminate doubts.
In 2024, 43% out of more than 2200 surveyed people felt more anxious than in 2023.
As someone who gets stressed before an appointment, I know what a confirmation email with a brief description can do. At the very least, you get a feeling of certainty and confidence.
This makes messages about upcoming appointments an investment in customer satisfaction, besides increasing positive perceptions of such visits.
Key characteristics of an appointment confirmation email
Now that we have defined our terms, I suggest we review the traits of an informative appointment confirmation email:
- Planned delivery: A series of automated appointment reminders ensures people receive messages in advance and have enough time to prepare or reschedule.
- Appointment management: Effective appointment confirmation emails have an element of self-service and allow people to manage their visits. This reduces no-shows and cancellations.
- Calendar integration: The inability to sync visits with the calendar will lead to missed appointments. Ensure that a scheduled appointment can be integrated into any calendar.
What is included in the appointment confirmation email?
Having proper appointment confirmation email content is another step on the way to success. The information and layout elements you include can brighten your reminders and set them apart from the competition. Let’s have a look at these.
Email opener
Greeting customers is a great starting point, and it does not have to be boring. I have picked a few email openers for the beauty and healthcare industries to prove that an appointment reminder can be as entertaining as any other email.
Here are a few examples for those working in the beauty sphere:
- “A little ‘me time’ with our beauty team is all you need to feel like a better you. See you on {Appointment date}.”
- “{Customer’s name}, there are only three days until your session. It is your skin’s time to shine, and we can’t wait to see you on {Appointment date}.”

While healthcare tends to be formal, as the reason for the visit defines the tone of voice, you can still let creativity roam free from time to time:
- “A healthy outside starts from the inside. Let’s move you closer to wellness on {Appointment date}. Are you still up to it?”
- “We’ve prepared everything for your comfort during your check-up on {Appointment date}. Are you still coming, {Customer’s name}?”
Appointment description
While an appointment reminder provides the necessary details regarding the date and time, they can do more. Confirmation texts help people prepare, both mentally and physically, making a positive impression long before the visit.

Here are a few more ways to strengthen appointment reminders for both industries:
- Documents: To avoid the last-minute hassle, you can help people pack by providing checklists and tips on relevant documents.
- Clothing tips: Giving tips about comfortable clothes shows your dedication to customer satisfaction and makes the visit easier.
- Procedure overview: Providing people with essential details about how the process will go is important. It reduces the stress of facing the unknown and, once again, improves the customer experience.
- Customer’s medical or beauty team: Online appointments do not always show who will work with the customer. Your appointment confirmation email can introduce the team to the patients.

(Source: Stripo template)
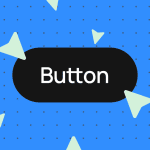
Email buttons
Email buttons are integral to appointment confirmation messages that catch the eye. However, they are used for more than visuals and encouragement. The buttons help with appointment management — rescheduling, canceling, or confirming. Why bother adding these options?
Around 75% of medical customers are likely to attend an upcoming appointment if they have the option to reschedule.
The healthcare and beauty spheres heavily rely on show rates, and having a few functional and accessible email buttons can improve success rates.

Contact details
Around 45% of customers care most about resolving their issue on the first contact. This brings us to the following section of the appointment confirmation email — the contact details.
Customers in the healthcare and beauty spheres need more than technical troubleshooting. They need quality service and a trained support team. Adding contact information removes any concerns and shows a readiness to step in and address any special requests.

How to create a contact details section with Stripo
Crafting appointment confirmation email templates does not have to be exhausting. With Stripo’s template builder, you can quickly set up customer service details. Here is how you can do it:
- Open the template builder.
- Expand the Structures & Modules section.
- Choose General modules to review pre-made structures.
- Drag-n-drop the chosen module right onto the template.
After the module is added, you may adjust it to suit your needs. All Stripo templates are accessible, so we handle the code while you work with the visuals of the email confirmations.
What is an appointment confirmation email design?
Functional and accessible — these are the pillars of the appointment confirmation email template. As we’ve discussed accessibility and brand consistency, let’s explore the key design points to keep in mind.
Keep emails accessible
Accessibility is a must for confirmation emails, especially in healthcare. It remains a hot topic, and the numbers leave no doubt in this regard. Of 409,357 analyzed emails, only 28 contained no issues.
While accessibility is crucial for healthcare, it’s equally important for the beauty industry. How? Accessible practices allow businesses to connect with a broader audience and grow.
Stay on-brand
Recent studies show that consistent brands have a high level of creative quality, which also applies to visit reminders. The best appointment confirmation email represents the company in a way that will strengthen your email campaigns.
For industries such as beauty, where visuals reign, sticking to a company’s fonts and tone of voice will help people recognize you. On the other hand, in the healthcare sphere that is focusing on trust, well-crafted emails can strengthen reliability.
Optimize appointment confirmations for mobile devices
After your appointment’s design is on brand, we can move to optimizing it. Why should we do this? Only 39% of customers check email on desktops, so appointment confirmations are often viewed on small screens.
Not adjusting confirmation messages to mobile devices may lead to recipients missing important notes or buttons, thus worsening their experience.
If you craft your templates with Stripo, you may switch to the mobile mode by clicking on the dedicated icon. The editor lets you tweak the template as much as possible for any device you need.
![]()
Tips for appointment confirmation emails
The 3-3-3 rule
Plans change, so the appointment date chosen a few months ago may no longer be convenient. This is when the 3-3-3 rule comes in handy, helping you send appointment confirmation emails exactly when they are wanted:
- 3 weeks before the appointment: This is the perfect time to send your first reminder email. It allows a person to plan their schedule accordingly.
- 3 days before the appointment: This is excellent timing in case of any change in plans or trips out of the city.
- 3 hours before the appointment: This message ensures that sudden situations or problems do not lead to last-minute cancellations. By providing an option to reschedule appointments, you may reduce no-shows.
Visual timelines
If the appointment is planned and there are a few preparation stages, using a progress bar may be your ticket to shine. You can indicate all the steps the customer has gone through, starting with booking an appointment or setting the patient’s account up and ending with an actual visit.
This way, the recipient sees the path and the next steps and can better manage their expectations.

Appointment confirmation email examples
With all these creation steps and tips in mind, it is time to discuss some actual text copy to level up your campaigns. These appointment confirmation email samples, with catchy openers, procedure descriptions, and confirmation buttons, will draw attention even in a crowded inbox.
Beauty industry example
Hi {Customer name},
Your next beauty experience is just around the corner, and we can’t wait to help you shine! Here are your appointment details:
Date: {appointment date}
Time: {appointment time}
Duration: {appointment_duration}
Location: {salon_address}
Before your appointment:
- Arrive 10 minutes early to check in and get comfortable.
- Remove old nail polish or let us know if you’d prefer to keep your current color.
- Let us know your preferences (gel, acrylic, or natural) so that we can provide the best service for you.
You can confirm your appointment by clicking the button below:
[Confirm My Appointment]
If you have any questions or need to make changes, feel free to reach out.
Healthcare industry example
Dear {Customer name},
Great news — your doctor’s appointment is officially confirmed. We’re ready to provide you with the best care possible.
Here’s what you need to know:
Date: {Appointment date}
Time: {Appointment time}
Location: {Clinic address}
Doctor: Dr. {Doctor name}
Before your visit:
- Arrive 10 minutes early for a smooth check-in process.
- Bring your health records, prescriptions, and test results so we can provide tailored care.
- Wear comfortable clothing, especially for a physical exam.
If you’re feeling nervous or have specific questions about your visit, don’t hesitate to share them with us beforehand.
[Confirm My Appointment]
If you need to reschedule or have any questions, simply reach out to us.
Wrapping up
Sending appointment confirmation emails can be your ticket out of high no-shows or cancellations. With functional buttons, detailed instructions, accessibility, and mobile optimization, the reminders will stand out, and your customer satisfaction rate will rise.
I hope these tips and email creation steps have inspired you to elevate your own appointment confirmation emails. Good luck!


0 comments