Many people love quizzes that allow them to either learn something new about themselves or just to have fun. People used to look for them on websites or in magazines, but nowadays, each recipient of your email can take any specific type of quiz you wish to create. With this, allow us to present Image Quiz—the latest extension of our interactive module generator. Let’s go through all the stages of creating this game in our generator so that you can see for yourself how you can create such an interactive mechanic in just a few minutes.
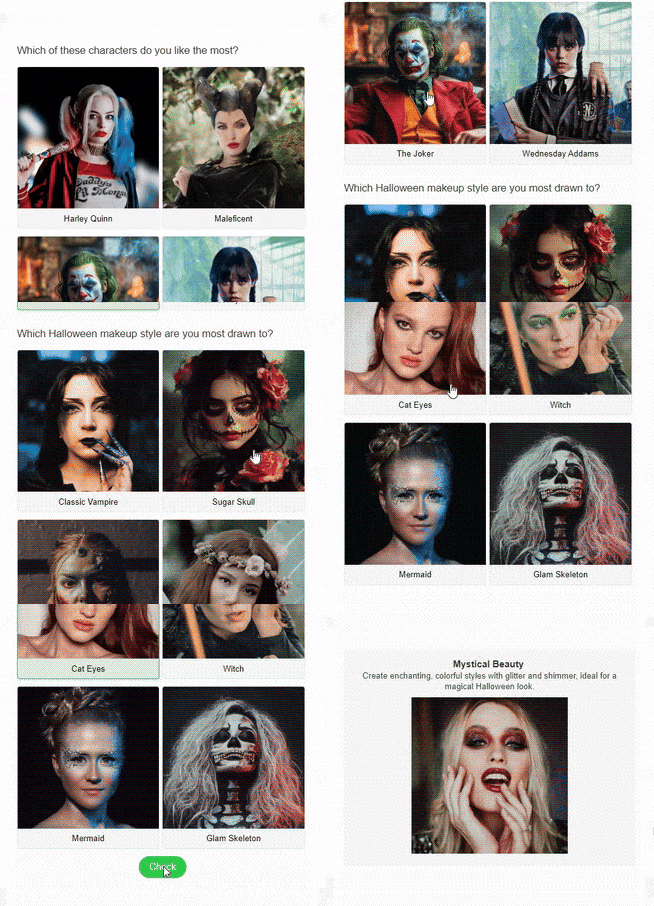
How can you use Image Quiz for your email campaigns?
The beauty of Image Quiz is that such an interactive mechanic can be tailored to any occasion due to the fact that you can create quizzes with appropriate images, where you are limited only by your imagination. A quiz for Halloween? Easy. A Black Friday quiz? Consider it done! A quiz on a special date in your business? This can easily be created with a little creativity and some custom images that are already in your email.
With that said, here is a list of its practical applications:
- giving rewards to recipients (promo codes, discounts, and so on);
- giving personal product recommendations depending on the quiz results;
- creating hype around your announcement of a new product or a special event;
- using quizzes as a way of providing materials (e.g., white paper for completing the quiz);
- making email campaigns more engaging with festive-themed Image Quizzes (Christmas quiz, Easter quiz, etc.).
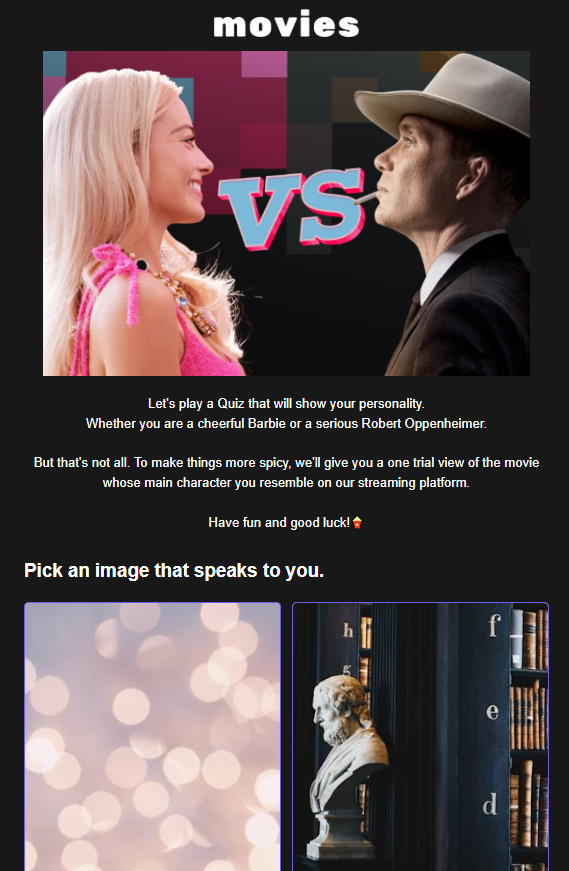
How to generate an interactive Image Quiz module
Let’s begin our game-creation process. Just follow the steps below to make your own game using our generator.
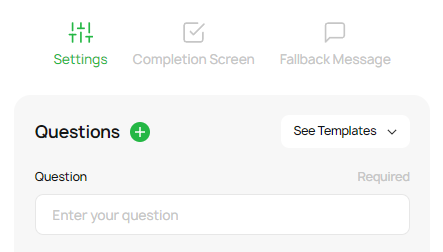
Step 1. Enter your question.
What’s a quiz without questions? Creating your own quiz starts with entering questions for recipients to answer in the appropriate field.
Step 2. Add answers.
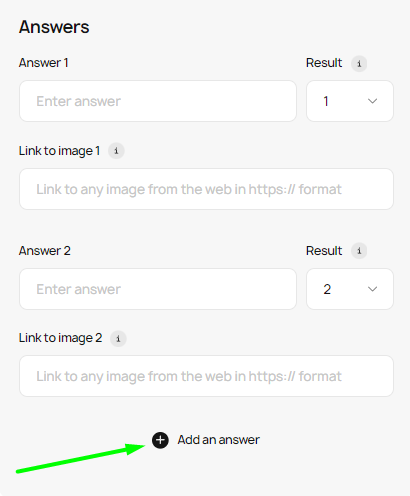
Every question must have an answer. Just enter the first two answers in the “Answer” fields to make a complete basic question for your quiz. You can also add multiple answers by clicking on the plus button on the left side of the “Add an answer” option.
Step 3. Link images to your answers.
As our game is called “Image Quiz,” adding your images is a vital step during the game creation process. For this, you can add links to images in the corresponding fields that support your answers. This means that the “Link to image 1” field will attach your image to the first answer, and so on.
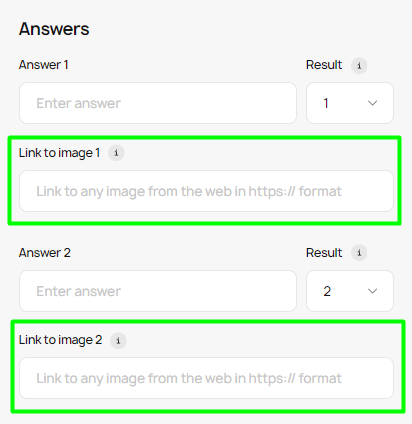
Important note: The uploaded image must be in PNG, JPG, or GIF format. Furthermore, the file size should not be larger than 3 MB, and the dimensions should not exceed 4,000 × 4,000 pixels.
Step 4. Create results for your quiz, and link them to the corresponding answers.
The final result of the quiz is what all recipients will want to see as their reward for answering the questions. As shown in the image, you can add the required text in the field under the Result 01 and Result 02 tabs to add the first pair of results for your game. You can also switch between result tabs by simply clicking on the specific tab button.
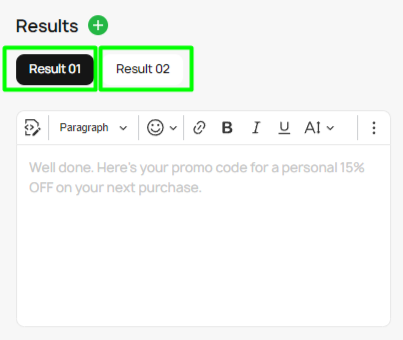
To add more results, click on the green button with a plus sign. If you want to delete a result, you can simply click on the trash bin icon on the tab itself.
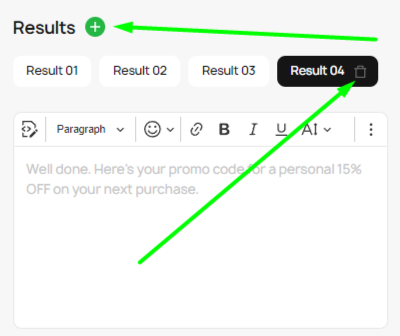
We’ll show you how to link the results you created to your questions a bit further.
Important note: The text editing area is filled with options. Here, you can choose the style of your text and font size, add emojis and links, and make your text bold, italic, or underlined. We encourage you to experiment with these options to make the most suitable copy for your game design idea.
Step 5. Add the final result image.
The final result obtained by an email recipient must be supported with an image. To do this, you can just add the link to the image you want to attach to any result.
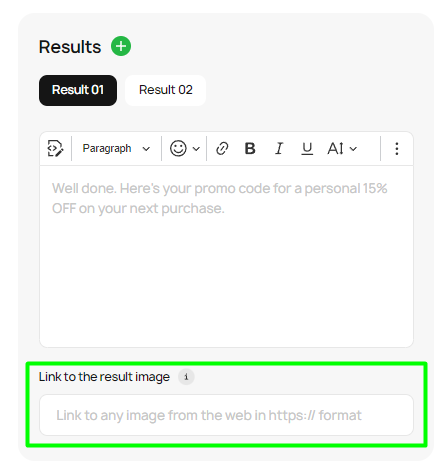
Step 6. Link the results to your answers.
To make the answers matter and to show the right ending screen, you must link the answers to the results. By answering a particular question, the user will tip the scale toward a certain result. As you can see, you can simply click on the arrow to see the whole list of results you can link to your answers (the number of results depends on how many questions or results you created).
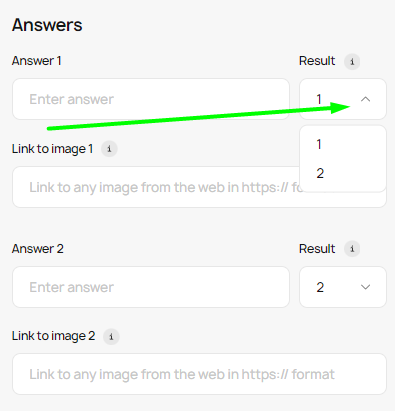
Important note: This step finalizes the creation of the first question for your quiz. To find more inspiration for your quizzes, you may check out the free templates we have provided within the generator. Just click on the arrow as shown to unroll the list, interact with our templates, and make your imagination juices flow.
Step 7. Create another set of questions and answers (if needed).
To add more questions to your quiz and make it more complex, click on the green button with a plus sign. Conversely, you can click on the trash bin logo if you wish to delete any question you no longer want to use. The process of creating the next set of questions is the same as in the previous steps. Please note that adding more questions is optional, so you can skip this step if you want to make a quiz with just one question.
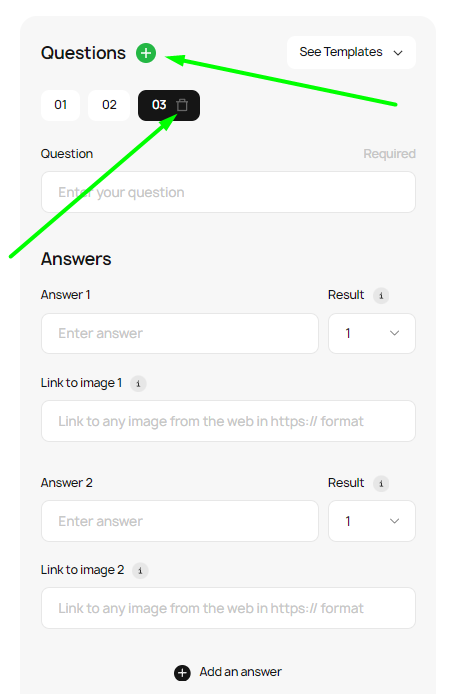
Important note: You can create as many questions as you need by following the steps above.
Step 8. Specify the “Try again” option (if needed).
To make your game re-playable, you can add a “Try again” button and specify its name in a special field. This setting, however, is optional, so you can skip this step if you don’t plan to make your game playable more than once.
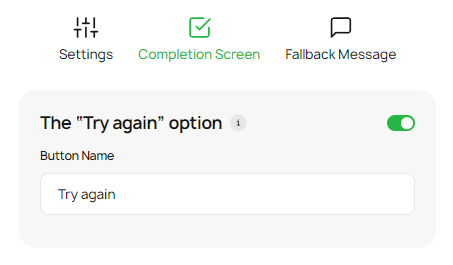
Step 9. Link your data storage for gathering answers.
The game you create will not only entertain your target audience but can also be a valuable data collection tool for your business. So you can add dedicated response storage for gathering answers. Specifically, you can collect valuable data by adding a data service link that you can create in Stripo to easily download the relevant data from your Image Quiz.
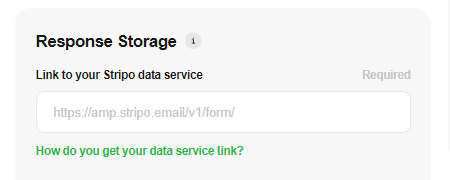
Important note: You can read more about data storage services and how to use them in a dedicated article on our Help Center.
Step 10. Add merge-tags for personalization (if needed).
Making the quiz more personalized by addressing each recipient by name is a good idea to increase engagement and show their importance to you. Merge-tags can help you with that, allowing you to easily add names to your game by inputting them into the corresponding fields.
You can add several merge-tags by clicking on the green button with a plus sign. If needed, you can delete the tags by clicking on the trash bin icon on the tag that you wish to remove.
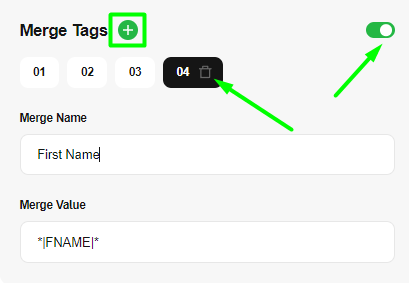
Important note: You can find more information about merge-tags and their valuable properties in our Help Center.
Step 11. Customize your game design.
Now that you have built the basic game, it’s time to give your Image Quiz some shine by tweaking your game’s appearance. Within the generator, you can edit the following appearance settings:
- overall color scheme;
- label color (responsible for a chosen answer’s color);
- question text color;
- overall background color;
- text color for answers;
- background color for answers;
- border radius and border color for answers;
- text color for the “Try again” button;
- border radius and border color for the “Try again” button.
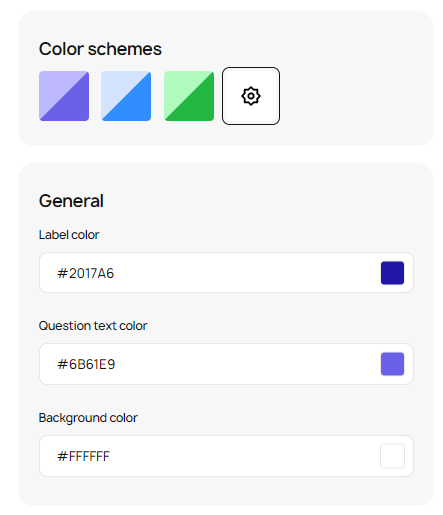
Tweak these parameters to your liking, making the most suitable design for your newsletters.
Step 12. Download and add the game to your email.
All the games that you create in our generator are designed to work in all email clients. Where the email client does not support interactivity (e.g., Outlook), recipients will see a fallback version that simulates interactivity while users interact with it, transferring recipients to the web version of the email. As a result, all recipients experience interactivity to the same degree. At the same time, you do not lose the ability to track the performance of the Web version.
All of these features are due to the fact that our generator provides you with a game module that contains the following:
- an AMP version of your email that works in Gmail, Yahoo, and FairEmail;
- an interactive fallback that works on all devices and with all email clients that support HTML5 and CSS3 (it also works in Apple Mail and Samsung Email);
- a text fallback version that works with email clients that do not support HTML5 or CSS3, such as some Outlook apps;
- using AMP and an interactive HTML fallback to ensure that 92% of your audience can interact with the interactive part of the game. With a text fallback, you can offer the remaining 8% that uses an email service that can’t work with interactive content, a promo code, or a different reward for which others compete during the game.
As we have shown in this instruction manual, adding a game to your emails is quite simple and does not take much time. We also described this process in detail in our first manual, “How to create interactive content without code hassle.” Click on this link and look for Step 6, where we describe the entire process in detail.
Wrapping up
Image Quiz is another interactive email mechanic that goes through our hands, so we can bring it to email marketers of any level. Thanks to our interactive module generator, you can create this rather complex interactive piece with just a few clicks, using only your creativity and nothing more. We continue to expand our range of interactive modules, so stay tuned for more updates.





0 comments