Updating contact information in all kinds of emails was a pain in the neck as it was taking you a while? Well, it won't take you long anymore...
The synchronized module is a brand new automation option that helps you edit/update all your email templates at once.
In other words, whenever you make changes to a synchronizable module within just one template/email, these changes automatically get applied to all other templates/emails where you used this module.

Why do you need this featured option?
How many emails do you use for proper communication with customers? I mean all emails, including promo, transactional, follow-up ones, a set of emails from a welcome series, abandoned carts, user retention emails, etc. On average, an online store uses about 50 emails to communicate with its customers.
Now imagine, the URL to your company page on Facebook’s changed, or you’ve made some rebranding and now you need to replace the present logo with a new one in all 50 emails.
That’s a whole lot of work, isn't it? Not to mention, you may get lost and forget which ones you have updated and which ones are to be updated. Quite often this is a stop-factor that prevents email marketers from updating or redesigning their emails...
From today, due to our new option, there’s no need to edit/update each template manually — use our synchronized modules to apply changes automatically.
What elements should you use this way?
In our opinion, it is reasonable to save headers, signatures, and footers, diverse modules that contain any contact information, the follow us block, etc. as synchronized modules. In other words, the elements that normally do not require changes from campaign to campaign.
The way it’s done
I won’t say that it’s easy as 1, 2, 3. Neither will I say this is rocket science…
So, here’s what you should do to utilize this brand new option for automating email marketing:
1. Prepare your content
Prepare the module/email element you are going to add to all email templates.
2. Save this module to the Modules storage
-
click the “Save as module” icon to save this element to your personal content library;

-
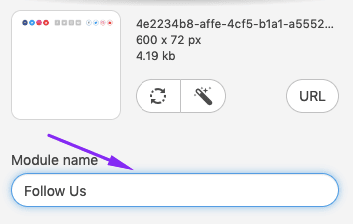
in the settings panel, you shall give a name to this module. I called mine “Follow us”;

-
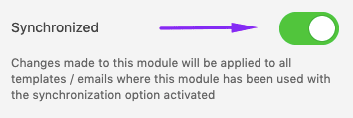
toggle the “Synchronized” button;

-
click “Save”;

If you’ve done everything right, then the OFF symbol will appear on the present email template, as shown below;

You’ve built a synchronizable module/content element, but the synchronization option has not been activated yet;
-
activate synchronization
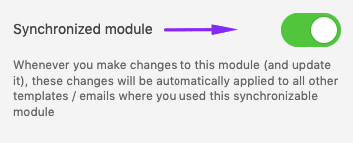
To finally activate this option, click this “OFF" symbol, then in the settings panel toggle the “Synchronized module” button.

Done!
You’ve just created and saved a synchronized module.
3. Edit and update these modules
You’ve added this module to all emails/templates that you built with us. Whenever the need to edit a piece of information in it occurs, you should:
-
open any email template where this module was used, and click the very module in a template;
-
edit this module — you can make any changes you like. I changed the links to my social media profiles and replaced the Twitter icon with the Pinterest one;
-
the “OFF” symbol appears on my content module again — click it to activate;
-
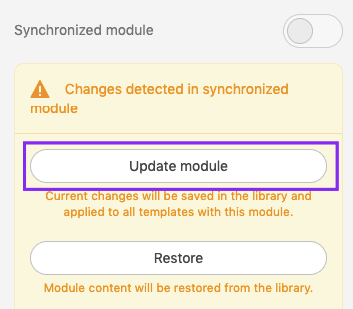
once you’ve clicked it, go to the settings panel, there you will be asked to “update” your module;

-
if done right, you will see the following inscription in the bottom right corner;

-
done! Changes made to this module have been applied to all the templates where you'd used this module.
In other words, this particular module has been updated across all templates where was used.
Final thoughts
Building emails is getting easier.
This is a brand new feature not only for our email template builder but as far as we know, for the email marketing industry too.
We are convinced the synchronized module option will help you update emails effortlessly and seamlessly.
If you have any questions or concerns on how to use it, leave a comment below or email us at contact@stripo.email.


2 comments