Collecting audience data and tracking email interactions are vital for enhancing your marketing strategies and maintaining personalized campaigns. Understanding who engaged and how they interacted provides valuable insights for optimization. While regular emails are tracked by the ESP or CDP of your choice, AMP emails are a bit tricky. That’s where Stripo Data Service enters the game, and today, we’ll talk about what it is for and how to set up your own Data Service.
What is a Stripo Data Service?
Let’s start with the basics. Data Service is a storage system where you can collect customer responses, feedback, and other interactions with your emails. These data are gathered from various sources, such as “Form” blocks, NPS questionnaires, and interactive content like games.
Why use AMP?
We’ve touched on such a thing as AMP for emails, but why are we combining Data Service and AMP?
AMP and HTML5/CSS3 are independent subsets of HTML used to create interactive email content. Both need to be included in a single email to ensure compatibility with email clients, as some, such as Apple Mail, fully support HTML5 and CSS3, while others, such as Gmail, fully support AMP.
Where AMP can be used:
AMP enables common actions — such as confirming registrations or appointments, submitting feedback, filling out forms, giving ratings, and delivering real-time content — directly within the email itself. This eliminates the need for additional steps or external transitions, providing a seamless user experience.
Sounds convenient, right? However, behind this convenience, there are several more significant benefits:
- AMP provides an effective way of showing your customers that you actually care about them by eliminating extra steps on the way to your content;
- AMP improves virality by introducing innovations and distinguishing your mailings from competitors’ mailings;
- AMP entertains your target audience with all the interactivity you can think of, making your emails engaging.
How to create a new Data Service
Now, let’s get down to business and create your Data Service. Please be advised that you can use our Data Service or embed any external endpoint, even the ones you built with Zapier. There are two paths you can choose when creating your own Data Service: with Stripo’s Data Storage or with Zapier Webhook.
Option 1. Choosing Stripo Data Storage
If you want to store recipients’ responses on our side, then you’re supposed to use our Data Service. You’ll have access to this data service at any time.
So, to build a new Data Service with Stripo, you need to:
- click the “Data” tab, located on the left side of the screen, in your Stripo account;
- in a new window, you will automatically see a “Services” tab;
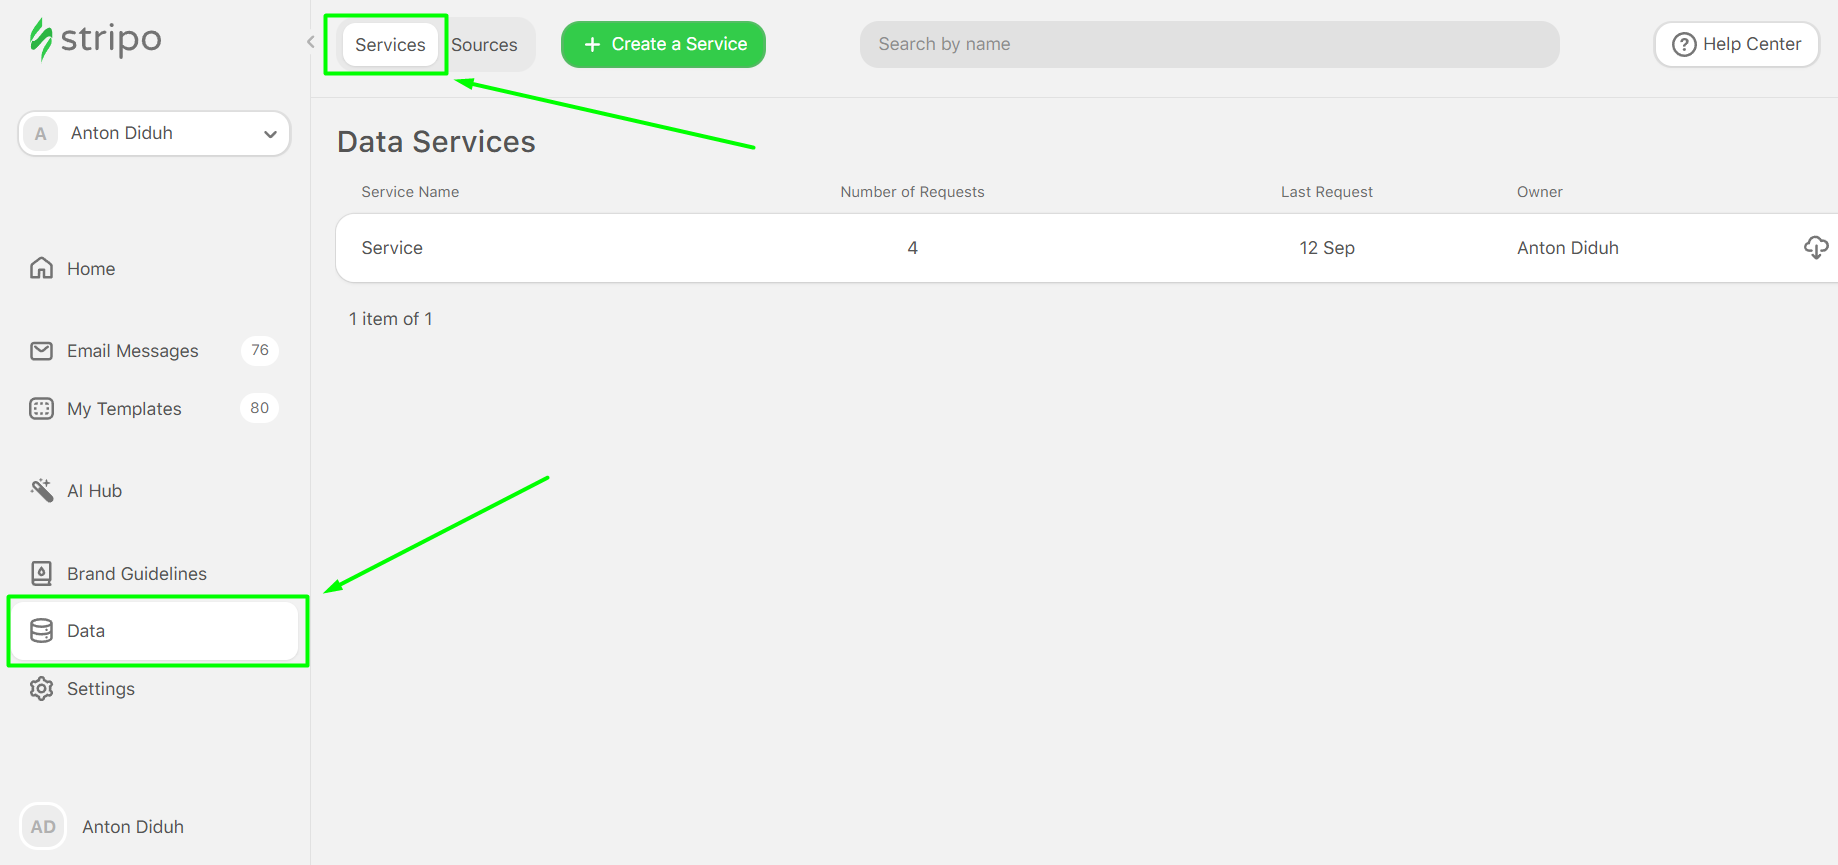
- click the “+ Create a Service” button.
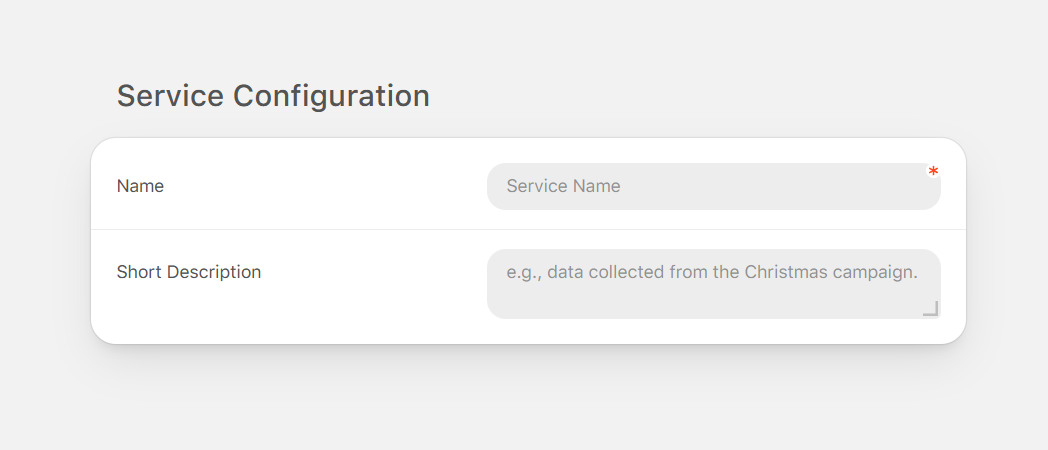
- the “Service Configuration” window will appear. Here, you need to give a name to your Data Service and enter a short description; the former is mandatory, the latter is optional;
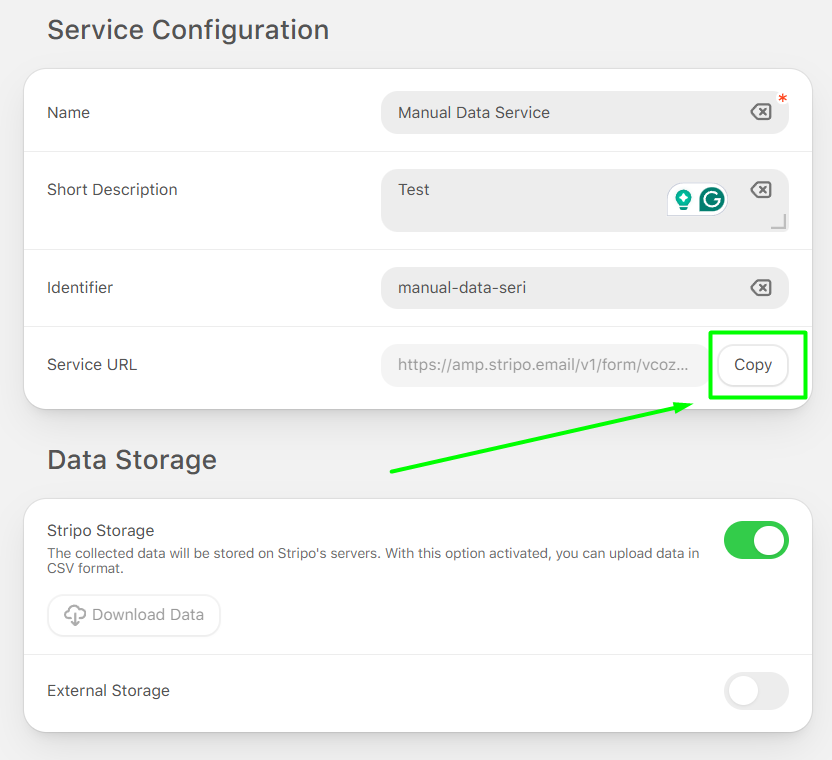
- all other fields are filled out automatically;
- copy the URL address for the future campaign.
Important note:
We recommend that you name this service after the name of your email campaign. We believe that this will make it easier for you to find and analyze the necessary data in your Stripo account after the email campaign has been finished.
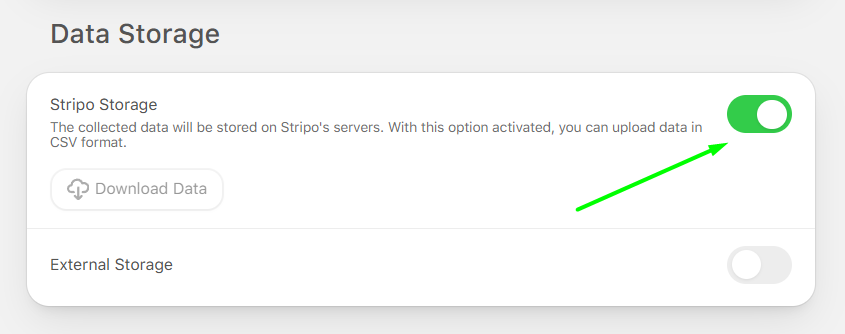
- in the section below, toggle the “Stripo storage” button.
Option 2. Choosing Zapier as Data Storage
To use Zapier as your Data Storage, you need to do all the steps described above, but instead of choosing Stripo as your data storage, you should:
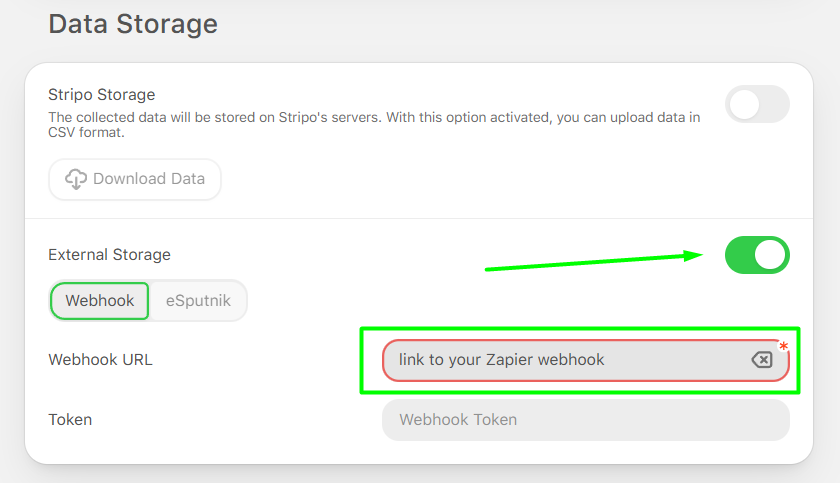
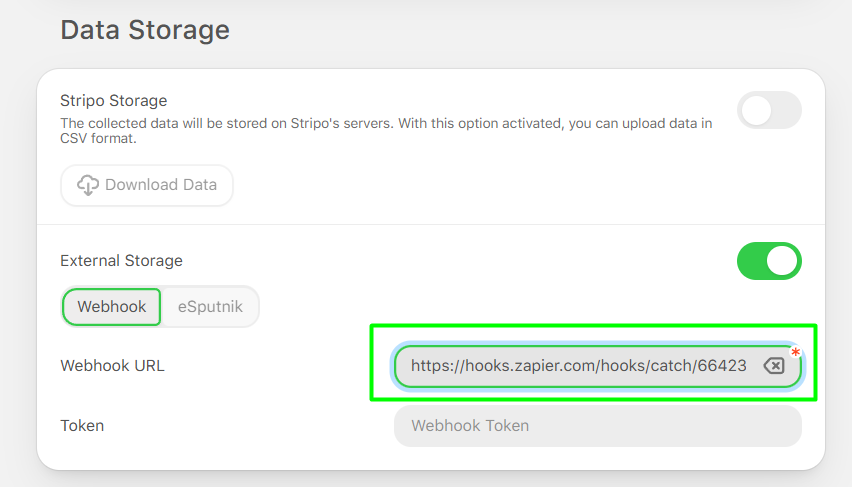
- choose “External Storage”;
- paste the link to your Zapier Webhook — we’ll build it now.
Creating Zapier Webhook
Zapier offers a wide range of zaps (connections).
As we want to store all recipients’ responses on Google Sheets, we need to connect Stripo to Zapier and Zapier to Google Drive.
Let’s do it:
- in your Zapier account, in the upper left-hand corner, click “Create” and choose “Zaps”;
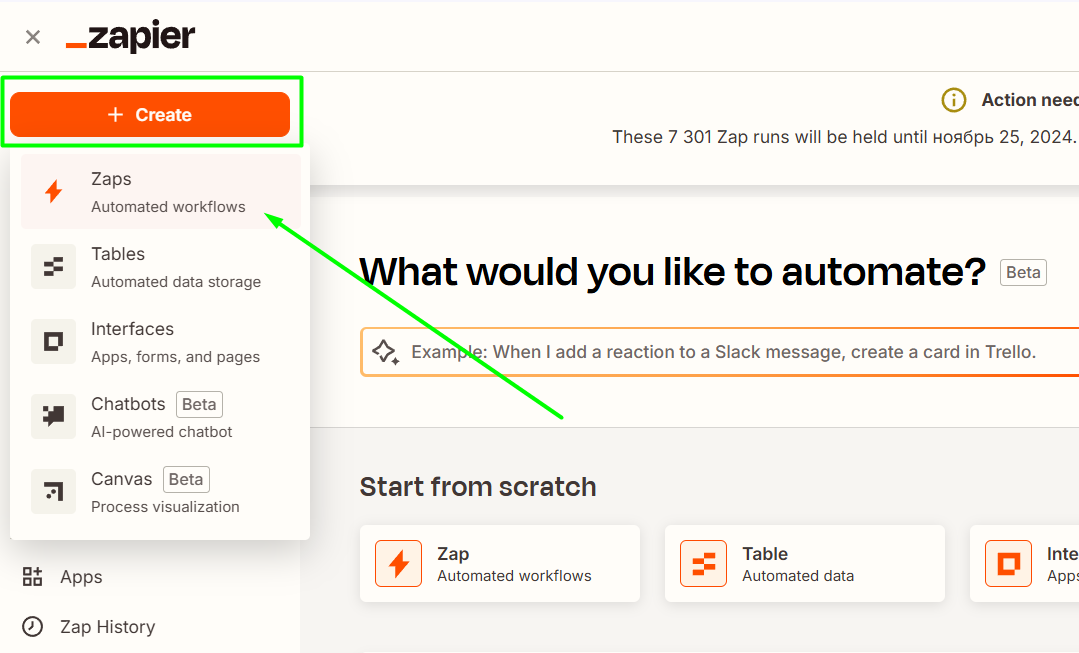
- give it a name;
- in the “1. When this happens” section, choose “Webhooks by Zapier”;
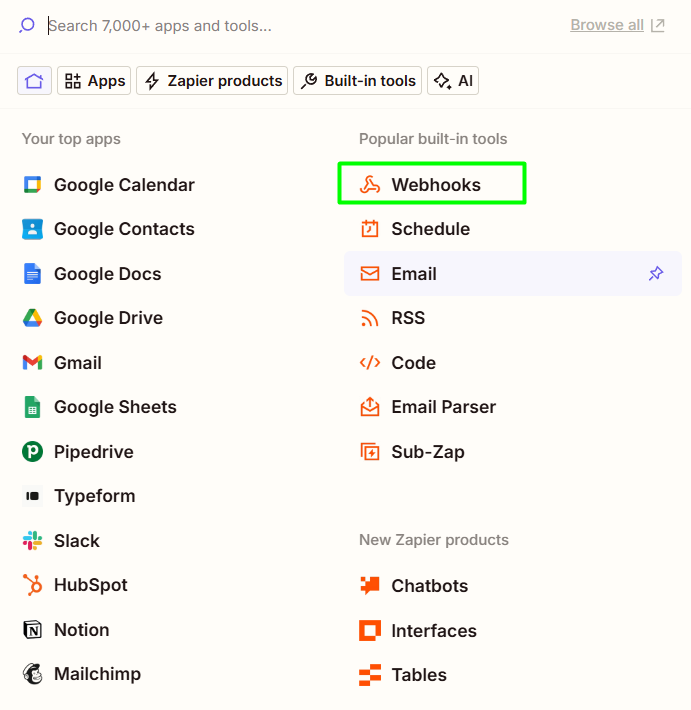
- as a trigger, you choose “Catch hook”;
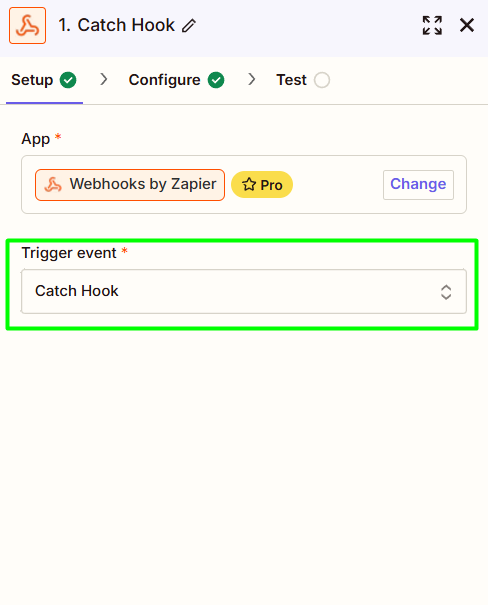
- click “Continue”;
- in the new window, click the webhook URL that Zapier has just generated for you;
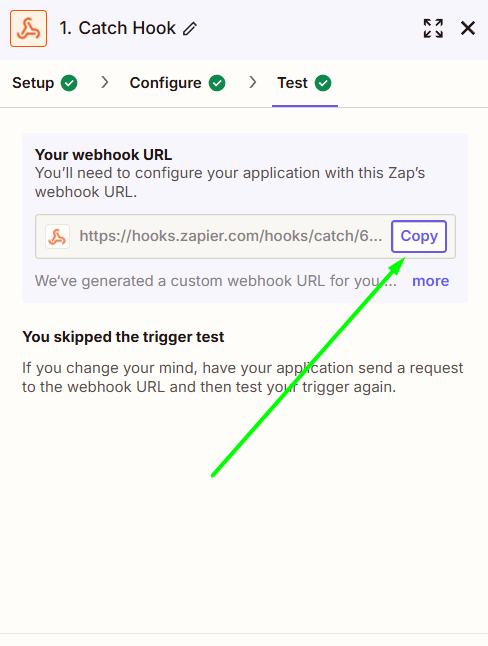
- then you get back to Stripo and insert this link into the respective field;
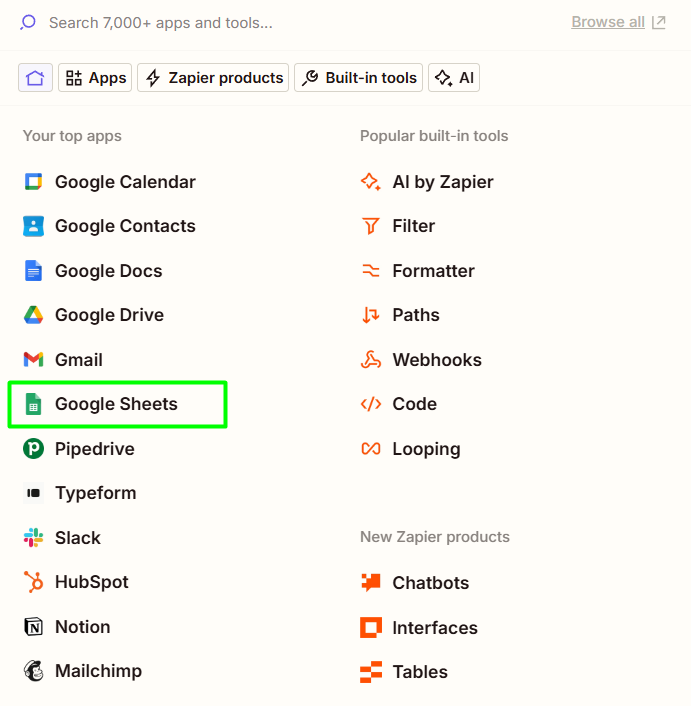
- in the “2. Do this” section, choose “Google Sheets”;
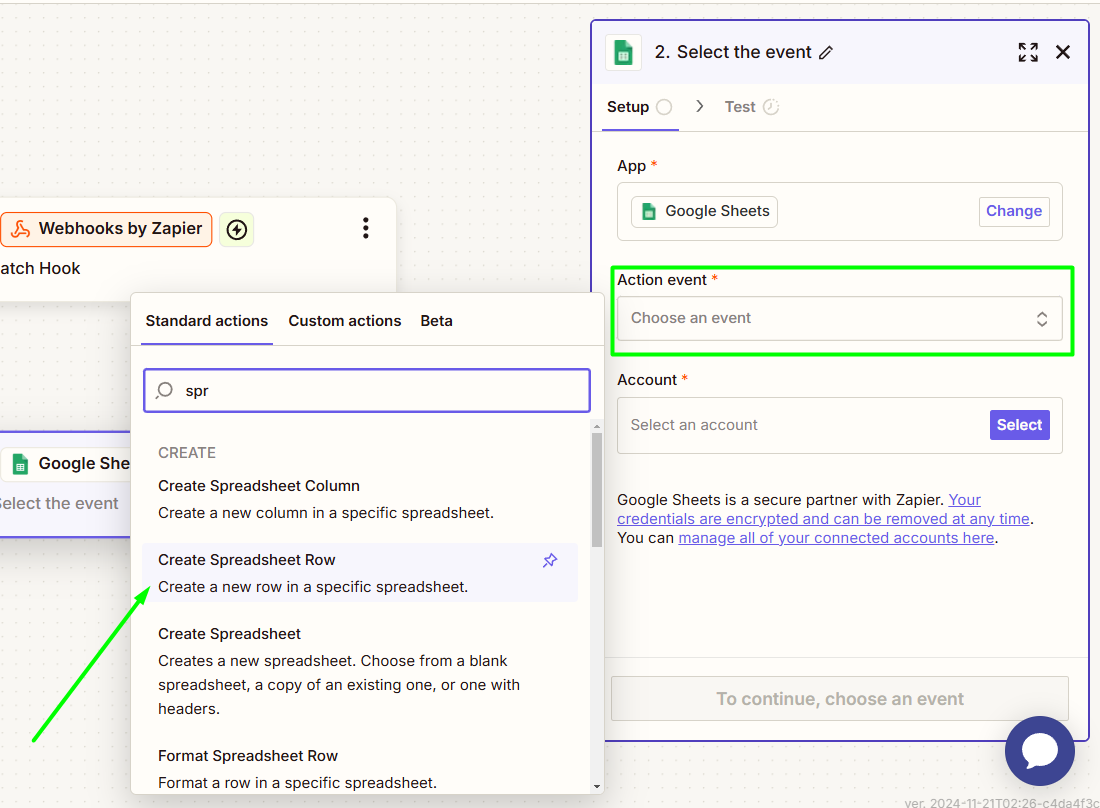
- now, we need to choose the right Action event — for our purpose, we need the “Create Spreadsheet Row” option;
- enter your credentials for your Google account and click “Connect a new account”;
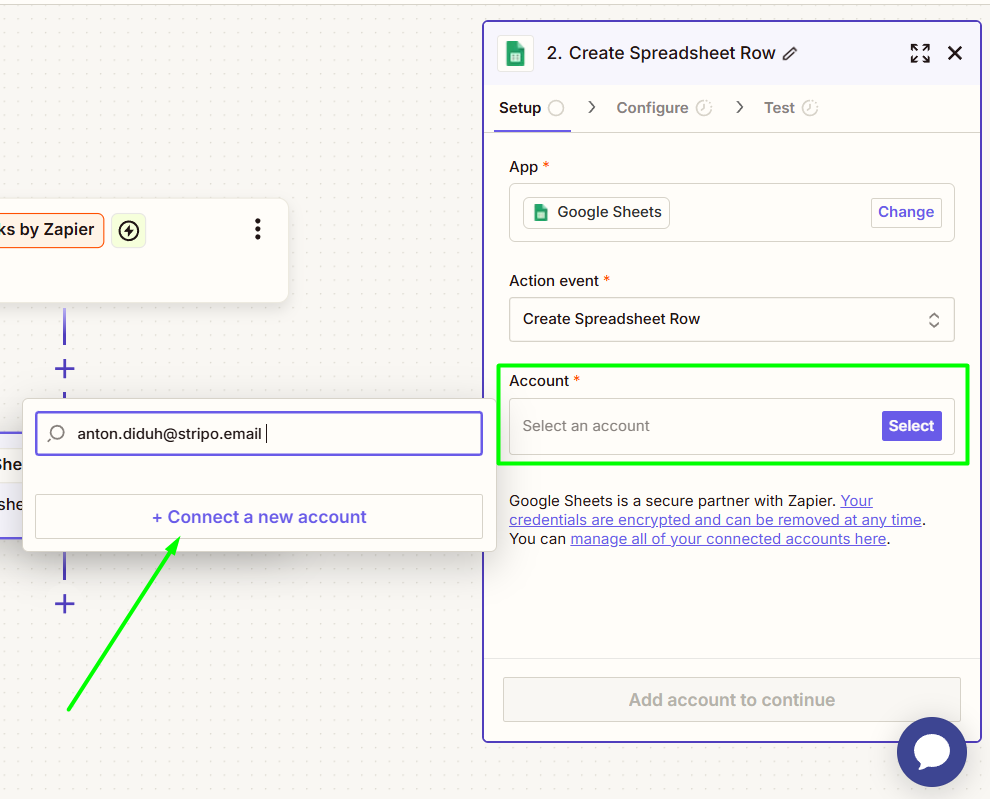
- give Zapier access to your Google Drive;
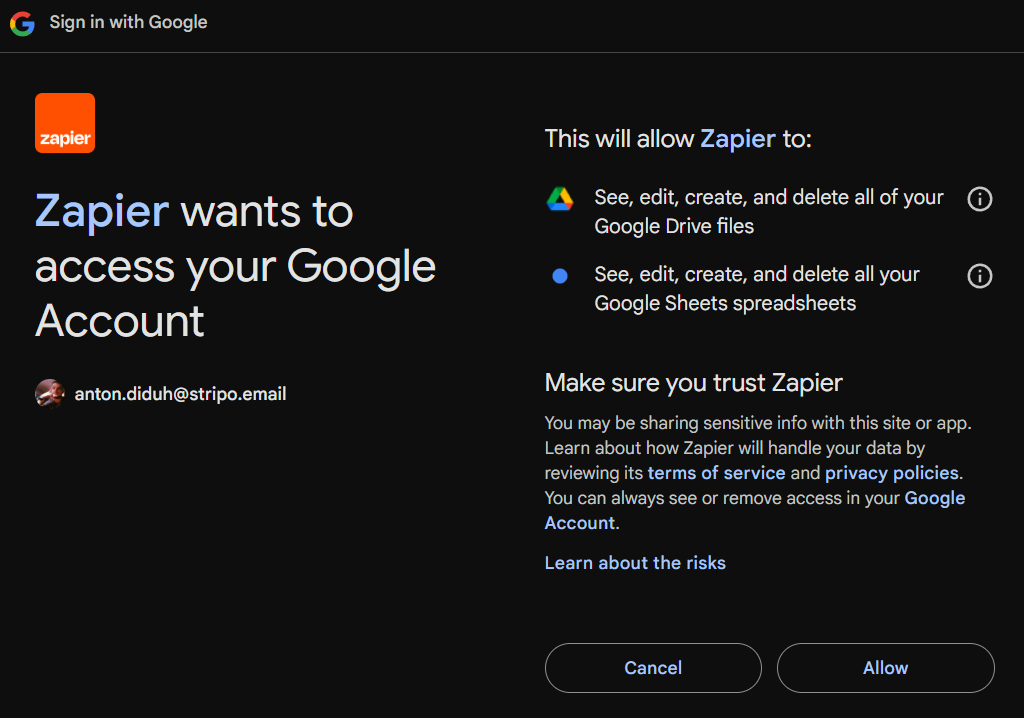
- Zapier automatically adds your Google Drive account to the list. You don’t even need to choose anything;
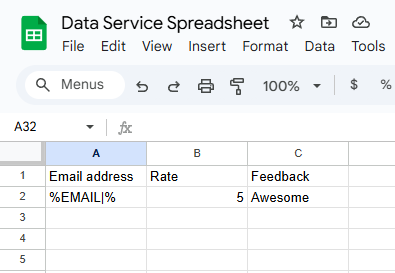
- to make all things work, you need to build a Google sheet with all the necessary columns for gathering information. For example, if your goal is to collect rates, feedback, and recipients’ email addresses, your simple spreadsheet will look like this;

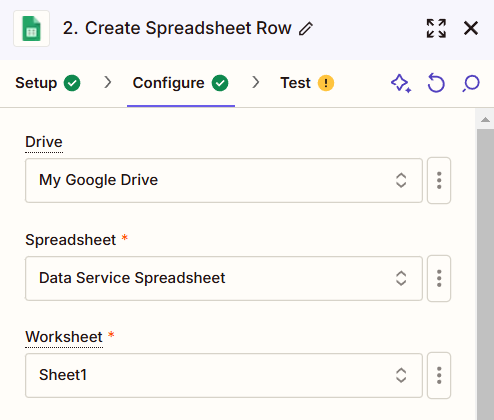
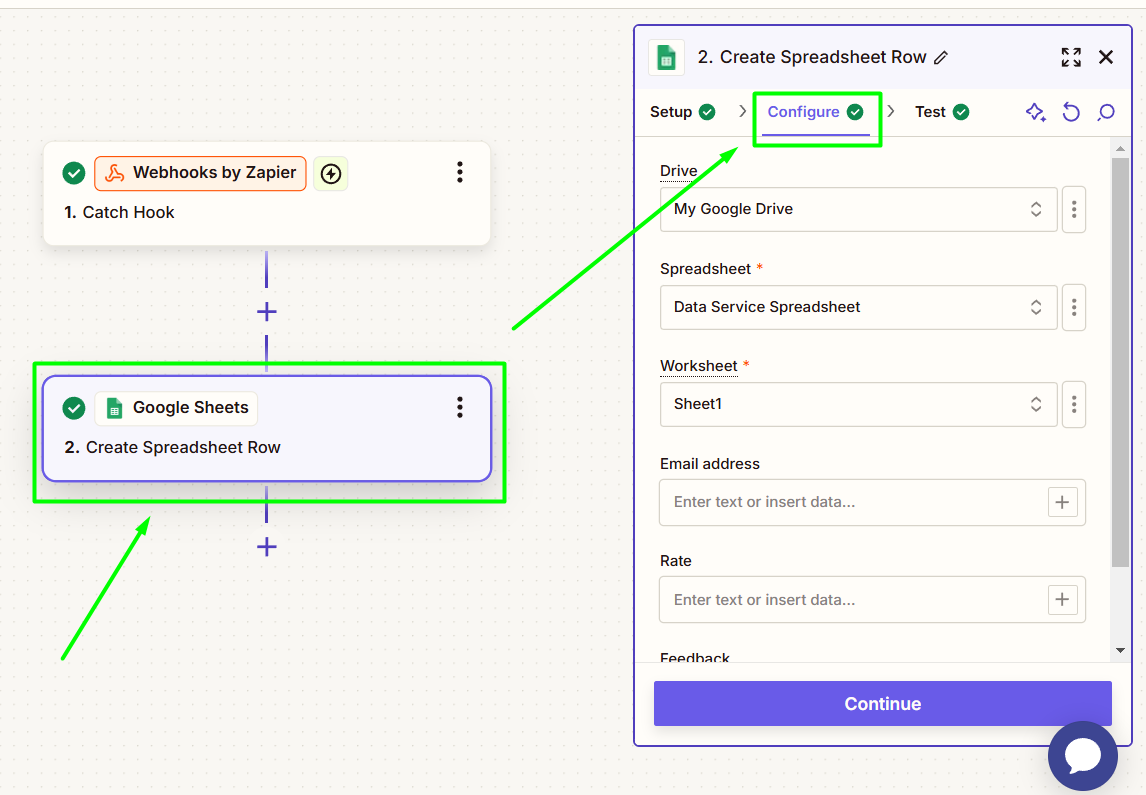
- in Zapier, you need to select “Drive,” where your spreadsheet is saved. After that, choose “Spreadsheet,” which is the Google sheet you’ve created and the worksheet. I chose “Sheet 1,” as I wanted to store all the data on a single page.
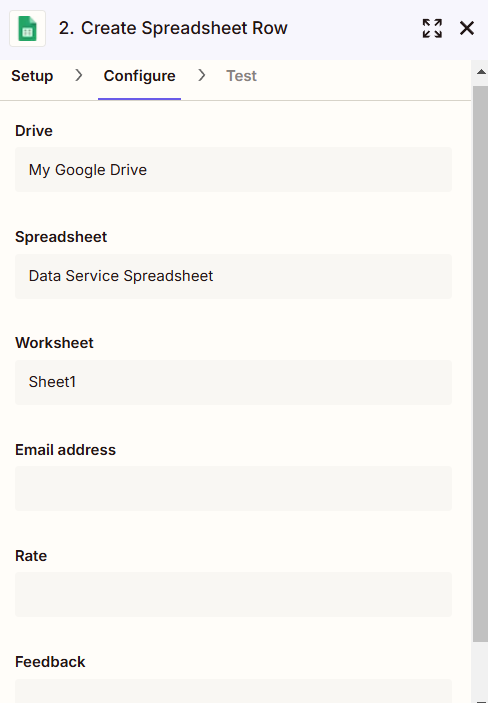
- Zapier pulls the names of the fields from your spreadsheet;
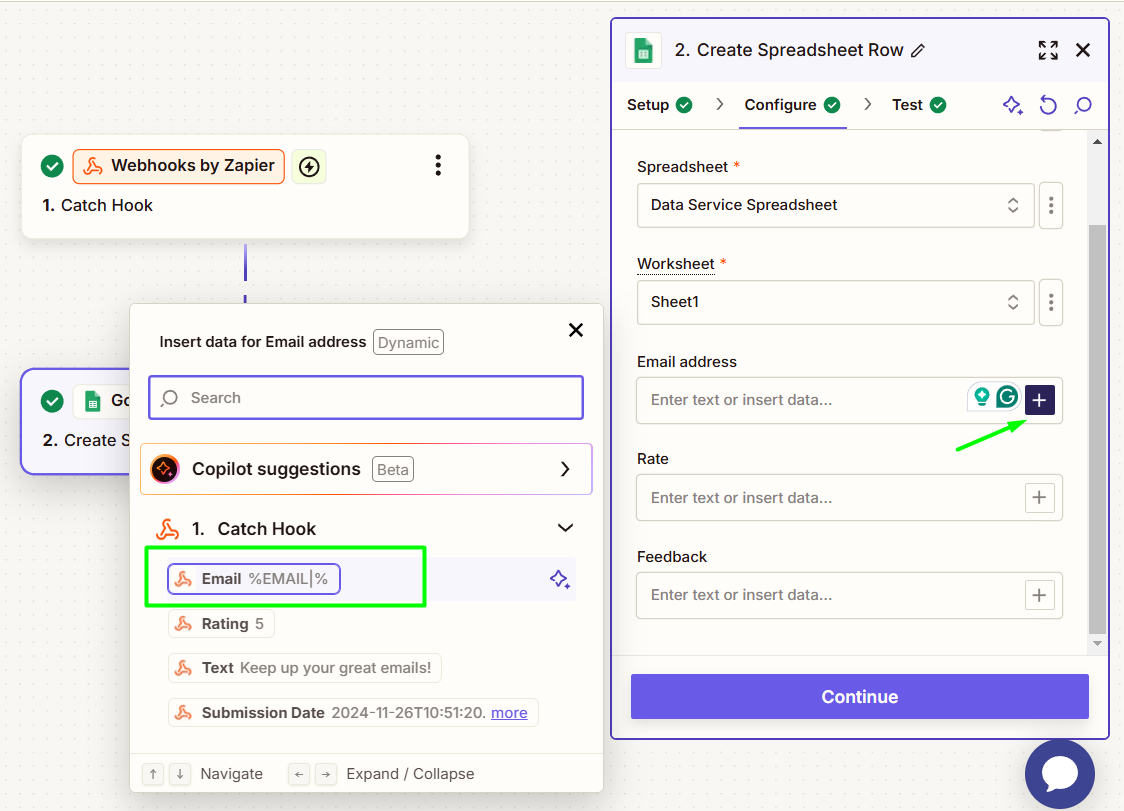
- Zapier pulls in data from your AMP Form (as we said, we’ll collect email addresses, rates, and feedback);
- click “Continue”;
- run the test to check whether the connection was established correctly;
- if your test was successful, click “Publish.”
For the desired data to be saved in your spreadsheet, you need to initiate a request to your created Zap. You then need to create a simple form, add our Data Service to its code, and do a test within Stripo. We have a prepared email form we’ll do manipulations with.
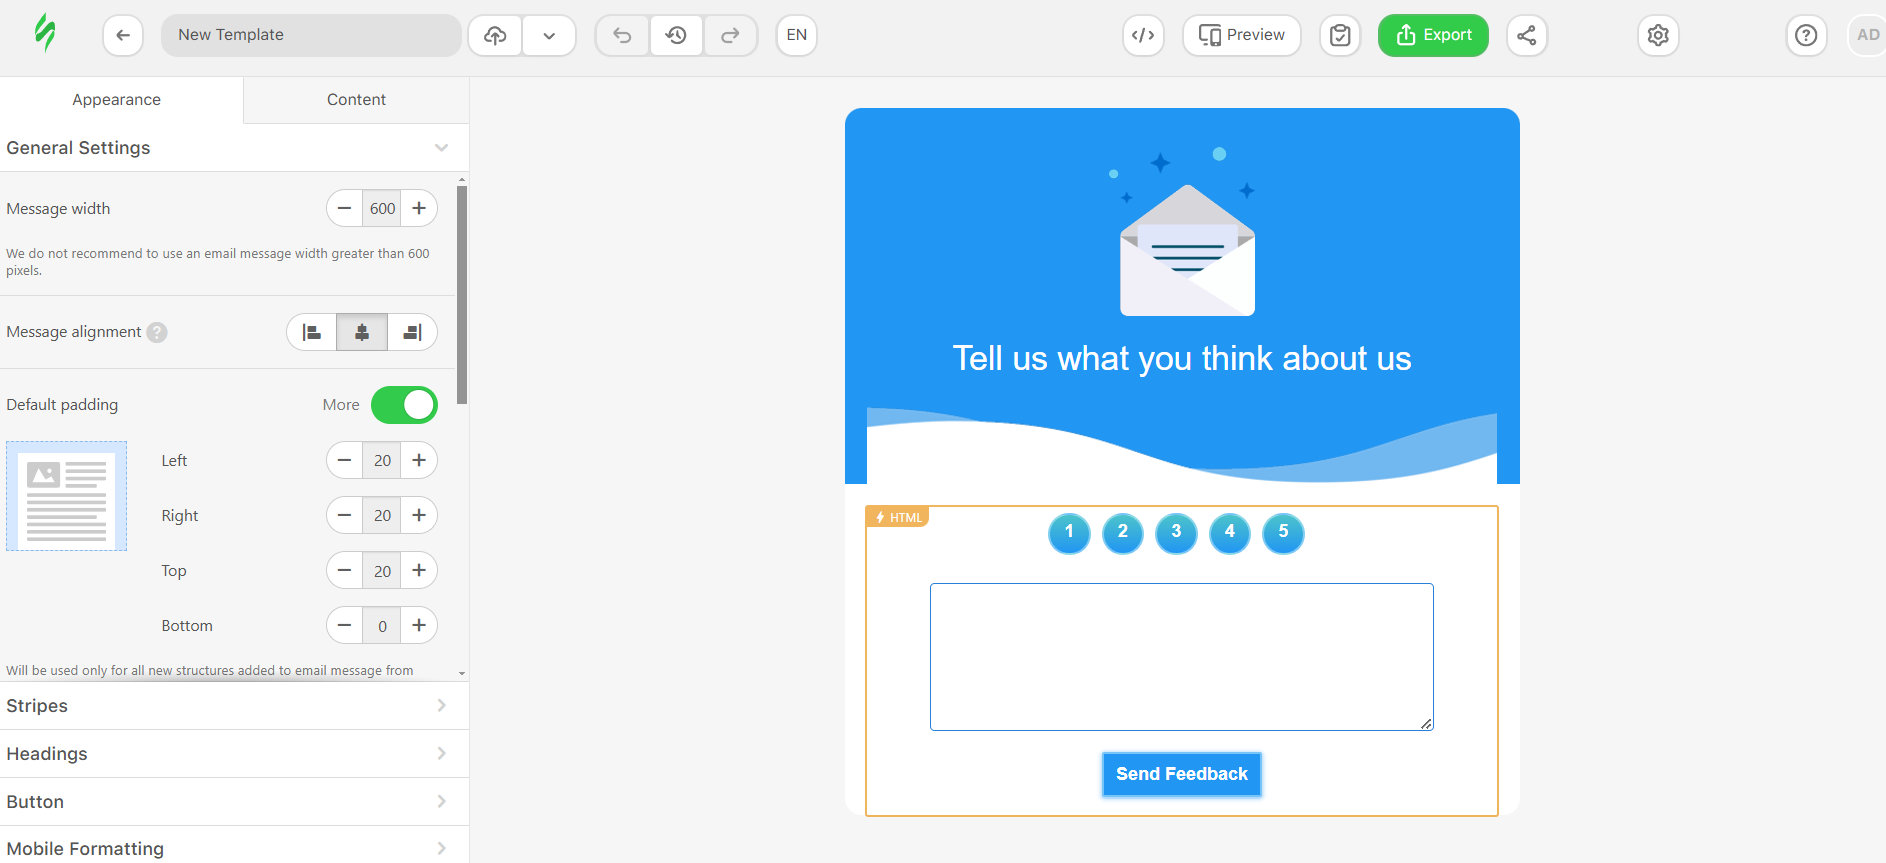
To make your Zapier hook work properly with Google Sheets, please do the following:
- paste the link of your Data Service, as shown in the screenshot below;
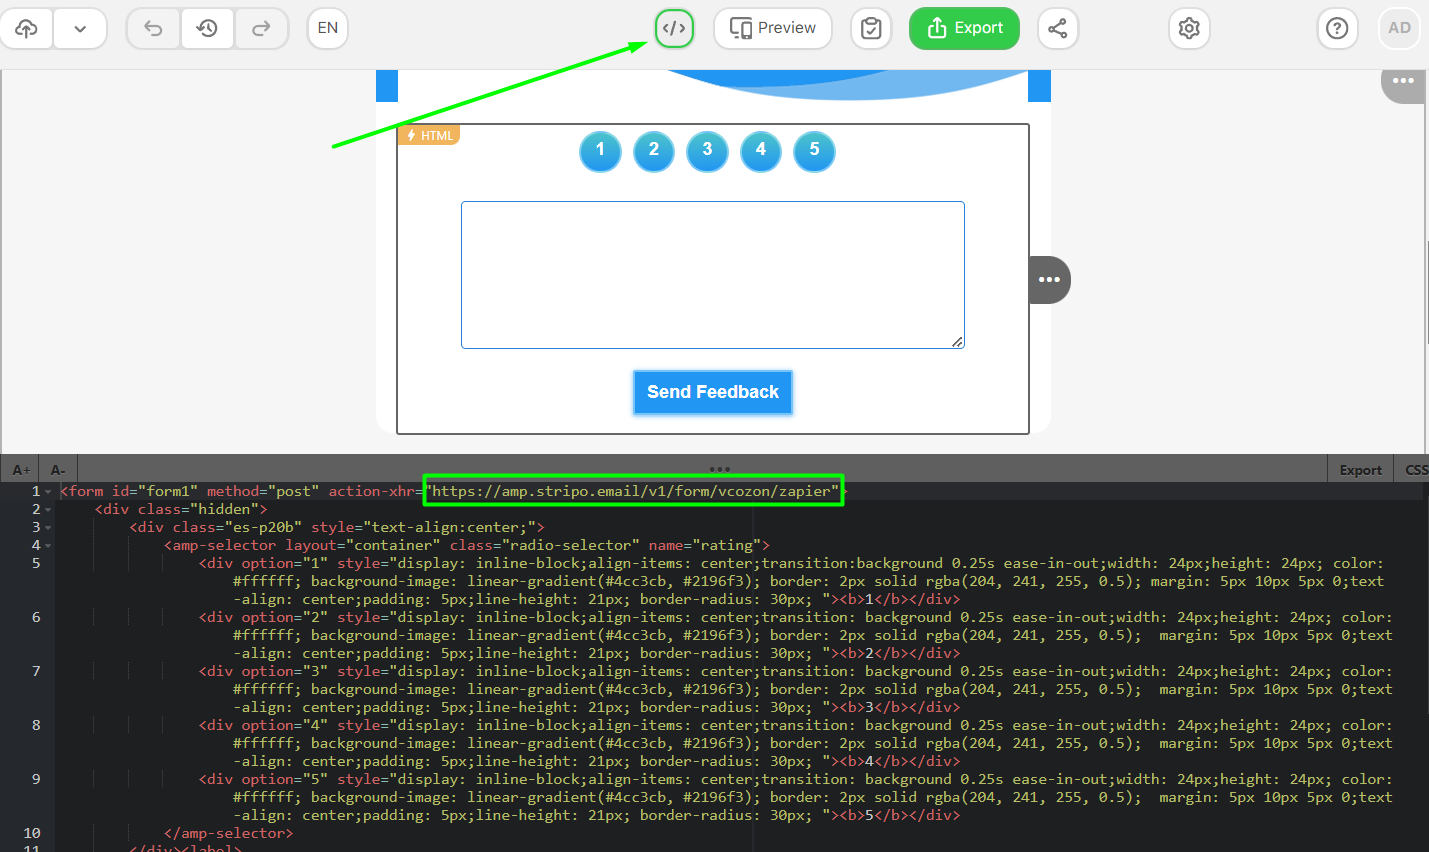
- click on the “Preview” button to enter the email preview page;
- fill in your created form and click on the button you use to send feedback.
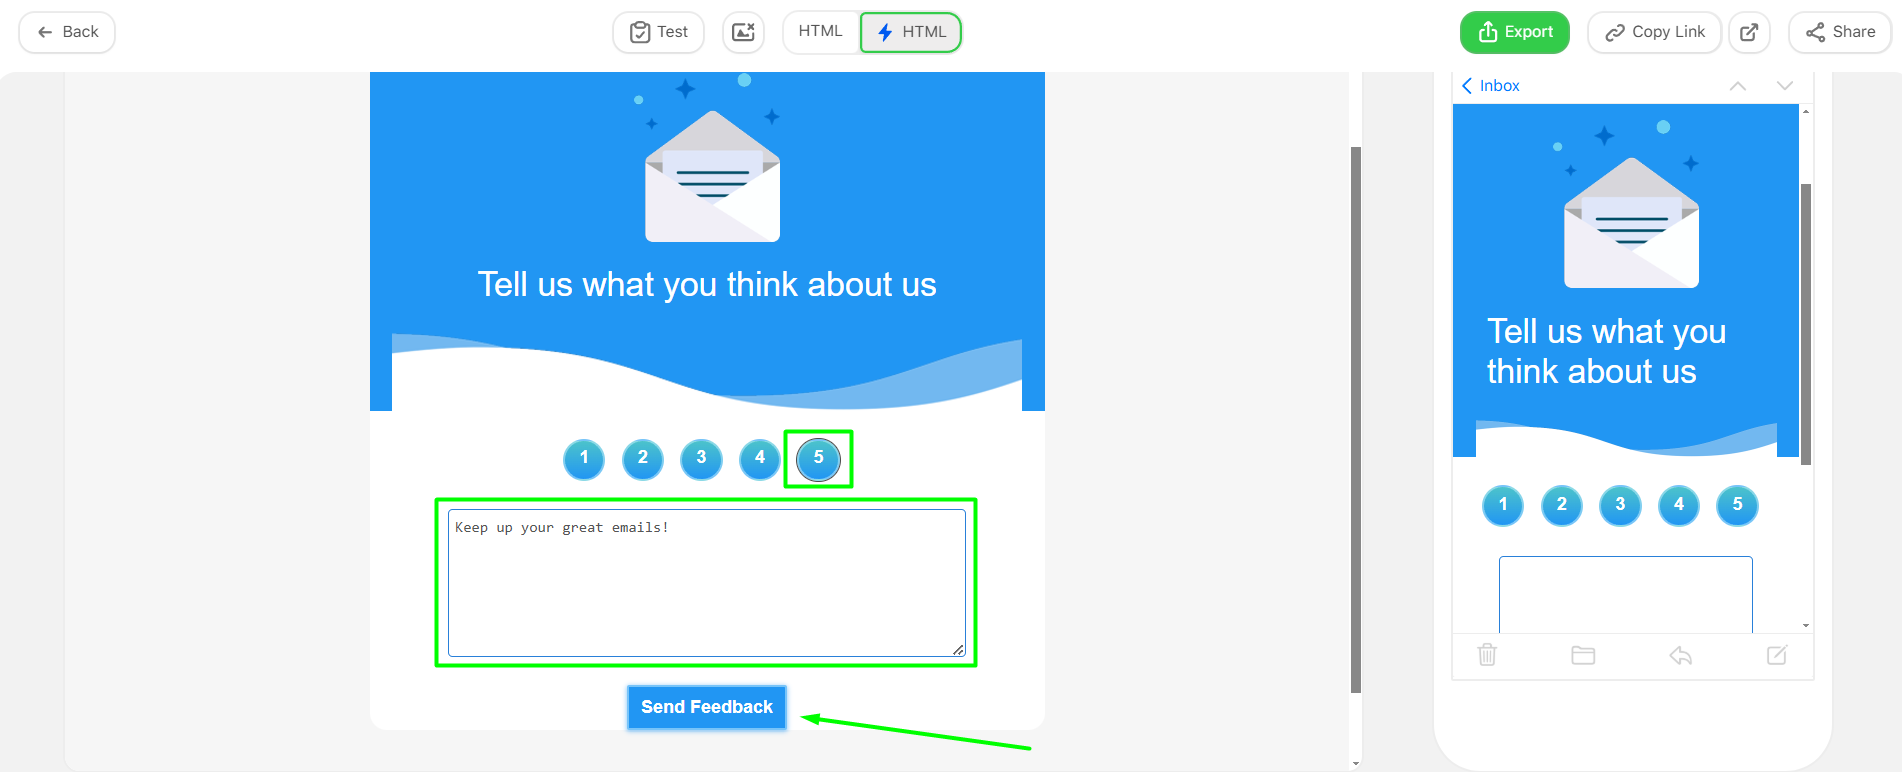
Once it’s done, we return to Zapier and our webhook. We need to set the example values for Zap to gather data in the right spreadsheet cells. Go to your created webhook and do the following:
- click on your webhook and go to the “Test” tab;
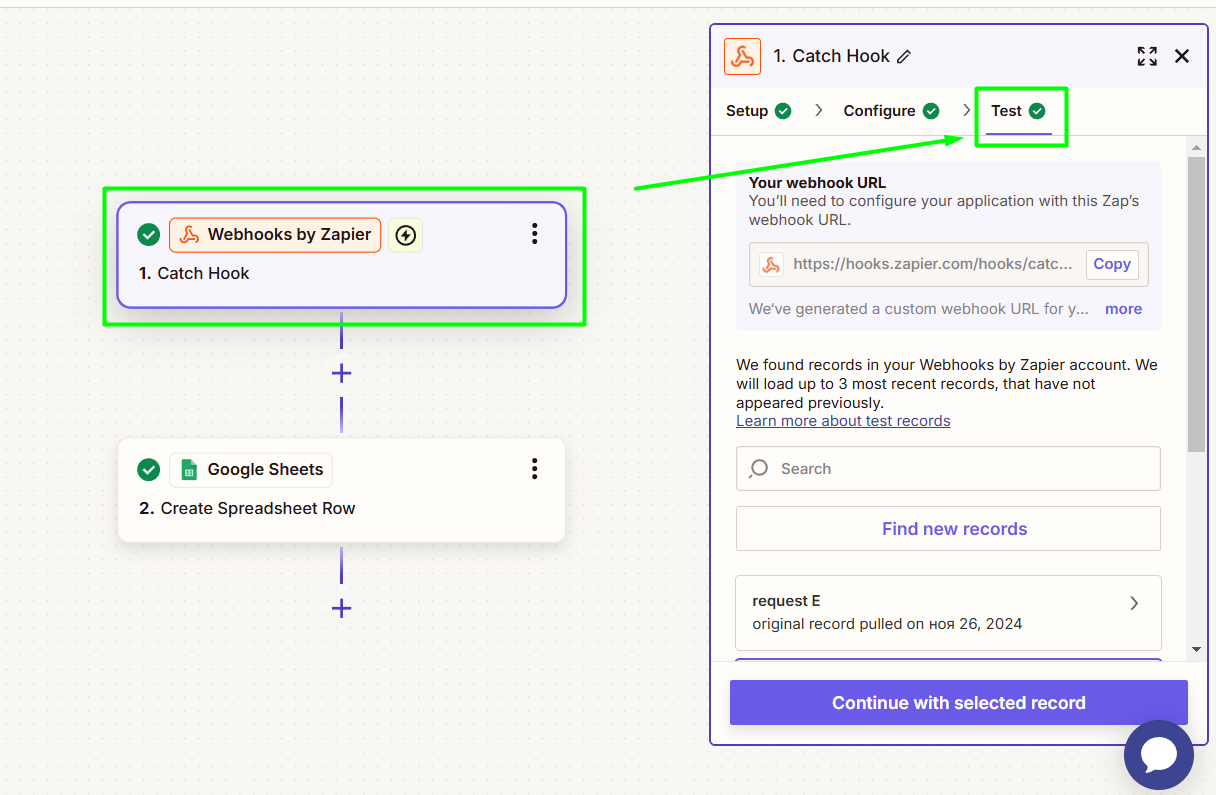
- click on the “Find new records” button, as it will update and show below all the queries your webhook received (on our screenshot, we already have the latest record shown);
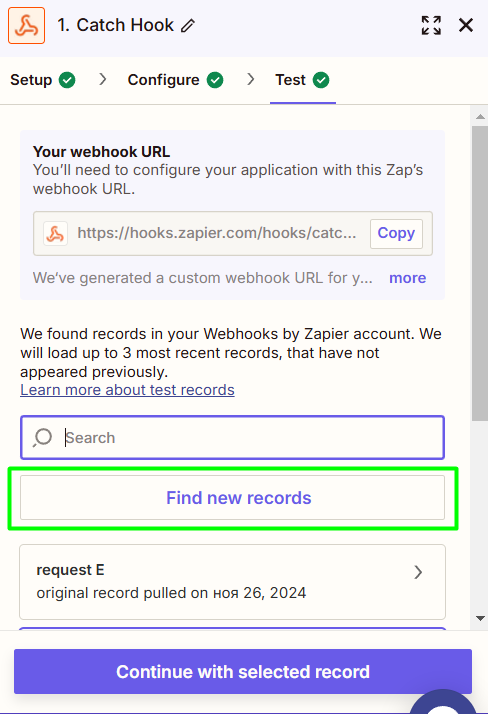
- check the record by clicking on it to see the values your webhook received from the form test.
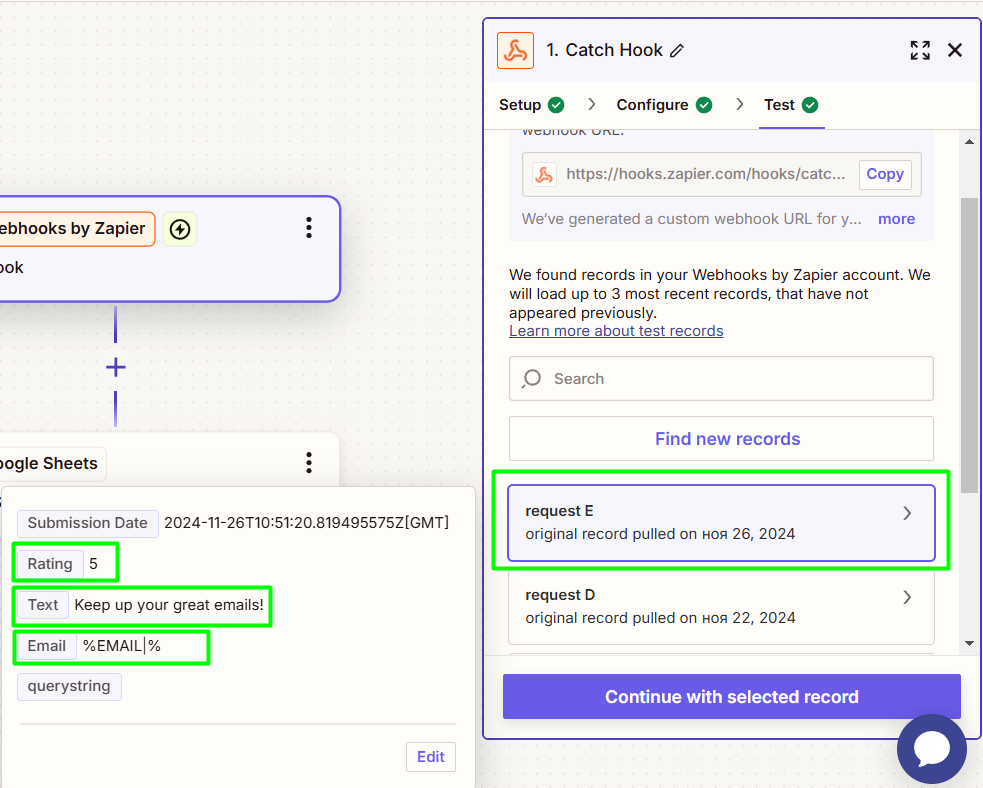
- click on the Google Sheets node and go to the “Configure” tab;
- assign the correct data to the right fields by clicking on the + button;
- the final look of the assigned data should be as follows:
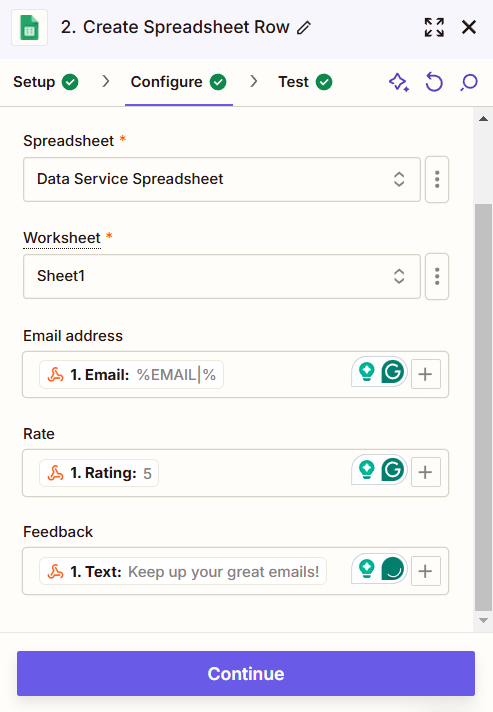
Once it’s done, save the changes. Now, all next webhook queries will be recorded in your Google Spreadsheet.
Important note:
We showed how data can be stored on our Service and on an external service (Zapier). But you can choose both if you like. Just toggle on both options:
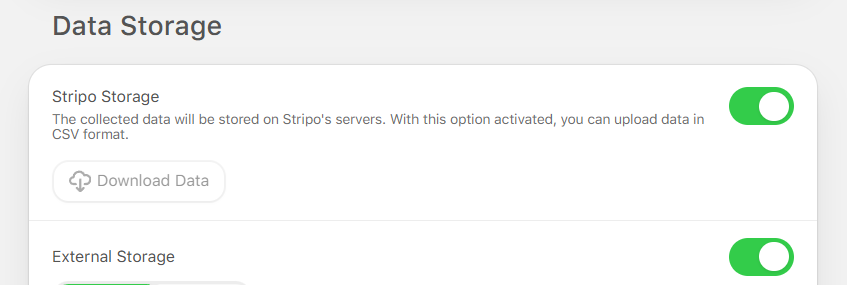
How to check your results and answers
To see the results of this campaign, you need to enter the “Data” section again, where all your Data Services are stored.
Find the service you’ve previously built.
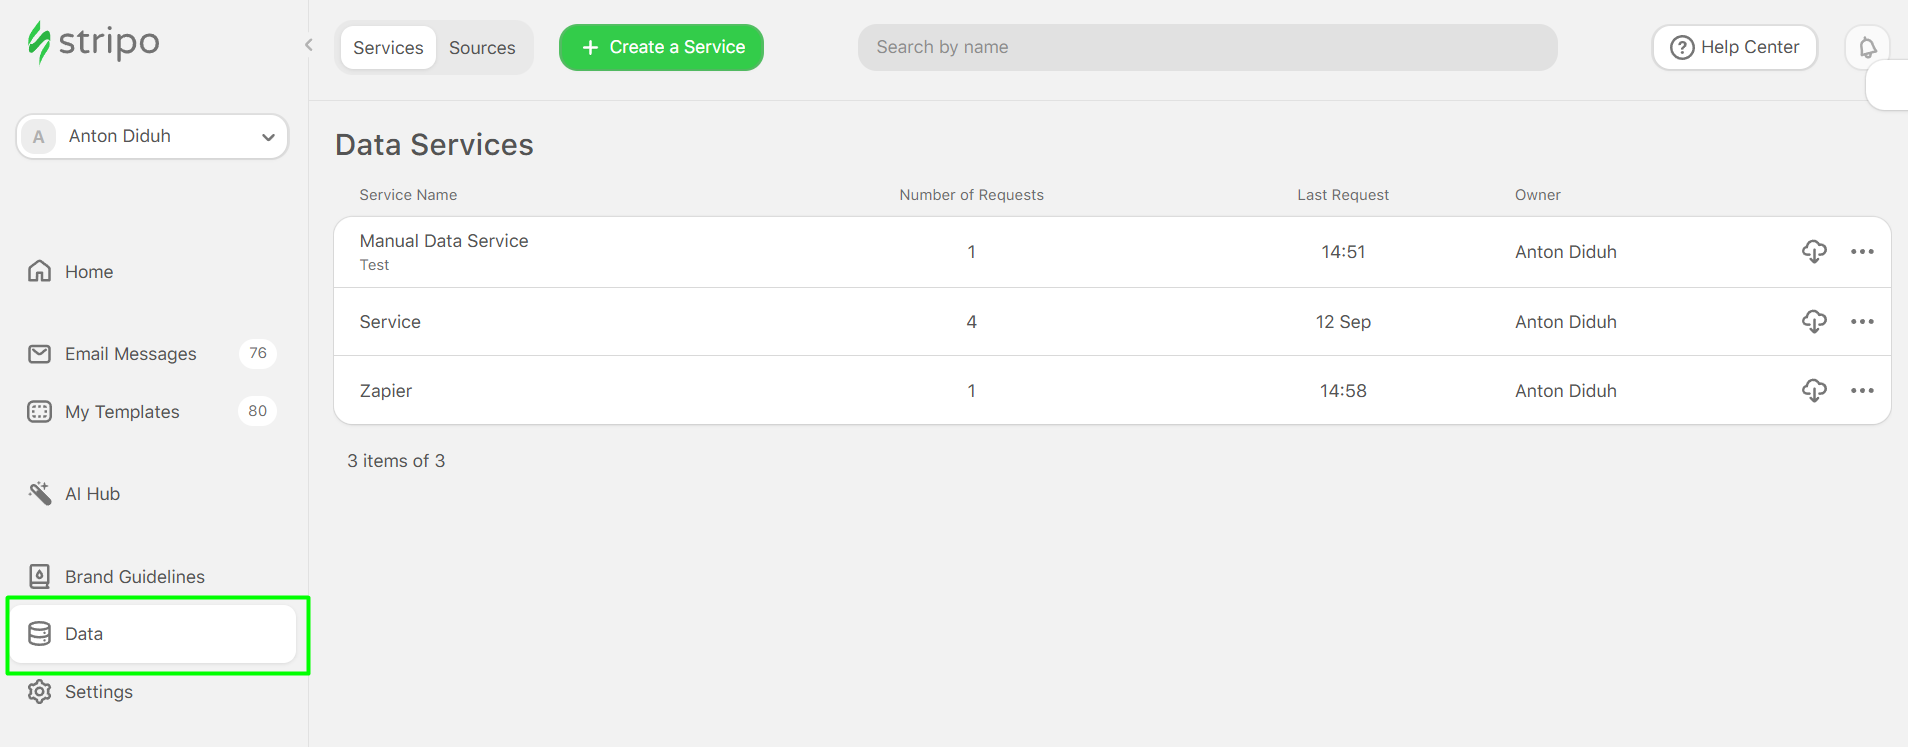
As you can see, it shows how many requests each service had and the time when the last request was made.
Click the “Download” button to get a CSV file with all the answers. This works for both our internal and external storage.
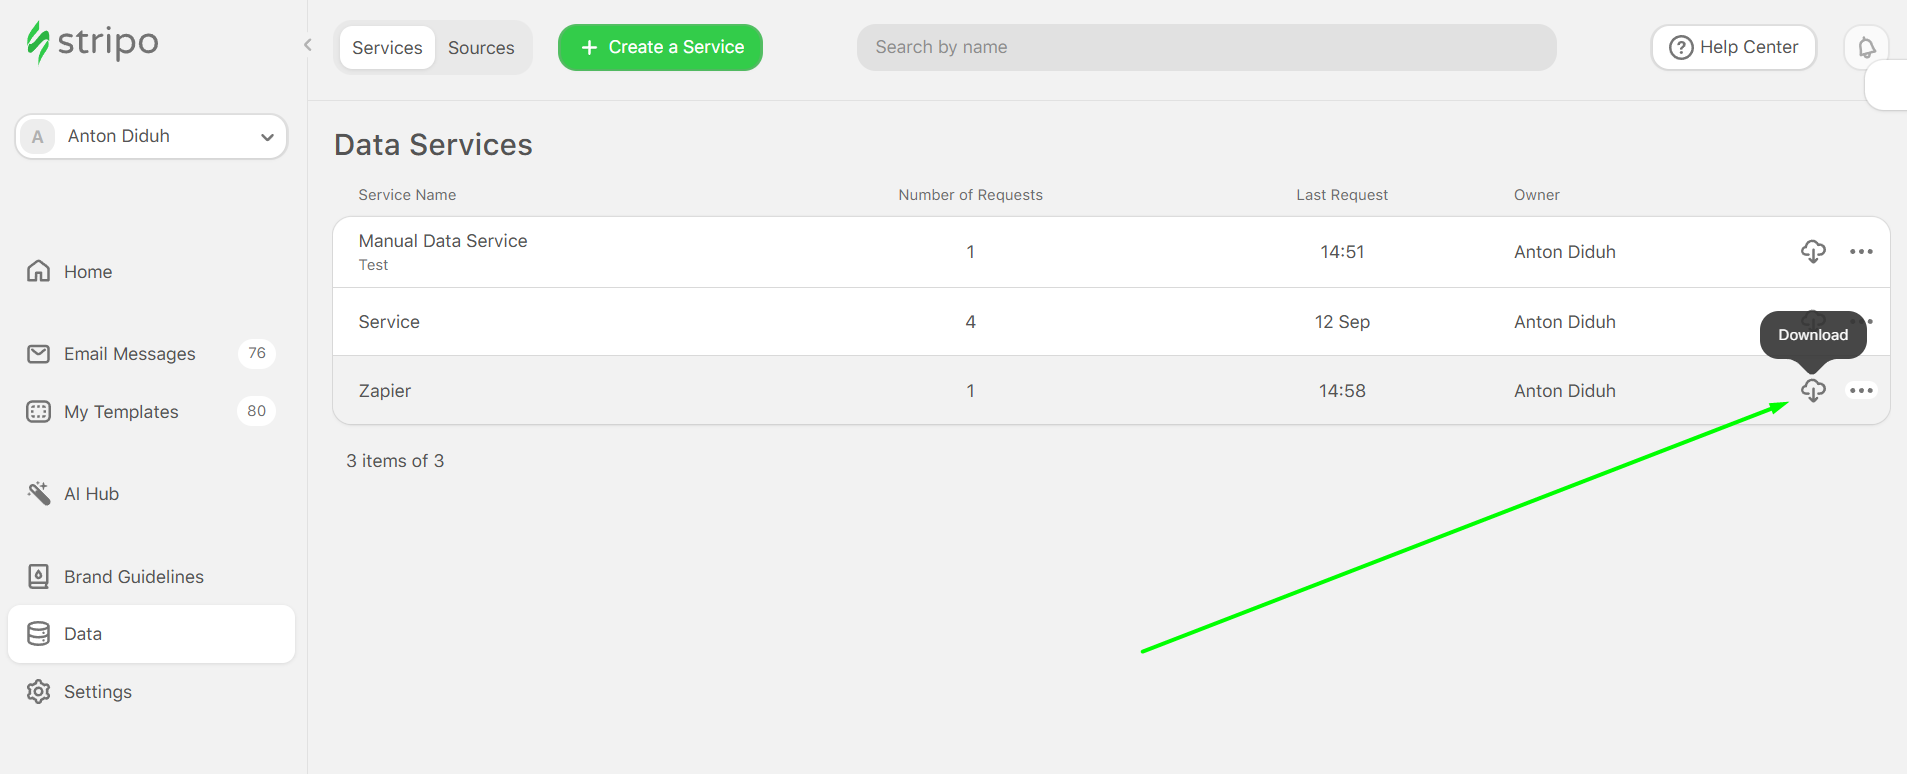
If you picked Zapier as your external storage, all your received data will be stored within the Google spreadsheet you attached to your webhook.
Word of advice
AMP is an advanced technology, so you need to be armed with knowledge and be prepared before adopting it. Here’s just a friendly reminder. To be able to send AMP content, you should:
- get whitelisted with Google;
- fix all the bugs, if any occur. You’ll see them in the Preview mode (otherwise, users will see HTML email);
- keep in mind that AMP works as it should in Gmail, Yahoo, and FairEmail;
- always create an interactive fallback version of your interactive email for email clients that support HTML5 and CSS3;
- сraft a text fallback, as it’s mandatory for email clients that don’t support HTML5 or CSS3;
- consider that AMP emails lose their AMP components if you forward them.
Wrapping up
Data Service is a great tool that leverages interactive emails, making them both fun for the recipient and valuable for the business. Data Service allows for gathering valuable data out of your AMP email campaigns to strengthen your future marketing endeavors and business development ideas.


0 comments