Leaving comments and submitting feedback in emails is now possible.
We’ll show how to collect 5X times more users’ reviews and feedback via email marketing. With absolutely no coding skills.
Watch our short video tutorial or keep reading the post:

Building AMP Forms for emails
Adding AMP forms to emails will take you just four simple steps:
Step 1. Creating a new Data Service
Data Service, aka data storage, is the place where you store users’ feedback and reviews.
To connect one to your emails, you need to:
-
go to Data;
-
enter the “Service” tab;
-
give it a name. We recommend that your service name is inherited from the campaign’s name;
-
then choose Data Storage — Stripo.
Important to note:
If you use the external one, you will have to paste a link to it.
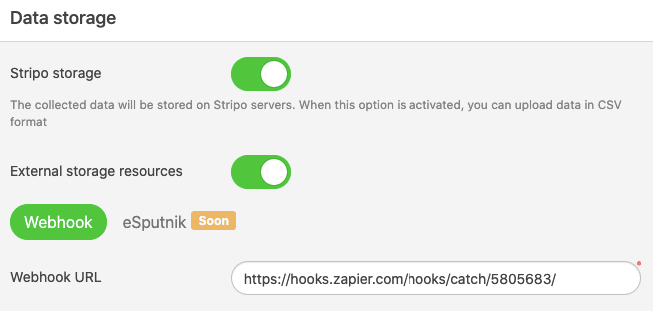
In one of our previous posts, we showed how to connect your Data Service to Google Sheets via Zapier. This means that all users’ feedback will be delivered and stored either on Zapier, or Google Sheets, or any other data storage that you connect to emails via Zapier.
Step 2. Adding AMP forms to emails
As we said above, building and adding AMP forms to emails with Stripo is easy as 1-2-3 for our new Drag-n-Drop AMP block.
Important to note:
This form will render only for those users whose email clients support AMP — you’ll find the list below.
Others will see a traditional form.
To add AMP form to emails with Stripo, you need to:
-
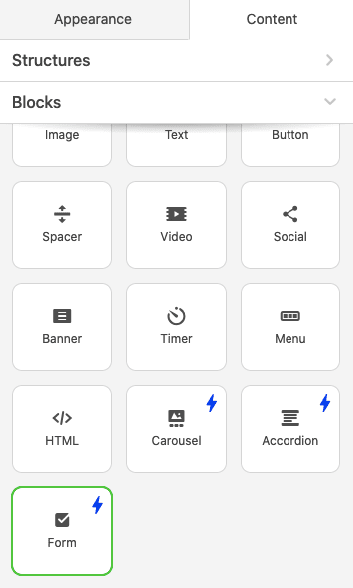
drag the AMP block into your HTML email;
-
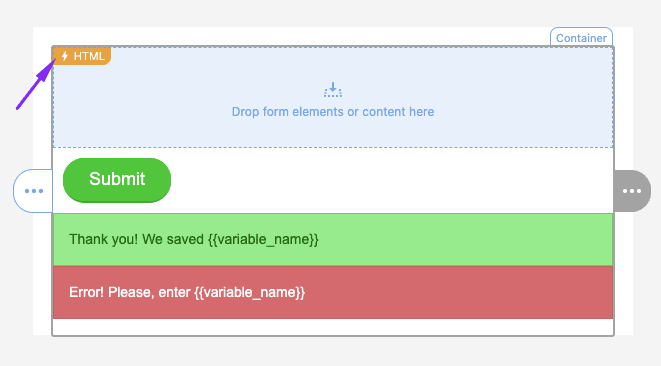
click the “AMP HTML” icon in this template to start working on its settings;
-
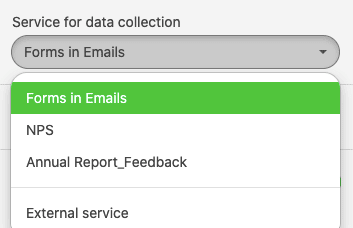
in the settings panel, select your data service. Mine for this campaign is “Forms in Emails”;
-
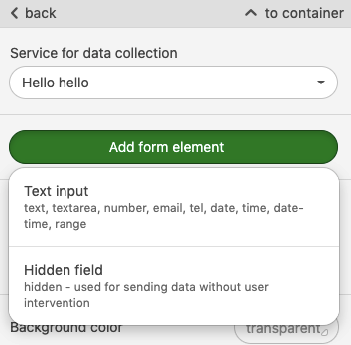
now please click “Add form element” and select “Text input”;
-
click “Label name” in the form to start editing it;
-
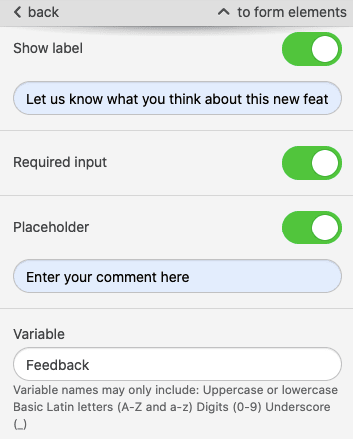
in the settings panel, in the “Show label” field enter your CTA text that starts the form;
-
enter “Placeholder” name;
-
and enter your Variable name — which will actually just help you find users’ feedback in a report;
Important to note:
Now if you want to know who of your users left this comment, you need to:
-
click the “AMP HTML” icon in your template;
-
then add a form element;
-
then choose a “Hidden Form”

-
click “input_hidden” in your form; -
then in the settings panel, enter Default Value and variable, where the “Default value” is the merge tag that retrieves the respondent’s email address. To get one, contact your ESP, or find one with Stripo.
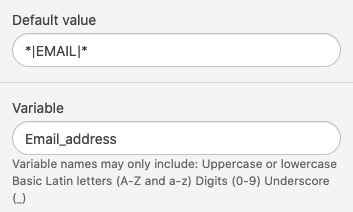
This field will be hidden in users’ inboxes.
Getting a merge tag with Stripo:
-
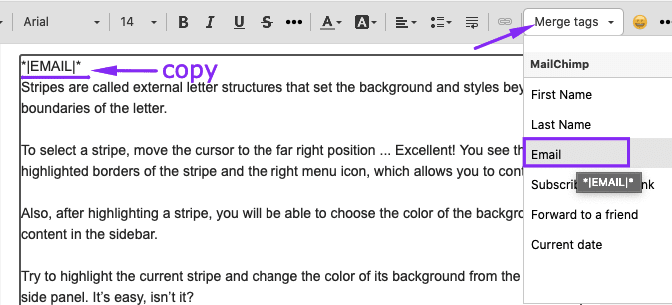
highlight a piece of text in your template;
-
in the toolbar, go to “Merge tags”;
-
choose your ESP;
-
then pick “Email”;
-
copy this merge tag.
Designing your form
To design this form you need to:
a) form itself
-
to design the form itself, click on the “AMP HTML” icon in your template;
-
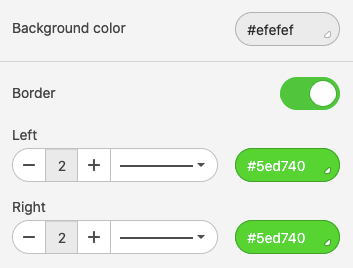
in the settings panel, set background color, and border.
b) button
-
to design button in the form, click on the button in the template;
-
in the settings panel, set button label, font type, font size, and color, text color, border-radius, and alignment.

c) notification section
-
click the “Success notification message” in your template;
-
edit text right there;
-
color for each section — by default they are green and red — and text color should be set in the settings panel.

Done!
Step 3. Previewing and testing
To preview your AMP form, please:
-
enter the Preview mode to check out your email’s design;

-
be sure to check out both AMP HTML and traditional HTML versions.

To test this form, please:
-
send a test email to 1 or a few email addresses, click the “Test” button above the template;
-
enter your email addresses (if there are more than one, separate them with commas);
-
in the email, leave some a comment, or even a few of them;
-
then go to “Data Service” in your Stripo account;
-
find a necessary service;
-
download it as CSV file;

-
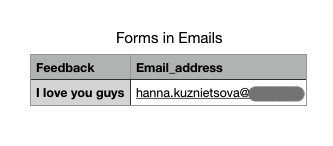
check if your answers are recorded in the report.
Important to note:
To send a test AMP email, please add Stripo as a trusted sender in your Gmail account.
Step 4. Building a fallback
Now that we know our AMP form works great, we may proceed to build a fallback for those users who can’t see dynamic content yet:
-
pull the Text block in your template right above or right below the AMP form;
-
enter your CTA text to encourage users to go to the external form to leave a comment on your services;
-
pull the Button block in your template;
-
design it;
-
paste the URL to your Google Form;
-
to include this structure in the HTML version of your template only, please click the “Structure” button;
-
in the settings panel, click the “Include in HTML” button.

Now please test this HTML form — send a test email to those colleagues whose email clients do not support AMP yet.
Word of advice
Here's just a friendly reminder. To be able to send AMP content, you need to:
-
fix all the bugs if any occurs. You will see them in the Preview mode (otherwise users will see HTML email);
-
make sure that your ESP/CRM is capable of sending AMP emails;
-
keep in mind that currently only Gmail (both web and mobile apps on all OSs) are capable of rendering AMP emails. Yahoo will join the list soon;
-
AMP emails lose their AMP components if you forward them.
Important
We created our AMP Academy with courses for newbies and geeks. There you'll find lots of useful information on how to design custom AMP emails, from carousels to real games.
You can also check out the 8 examples of interactive content in emails for inspiration or to learn something new.
Final thoughts
Now you know how to build AMP forms that help collect 5X more feedback from customers compared to external forms on your site or Google forms.
If you have any questions, please leave a comment below. We will be happy to assist.




6 comments