Ever thought of pulling data from Google Sheets into emails to automate the email production/email update process?
Well, it is possible. It is possible even without your interference.
We want to remind you what real-time content is: Real-time, aka dynamic, content allows updating your email content after the email has been sent. This means that users always see only fresh content, actual prices, and descriptions, they will not see announcements of sales after the sales ended. How does it work? You make changes to the content in Google Sheets, and this content gets updated in emails accordingly, the moment recipients open them.
Proud to announce that Stripo now lets its users pull info into emails from Google Spreadsheets.
What does it mean? You no longer need to deal with your servers and CORS headers at all.
But why would you actually care?
-
Recipients see only “fresh” relevant content no matter when they open the email.
-
Users will never complain that your “cut” prices and sales, they saw in email, do not work. They always see actual prices and actual sales in emails.
-
Updating content in emails, that were sent, is easy now with Stripo (we might all have sent emails with wrong product snippets, typos, wrong prices, etc).
-
Building emails with real-time content with Stripo is a piece of cake now for no need to connect servers to emails.
How to connect Google Sheets to emails via Stripo?
Prior to showing how to connect Google Spreadsheet to emails, I want to say that you can use this type of content across different campaigns:
-
all types of emails with product cards;
-
welcome emails to provide recipients with fresh “How-to” videos from Youtube;
-
transactional emails where you need to change/replace a link to updated “Help Center” posts”.
Important:
You need to do all the steps given below once. Then, you may just save this email element to Modules and reuse it as often as you’d like.
Step 1. Setting Google Sheets to Data Source

-
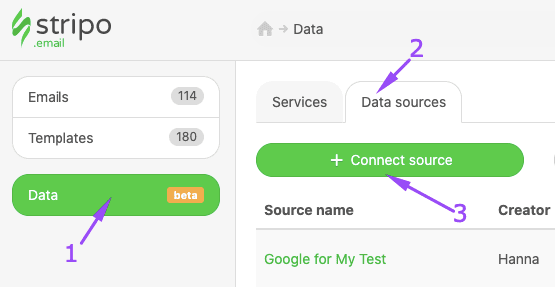
in your Stripo account, head to Data;
-
go to the Data Sources tab;
-
click the “+ Connect source” button;
-
give it a name;
-
below, go to the “Google Sheets” tab;
-
now click “Google” to connect a necessary Google spreadsheet;

-
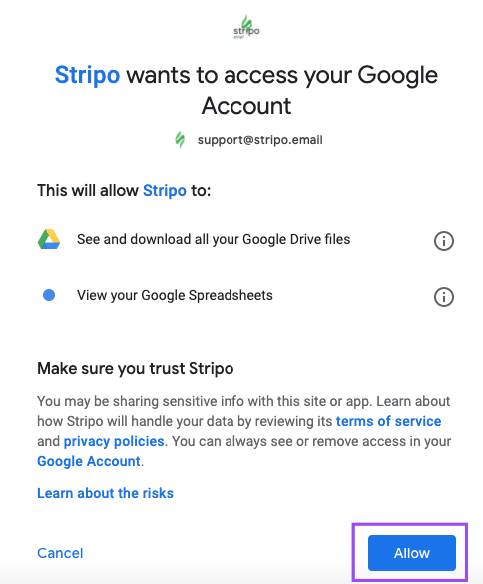
in a pop-up window, give Stripo access to your Google Sheets by clicking the “Allow” button;
Important:
Stripo successfully passed Google’s security test. So you can trust us with your tables. As this is the only thing our Data Source will have access to (for retrieving data purposes only).
-
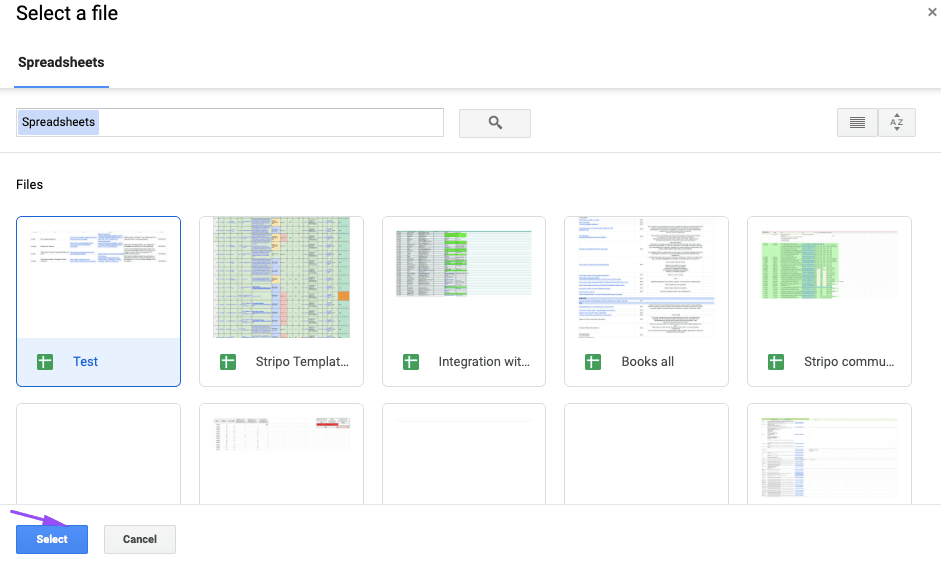
select your table by clicking on it;
-
click “Select;
-
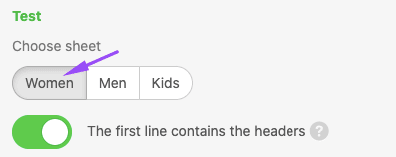
for your convenience, we show the name of the Spreadsheet and the number of its sheets. By default, we connect to the first one, but you can switch to any sheet from the selected Google Spreadsheet;
-
in your Data Source, you can check if all the information, like names of columns, names of rows, is retrieved correctly;
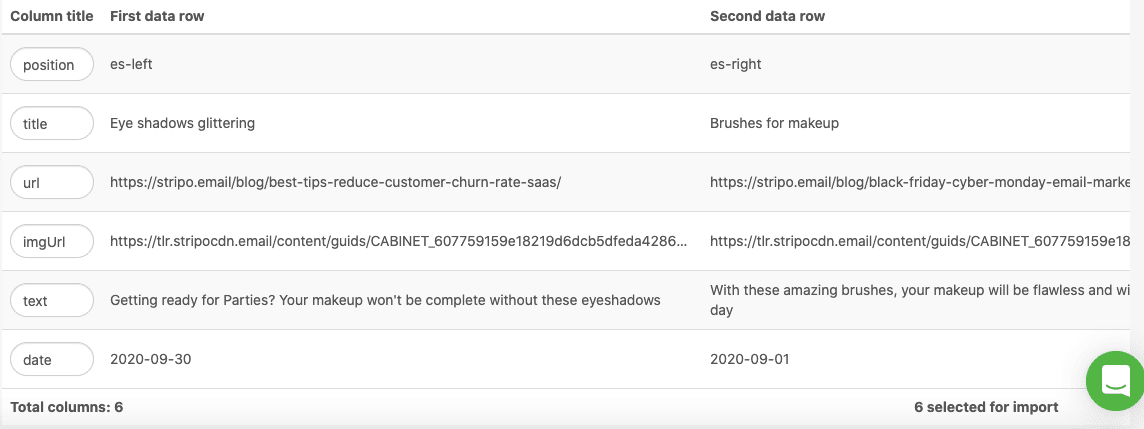
-
here you can disable unnecessary rows (even after the email has been sent out). You just need to scroll right and uncheck some elements;

-
now click “Connect Google Spreadsheet” in the bottom right;
-
copy the URL Address as you will need it later.

Step 2. Preparing your Google Spreadsheet
-
create a new table in Gmail;
-
give the columns necessary names — we recommend giving clear but simple names that contain just 1word, as you will need to add them to emails;

-
fill the table with the necessary information.
The “Position” column is necessary if you put two containers in 1 row.
Step 3. Preparing your email
First of all, you need to prepare your email:
-
design your product cards — everything, from buttons to image location and font size for descriptions;
-
enable the “Include in HTML only” option for these row;
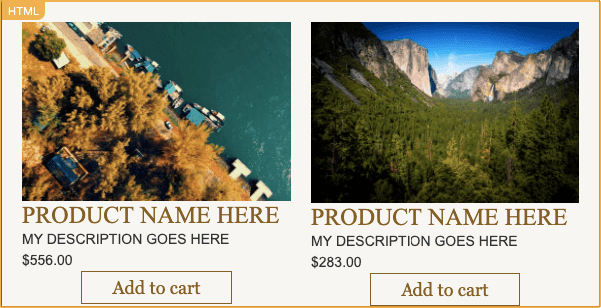
-
open its code and copy from the <table cellpadding="0" cellspacing="0"...> line till the next <table cellpadding="0" cellspacing="0"> line, not including (without it);
Important:
I copied only half of the code — the code of the entire cell for my product card — because I built a row with two containers. But if you put just one container per row, you will have to copy all the code in the code editor (for this particular email element).
You will need to paste it also one time, not twice, no matter how many product cards per row and rows themselves you are about to have — this code sample is repetitive. So, in the end, in your emails, you will have as many product cards as many lines you’ve filled out in your Google Spreadsheet.
-
drag a new 1-column structure into your HTML email template;
-
drag the HTML block in it;
-
open it and paste the code sample that you’ve just copied;
-
now connect your emails to the Google Sheet you’ve just created.
Step 4. Connecting Google Sheets to emails:
Here we are about to work on the row code.
For those of you, who already built emails with AMP lists as described in our “Data Source” blog post, this entire process seems quite familiar. The algorithm is the same:
-
right above the rest of the code, you add the following code sample:
<amp-list layout="fixed-height" height="360" width="auto" src="https://stripo.email/emailformdata/v1/list/ecxs/stripo-welcome-emails"> <template type="amp-mustache">
If done right, it will look like this:

-
here replace the link in the “src=” part with the Source URL address from Step 1;
-
and paste the code part, given below, at the very end of this “Structure/Row” code;
</template> </amp-list>
-
if done right, it looks like this;
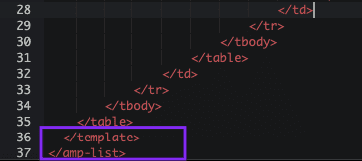
-
the part of the code (that is responsible for images) that is highlighted in the screenshot below should be replaced with the code given below;

(You set image width and height that fit your email design)
<a href="{{URL}}" target="_blank"><amp-img width="269" height="180" alt="{{Productname}}" src="{{imgURL}}" layout="responsive"></amp-img> </a></td>
Where:
-
{{Productname}} stands for the Product name — the one you entered in your Google Spreadsheet;
-
{{URL}} is the link to the product item on your site;
-
{{imgUrl}} is the link to the product snippet (the one you also put in your Google Spreadsheet.
If you have given different names to the columns in your sheets, put them in the curly brackets accordingly.
Now we need to connect other columns from the table to your email:
When designing product cards, for my convenience, I gave the cards’ elements names that are close to the names in the Sheets’ columns.
So, when I opened the code of my product cards, it took me only two minutes to connect my email to Google.
With two little differences:
-
I had to wrap all these names into curly brackets;
-
all elements that also were wrapped in quotation marks, should stay in those quotation marks.
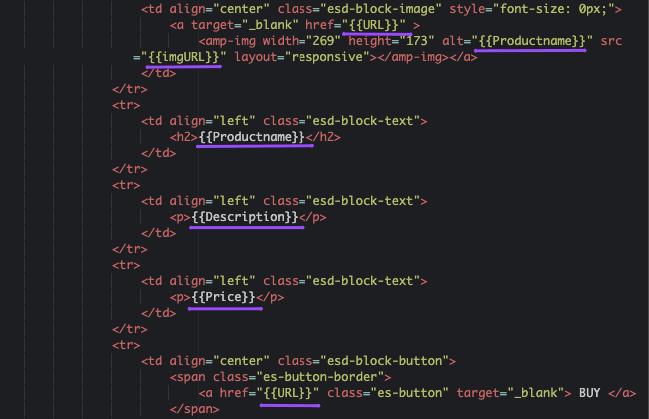
When you’re done, be sure to enable the “Include in AMP HTML” option for this entire row/structure.

Step 5. Building a fallback
In Step 3, we built our product cards and enabled the “Include in HTML” option.
This part of the email will serve as a fallback and will render in those email clients that do not support AMP yet.
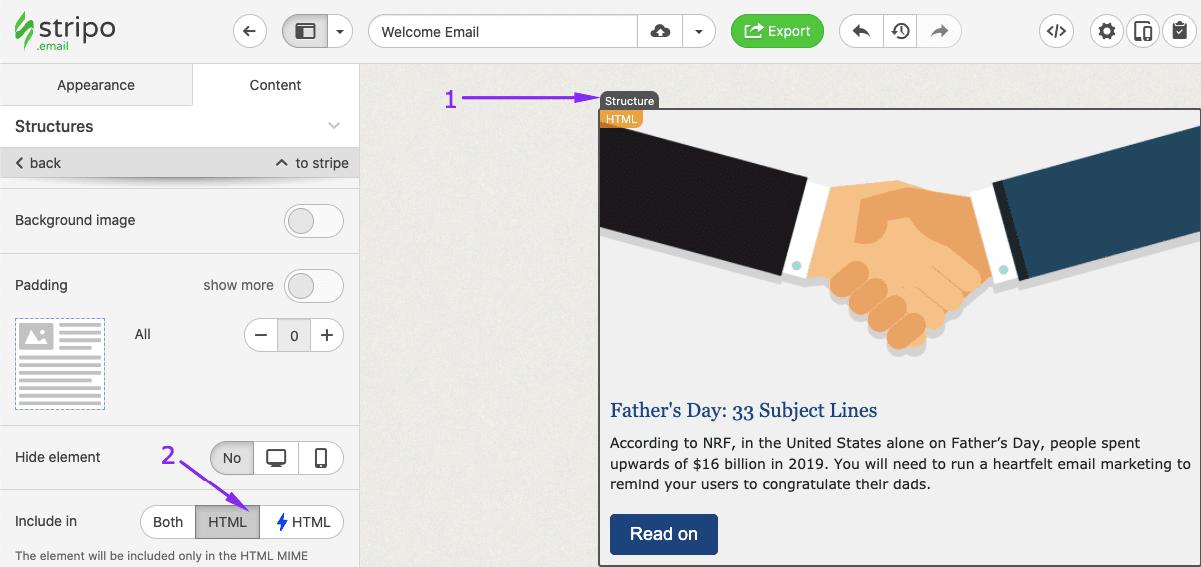
Step 6. Previewing and testing your email
Not only do you need to preview and test your email like you normally would, but you should also try and edit/update some info in the Google Sheets to make sure your spreadsheets are really set as Data Source.
Step 7. Saving this element to your Library
As we mentioned above, you may store and reuse this element across multiple campaigns.
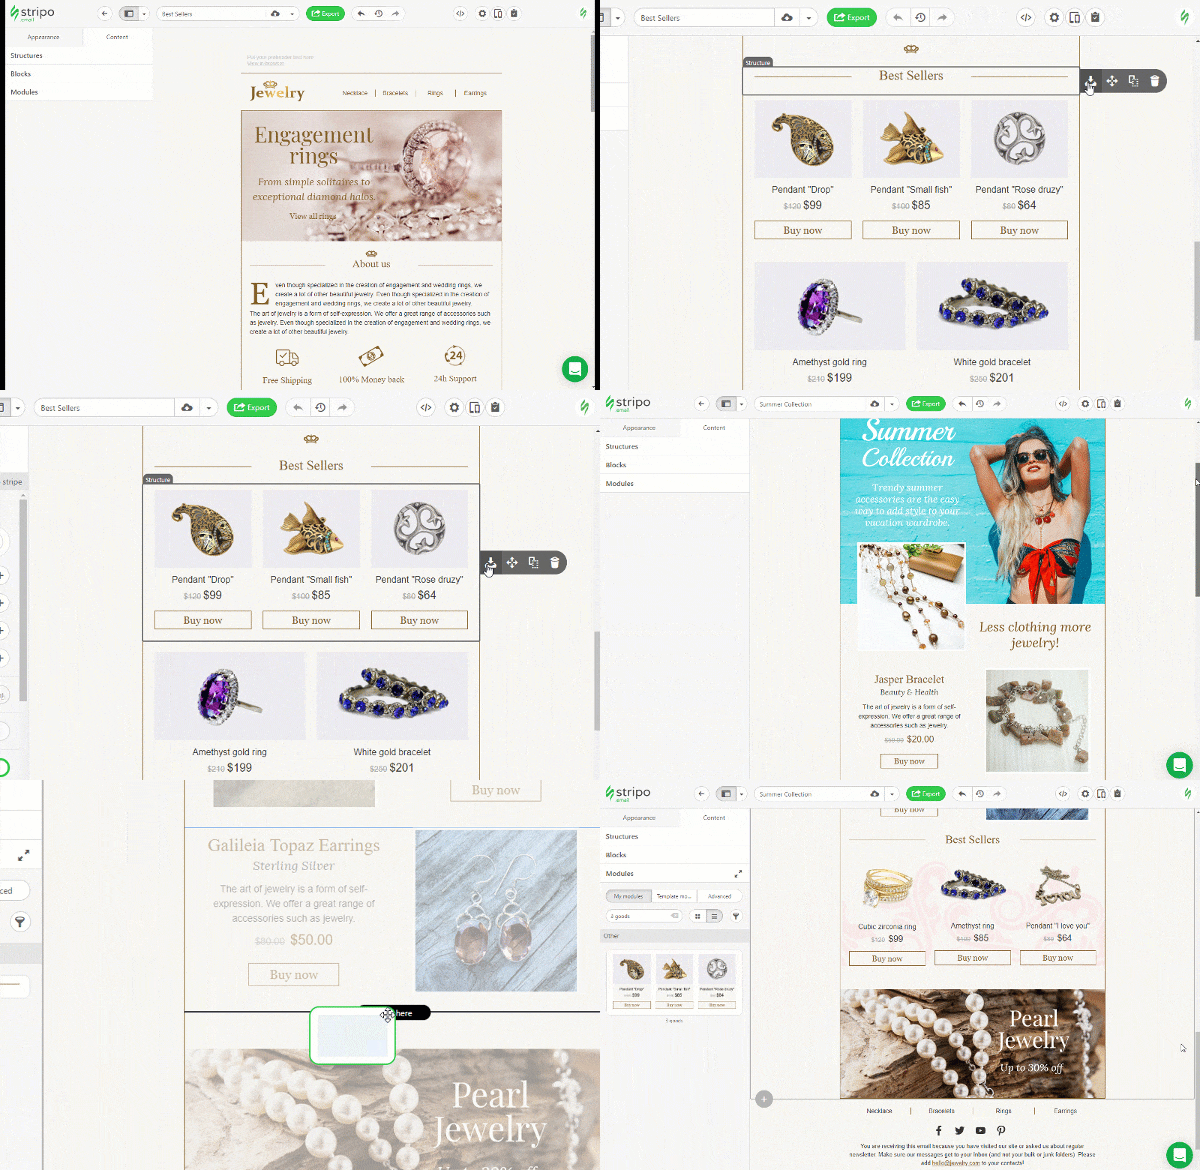
You will not have to do anything with Data Source, not with email code — just drop this module from the “Modules” storage into your template and update the info in your Google Sheets. That’s it.
Building emails is easy with Stripo!
Word of advice
Here's just a friendly reminder. To be able to send AMP content, you need to:
-
fix all the bugs if any occurs. You will see them in the Preview mode (otherwise users will see HTML email);
-
add the fallback — HTML version — in this email. Above, we showed how to do it;
-
make sure that your ESP/CRM is capable of sending AMP emails;
-
keep in mind that currently only Gmail (both web and mobile apps on all OSs) are capable of rendering AMP emails. Yahoo will join the list soon;
-
AMP emails lose their AMP components if you forward them.
Final thoughts
Being able to update/edit content in your emails after the email has been sent is a great way to provide users with only fresh, relevant, and real information.
Building such emails with Stripo prevents you from the necessity to deal with JSON, set CORS headers, etc. You save time on email production, yet make your emails more functional and useful.






0 comments