Looking for ways to build a custom email fast to further send it through Mailchimp? We’ve got you covered. Stripo offers hundreds of free email templates for Mailchimp 2022.
How does it work, how do you customize those templates and how do you export your emails to Mailchimp? We will show it in this post.
A short intro or why use an alternate email builder?
Mailchimp is a world-known ESP, preferred by 22% of email marketers worldwide. They have a compelling knowledge base, they enable recipients to share/forward emails to friends, they provide users with cutting-edge analytical tools, a subject line helper, email content optimizer, and many other things.
The fact that Mailchimp statistics say that it serves over 22% of the market only proves that this tool is awesome.
However, sometimes you might need to combine this tool with an external email builder.
Below, we will show how to export emails from Mailchimp to Stripo. And now let us highlight a few unique features that speed up email production.
Benefits of the Stripo email template builder
Stripo’s main goal is to speed up the email production process. So, to do so, we offer the following functionality:
-
the Content Modules option — allows you to reuse email elements across multiple emails. You build an email module, save it to your personal Content Modules library, and use it whenever you need;
-
the Synchronized Modules option — allows you to edit/update a number of emails at once. Below, we will show you how to use this one right to save hours, not to say days, on email production;
-
the Smart Elements option — to create product cards, aka product content blocks, within seconds. You configure them just once, and when building this module next time, you simply insert a link to your product and Stripo retrieves data and fills it in respective fields;
-
the Countdown Timer — to let you add countdown timers to your Mailchimp marketing templates in no time, no code;
-
over 70 social media icons — you choose a design style from over 30 options. Most importantly, you can even upload your custom ones;
-
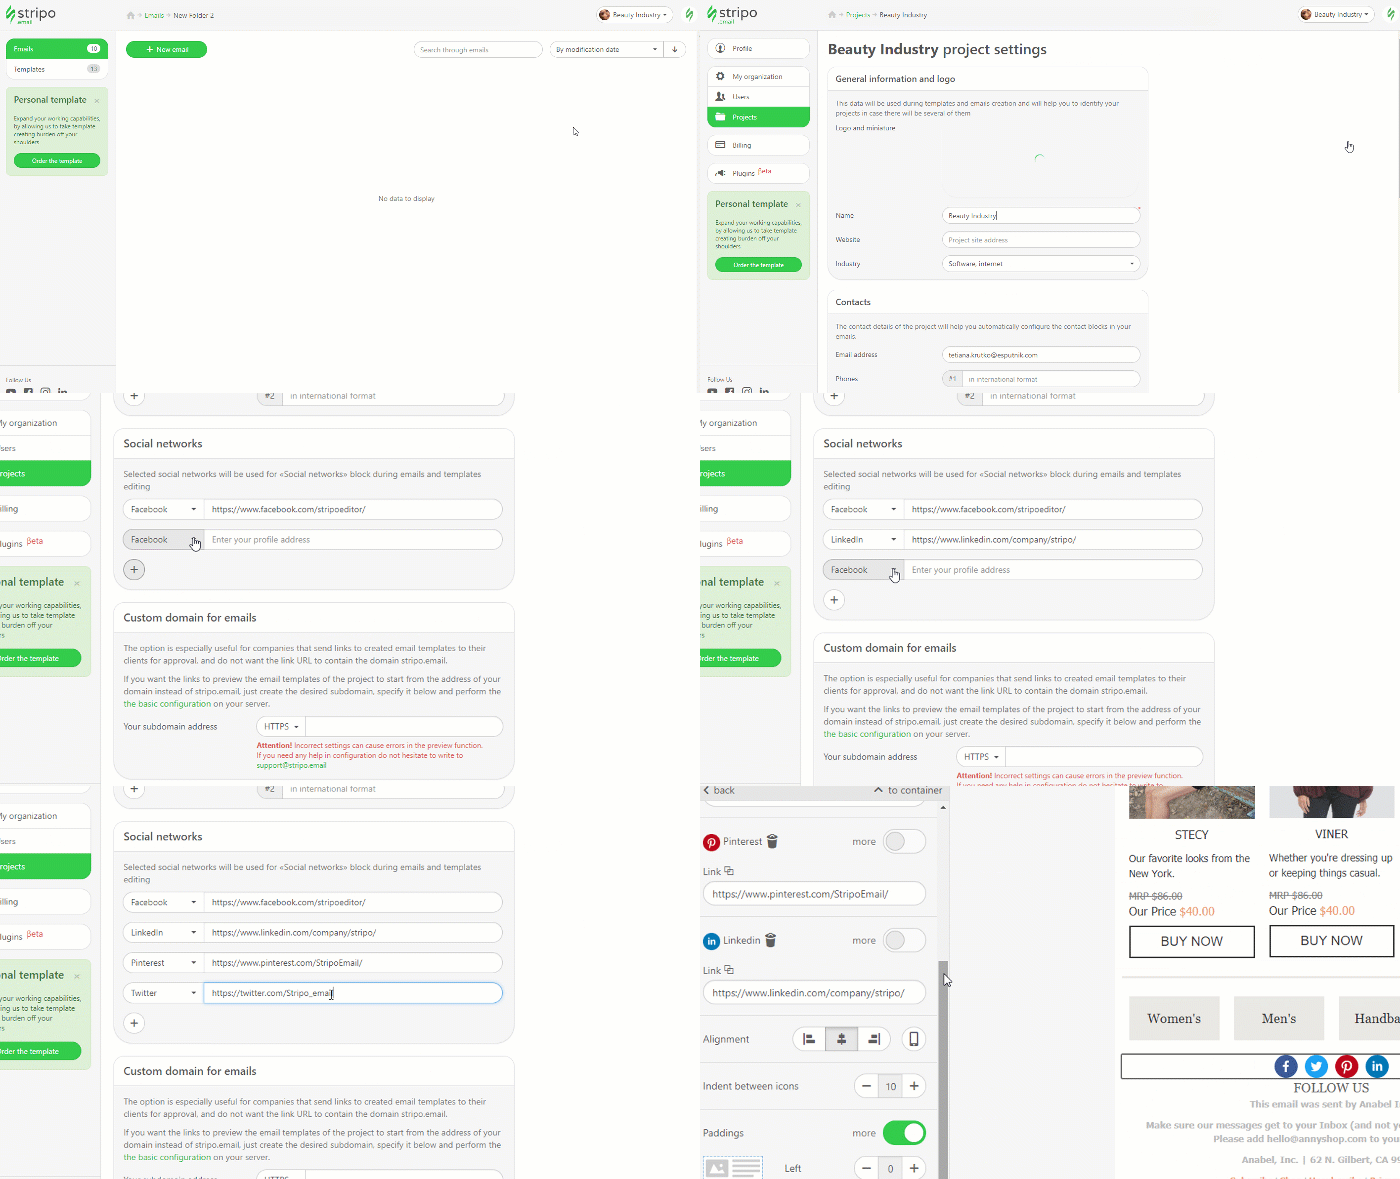
ability to add the “Follow us on social media” block into your email templates with just one click. You fill out all the necessary information just once in your personal profile with Stripo. Next time just drag the “Social” block into your template, and Stripo will automatically pull in necessary icons and links;
-
RTL — allows you to write texts from right to left in emails with no coding skills. Just toggle the RTL button in the General Settings tab;
-
Stripo Email Translate to go multilingual — translate your Mailchimp email copy into 10 languages at once right in the editor;
-
the Anchor links option — use them to navigate recipients inside the email and take them directly to the section they are interested in, without the need to scroll;
(Source: Email from Mercedes-Benz)
-
annotations generator for Gmail Promotions tab use them to show your recipients the value offer, the amount of the discount, and the preview image right in the Inbox without having customers open emails;
-
custom Mailchimp template width for your email — set any from 320 to 900 pixels;
-
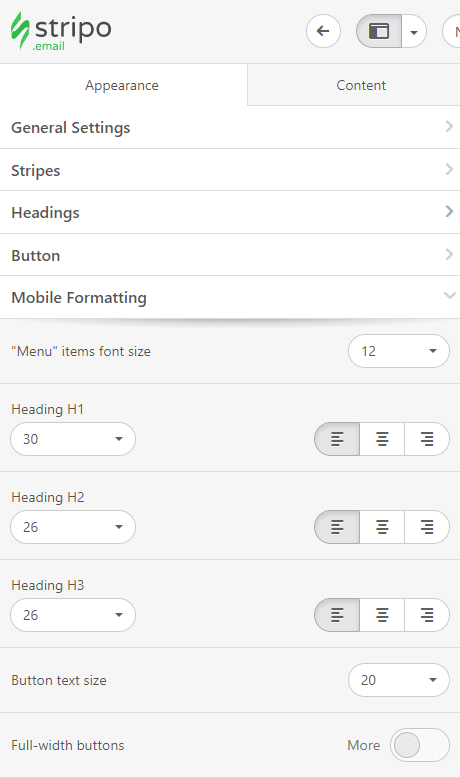
the Mobile Styles option — not only do you set custom button width and font size for the mobile version of your emails, but also hide/disable any element of your email on mobile devices;
-
850+ best responsive Mailchimp newsletter templates. They are fully customizable;
-
the Brand Guidelines option to help you build brand-consistent newsletters no matter what agency or email designer you hire to help you with email design. You pick any template of yours, and we generate a Guide with the email design styles used in it, along with reusable Content Modules.

How to export an email template to Mailchimp
In this section, we will describe in detail how to export and edit your email in Mailchimp.
Step 1. Building an email for Mailchimp
I won’t surprise you if I say that in order to export an email, you need to build it first ;)
Choosing a template
There are two ways to do that:
Option 1: Using Stripo’s prebuilt email templates for Mailchimp
To choose any of the templates that we offer, you need to:
-
in your personal account, click the “Templates” tab;
-
go to the “Prepared” templates tab;
-
pick any template you like.
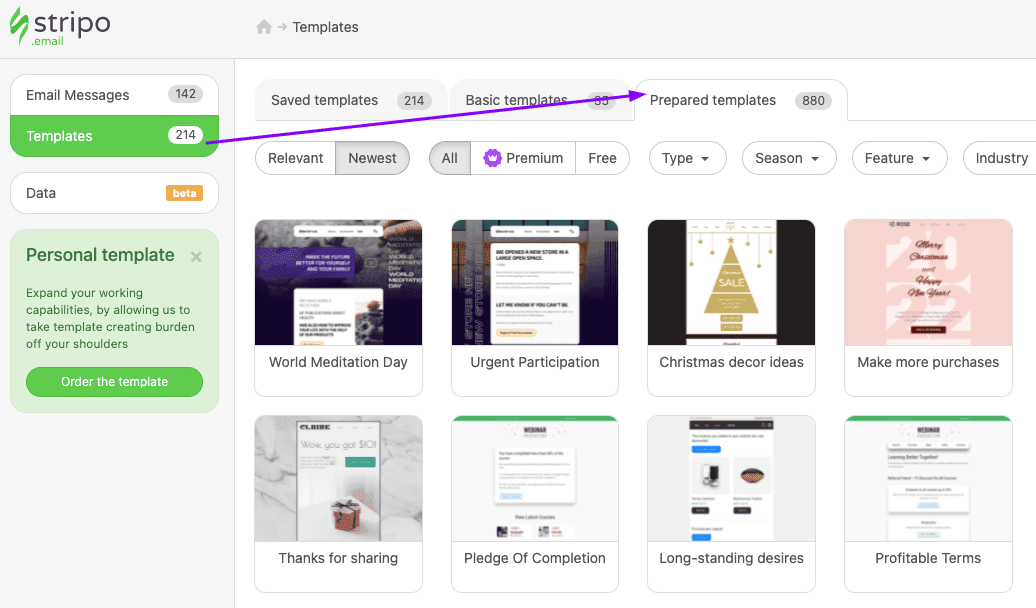
As you can see, all the templates are grouped by “Seasons”, “Types”, “Features”, and “Industry”. To use the one you like, just open the template and start working on it.
Option 2: Building an email template for Mailchimp from scratch
To do so, you need to:
-
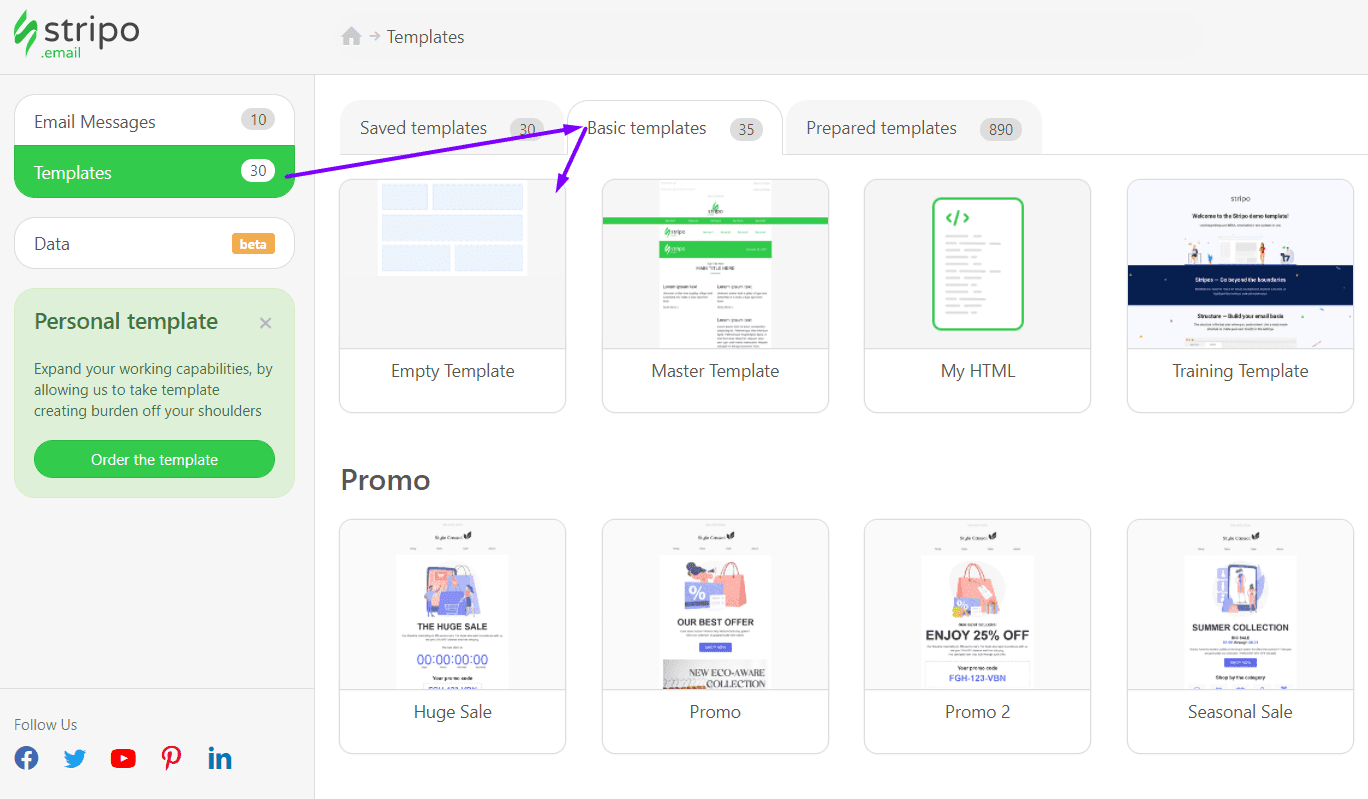
in your personal account, click the “Templates” tab;
-
go to the “Basic” templates tab;
-
pick the empty template.
Major benefits of the Stripo editor were described above.
Personalizing Mailchimp email
If you want to address your customers by name, be sure to add merge tags to emails.
You can easily do it with Stripo prior to exporting a template to your ESP.
So, how to personalize Mailchimp email:
-
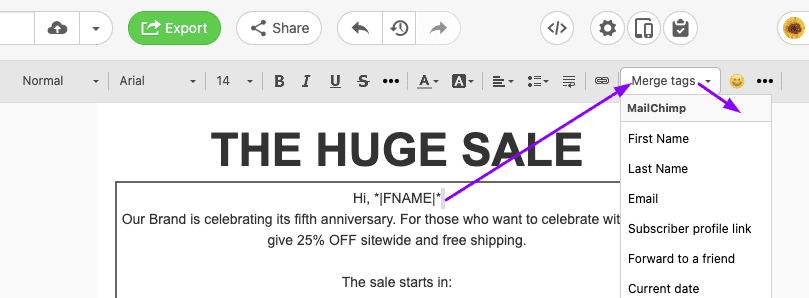
left click in the template exactly where you want to add a merge tag;
-
in the Toolbar, click on “Merge Tags”;
-
choose Mailchimp;
-
select a necessary merge tag.
Checking Mobile styles of your emails
Once you’ve finished your template, you might want to make sure it’s fully responsive.
As we said above, Stripo lets you set font sizes to regular texts, to various headings, to buttons, etc. for the mobile version of your emails. They may differ a lot from the desktop ones.
So, how to make Mailchimp email mobile-friendly
-
open the Appearance tab;
-
go to the Mobile Formatting section.

Testing Mailchimp emails
To make sure you’re sending out only flawless emails, you may:
Option 1: The Preview Mode
The Preview Mode shows how your email looks on desktop and mobile devices.
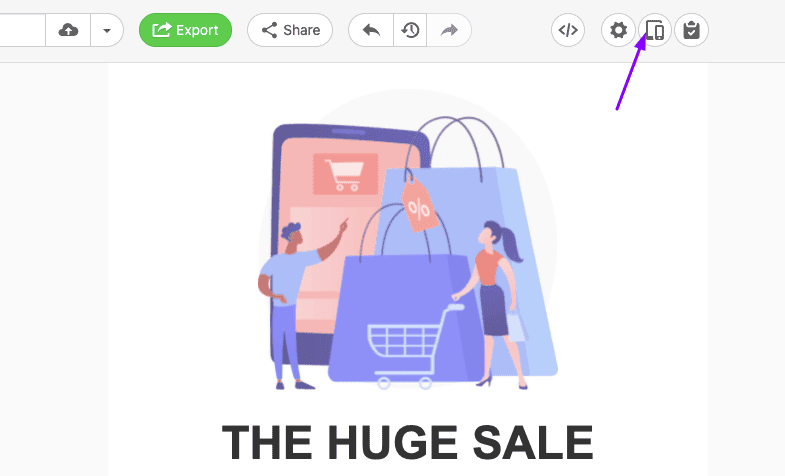
As for the mobile version, you will only see if your emails are fully responsive, or if you still need to work on the Mobile Styles.
If your email looks good, we recommend you proceed to Option 2.
Option 2: Test emails
Send a test email to yourself and colleagues of yours to check if all your buttons are functioning if all your emails have clickable links.
To send a test email to a number of recipients, enter their email addresses with commas in between.

If your email works fine on your personal device, be sure to proceed to Option 3.
Option 3: See how your email renders across 90 combinations of major email clients and devices
This option allows you to see your emails exactly as your recipients will see them.
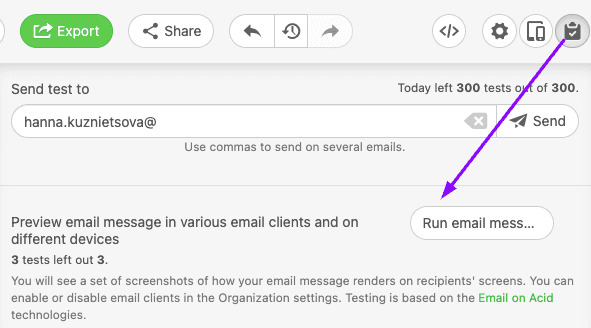
To enable this test, Stripo is integrated with Email on Acid.
Step 2. Exporting emails to Mailchimp
Stripo allows you to export one or a number of email templates at once. We’d like to show them separately.
Option 1: Exporting one email at a time — a new email
-
click the “Export” button above your template;

-
in the dropdown menu, in the "Export to ESP" section, enter the "Popular" tab;
-
click the Mailchimp icon;

-
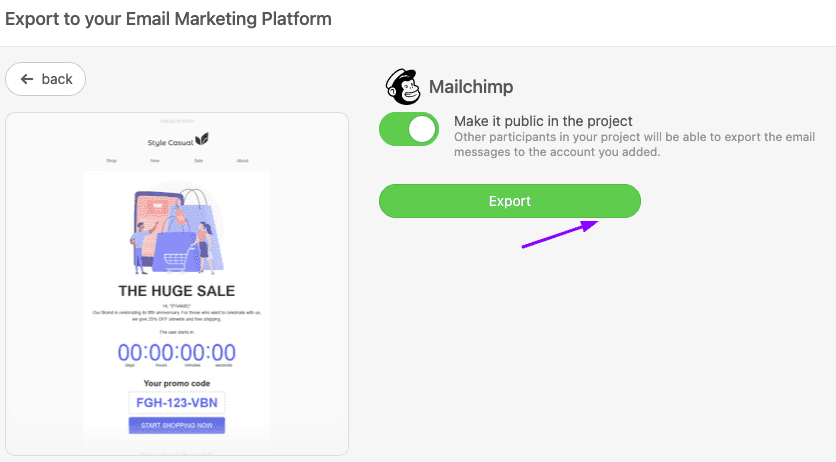
in a new popup window, click the “Export” button;
-
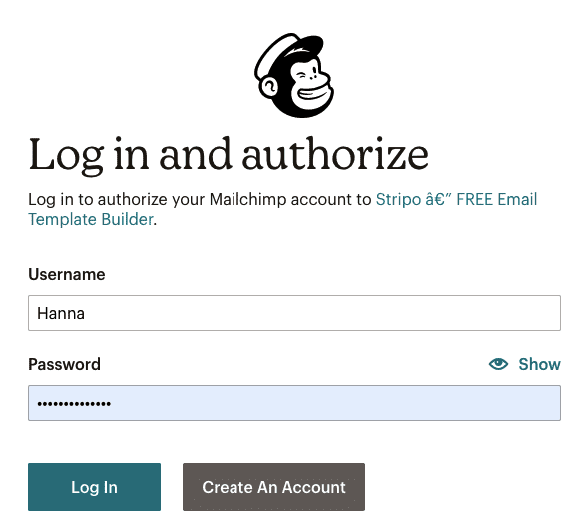
enter credentials to your Mailchimp account and click the “Login” button;
-
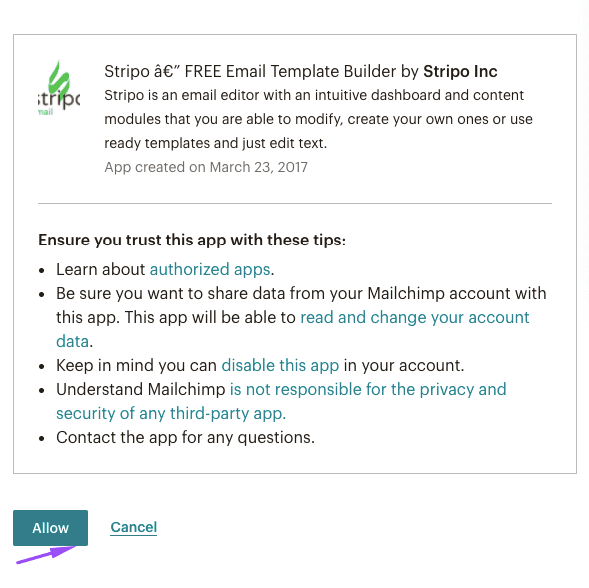
then you will be asked to click the “Allow” button to enable* the export;
-
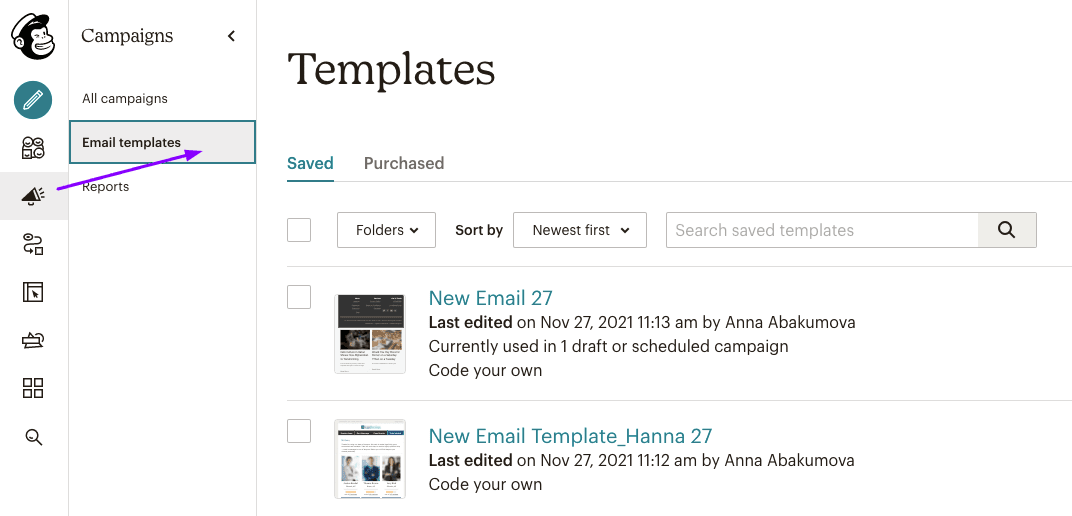
in Mailchimp, find your template in the “Campaigns” —> “Email Templates” folder.
* Important to note:
Please be advised that Stripo cannot see and does not store your password to your account with Mailchimp!
To make sure that all the exports from us to any ESP are totally secure for our customers and for us as well, every year we pass a Security test by Bishop Fox.
Option 2: Exporting one email at a time — an edited version of your email
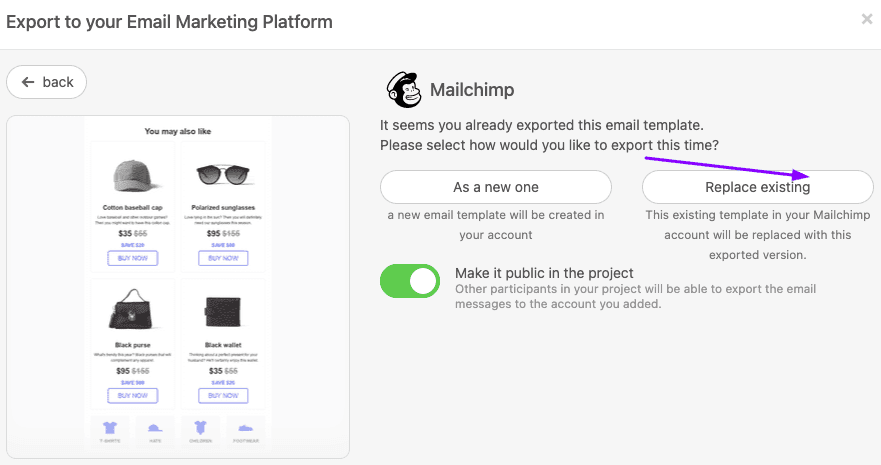
Put simply, this is when you replace an existing email with an updated one.
Sometimes it happens that you need to update an existing transactional email, or you have built a new promo email and want it to be located exactly where the previous one was.
Here’s what you do:
-
once your email is ready, you click the “Export” button;
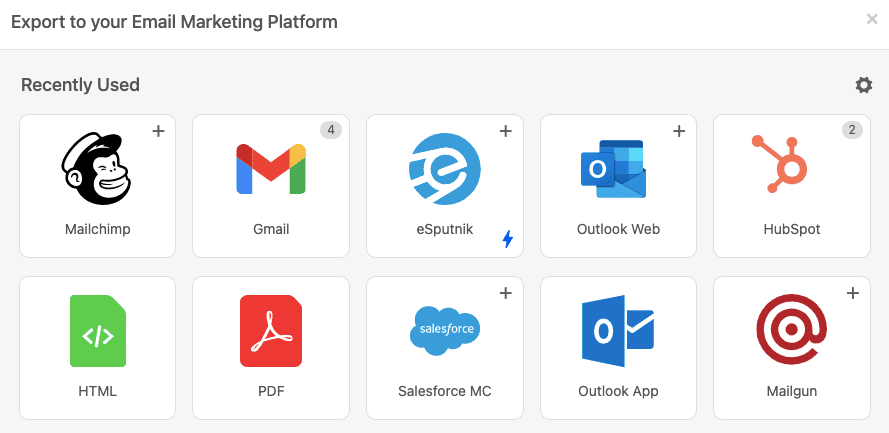
-
choose “Mailchimp” among other options — it will be located at the top of the page, in the “Recently used” section;
-
in a new popup window, click the “Replace existing” button.
Option 3: Bulk export
What I love the most about this kind of export is that you can export both new templates and replace existing ones.
So, how to bulk export emails to Mailchimp:
-
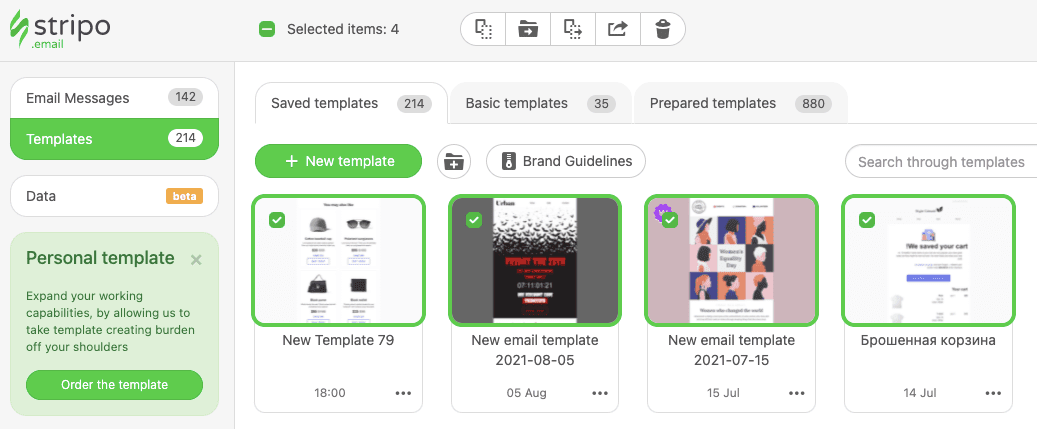
in the “Templates” or “Email Messages” area, select necessary templates. To select the first email, just put a pointer over it;
-
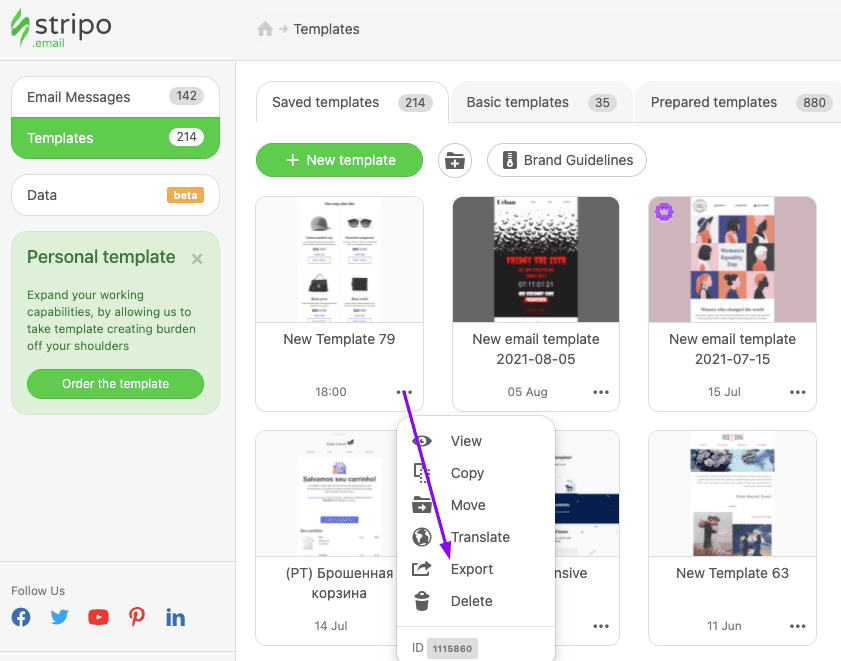
open the “Options menu” for any of the selected templates;
-
click Export;
-
in the new Popup window, you choose “Mailchimp” among other exporting options.
Important to mention:
If any of the templates has been previously used for “Automations” —> “Customer journey” and you replace it with a new one, you will not have to do anything after the export — the template will automatically replace in your “Customer journey” — no need to edit, check, or restart it. It will remain active, but your users will receive the version of your email.
The greatest news here is that if you have lots of Customer Journeys active (like all transactional emails, welcome emails, etc.) — they all will get activated at once.
Remember, we talked about the Synchronized Modules option above? We mentioned that you can edit a bunch of your templates in Stripo at once. And now you can also export them all at once — and you won’t even have to set or activate your customer journeys again — it all will be done automatically.
It saves you hours, not to say days on updating emails.
Step 3. Editing Mailchimp emails
Sometimes, you might want to edit an email template after it’s been exported.
The Mailchimp classic builder — Drag-n-Drop will not be available here. But still, there are two ways to edit your email:
Option 1: Editing design
To do so, you need to:
-
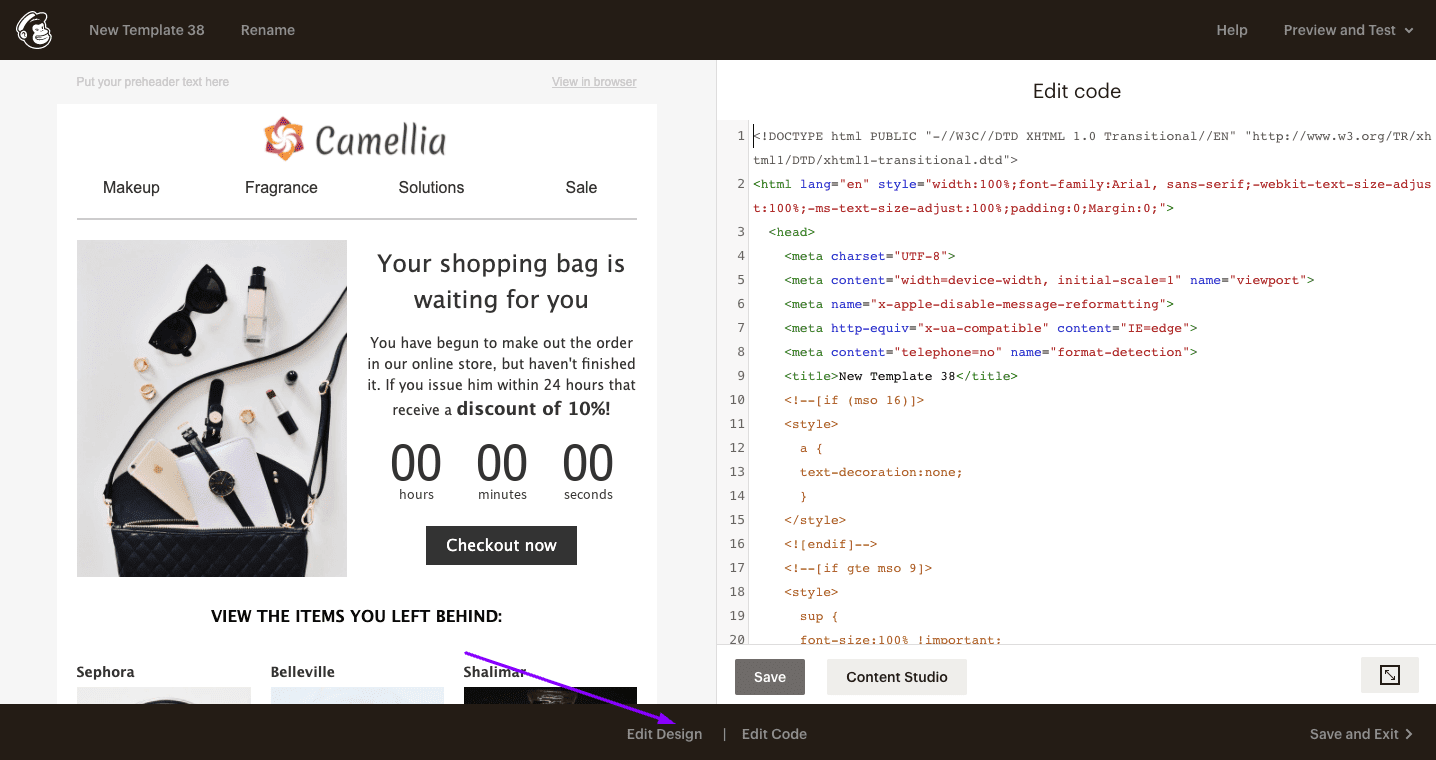
open your email template;
-
below it, click the “Edit Design” button;
-
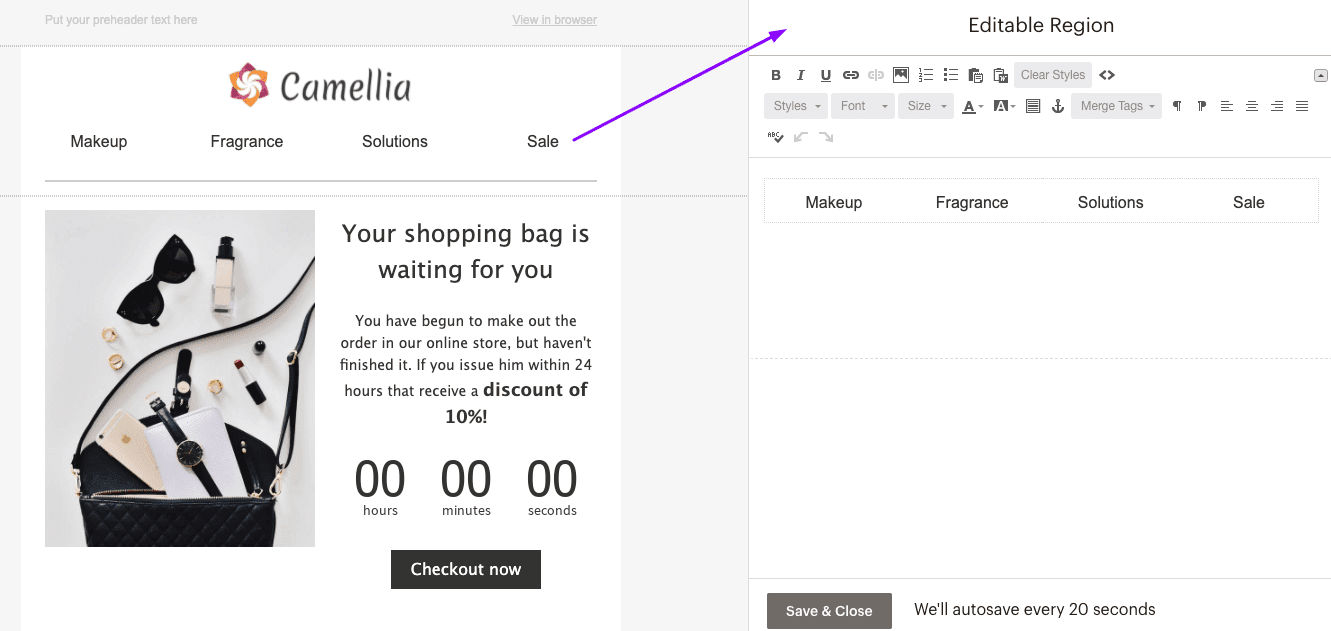
then you will need to click on a necessary email element — you will see a regular WYSIWYG editor;
-
here you can edit text, work on the text design styles, replace links, replace images, etc.
Option 2: Editing code
To open Mailchimp HTML editor, you need to:
-
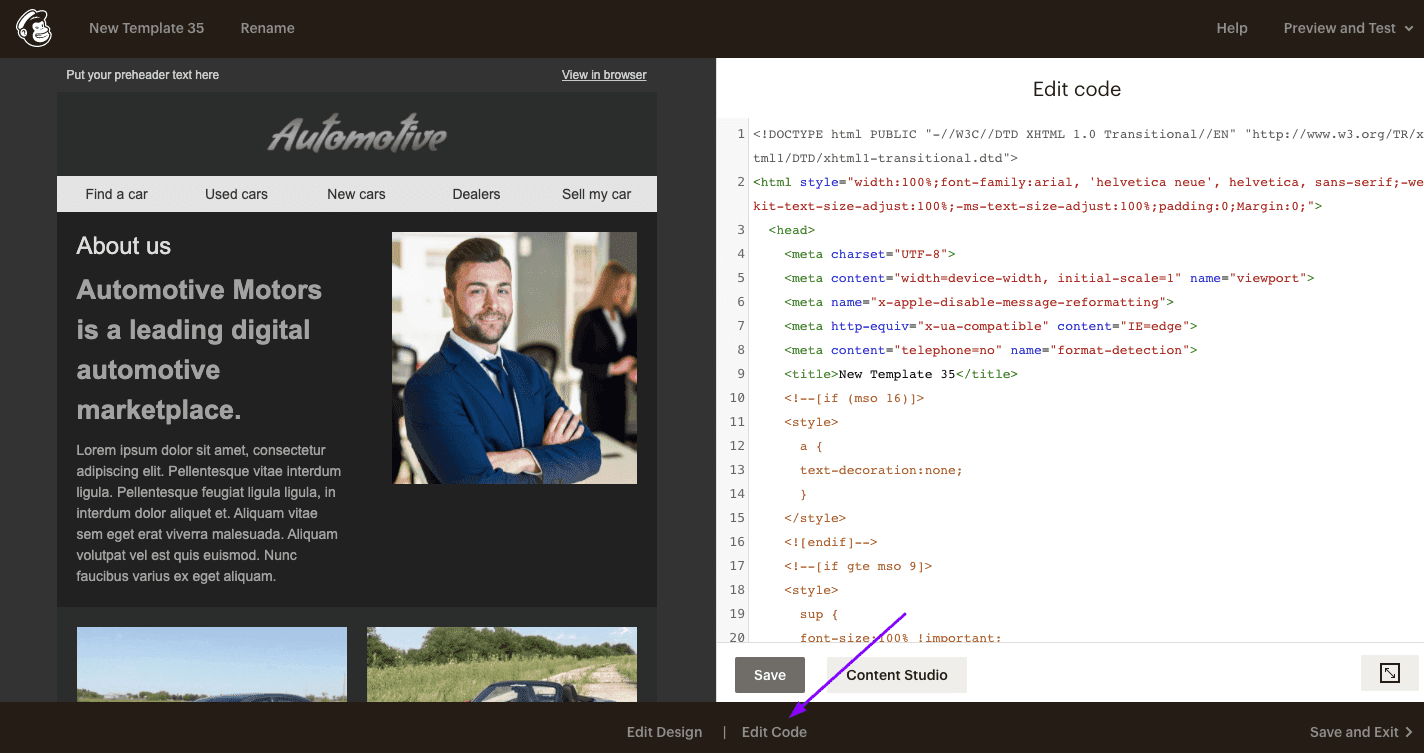
open your email template;
-
click the “Edit Code” button.
Optional ways to export email templates to Mailchimp
In addition to direct export to Mailchimp due to Stripo’s integration with the featured ESP, there are two more ways to export your email template to Mailchimp.
Given that I failed to make this blog post a brief one even though I wanted to (because I also wanted to describe all the steps of direct export to Mailchimp), I will describe these two methods in just a few words:
Way 1: Through Zapier
I won’t show a step-by-step guide here, because in our “How to Integrate Your ESP with Stripo by Using Zapier” blog post, I used Mailchimp as the ESP of my choice.
For detailed information on how to connect Stripo with Mailchimp through Zapier, please refer to the blog post given below:
Way 2: Through HTML Code
This method is way easier than it seems.
So, here’s what you do:
-
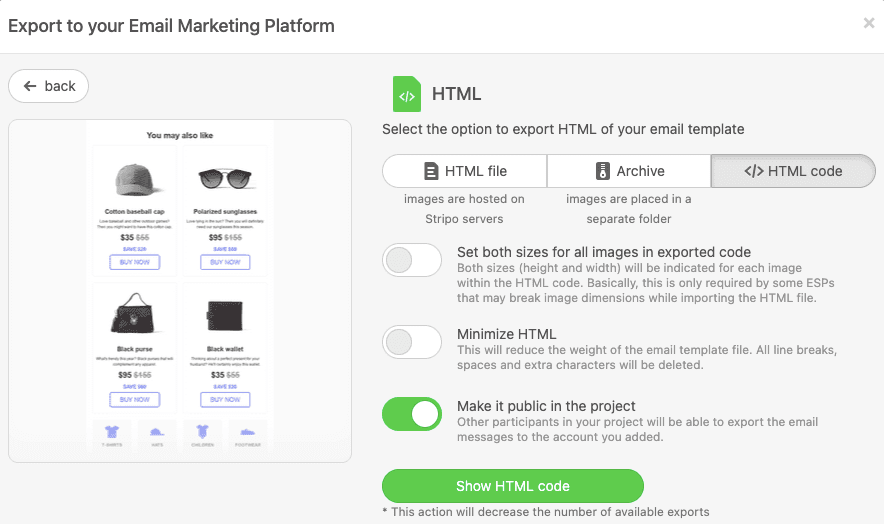
click the “Export” button above the template;
-
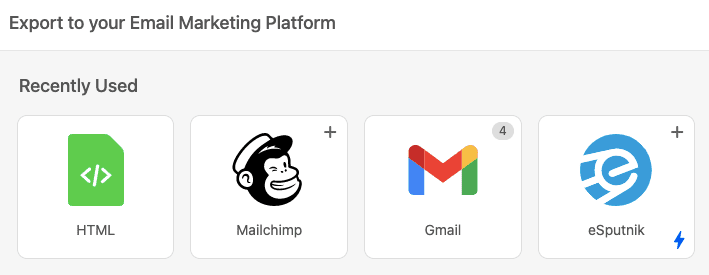
choose “HTML” icon;
-
in a new popup window, select the preferred type of HTML code. You can choose any because Mailchimp supports all of these import options;
-
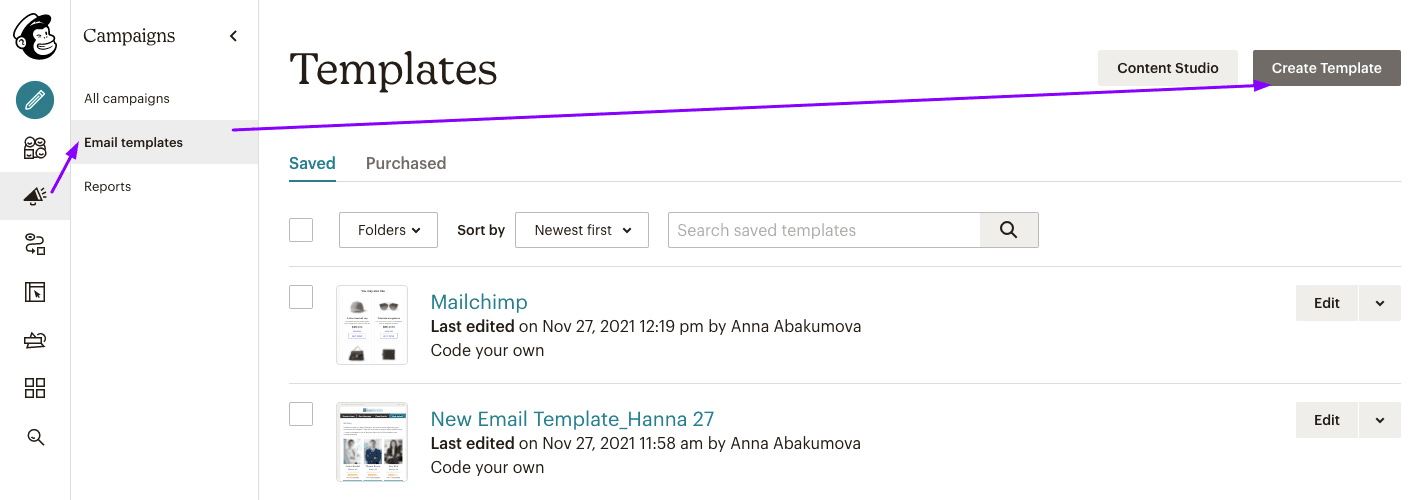
open your Mailchimp account;
-
open the “Campaigns” tab;
-
go to the “Email templates” tab;
-
in the upper right corner, click the “Create” button;
-
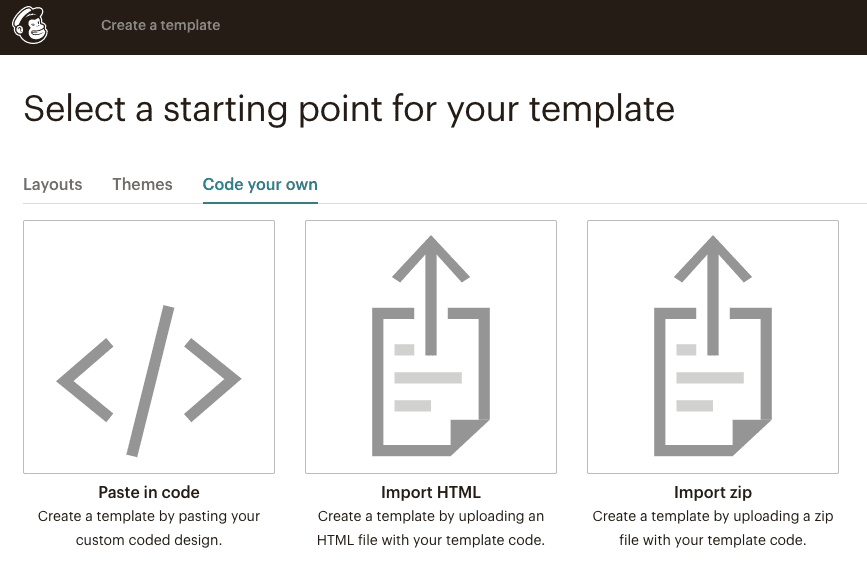
choose a code import option according to the chosen code export option.
That’s it.
As you see, there’s no need to really deal with the code.
Final thoughts
Building high-quality newsletter emails with Stripo is a piece of cake for the multiple options that our editor offers. Export created emails to Mailchimp and send them through your favorite ESP to valued customers.




2 comments