Dynamic updates, real-time content, hyper-personalization, a new level of gamification, leaving feedback in open forms, booking meetings, etc. — all these actions are now possible right in users’ inboxes with the advent of AMP for email.
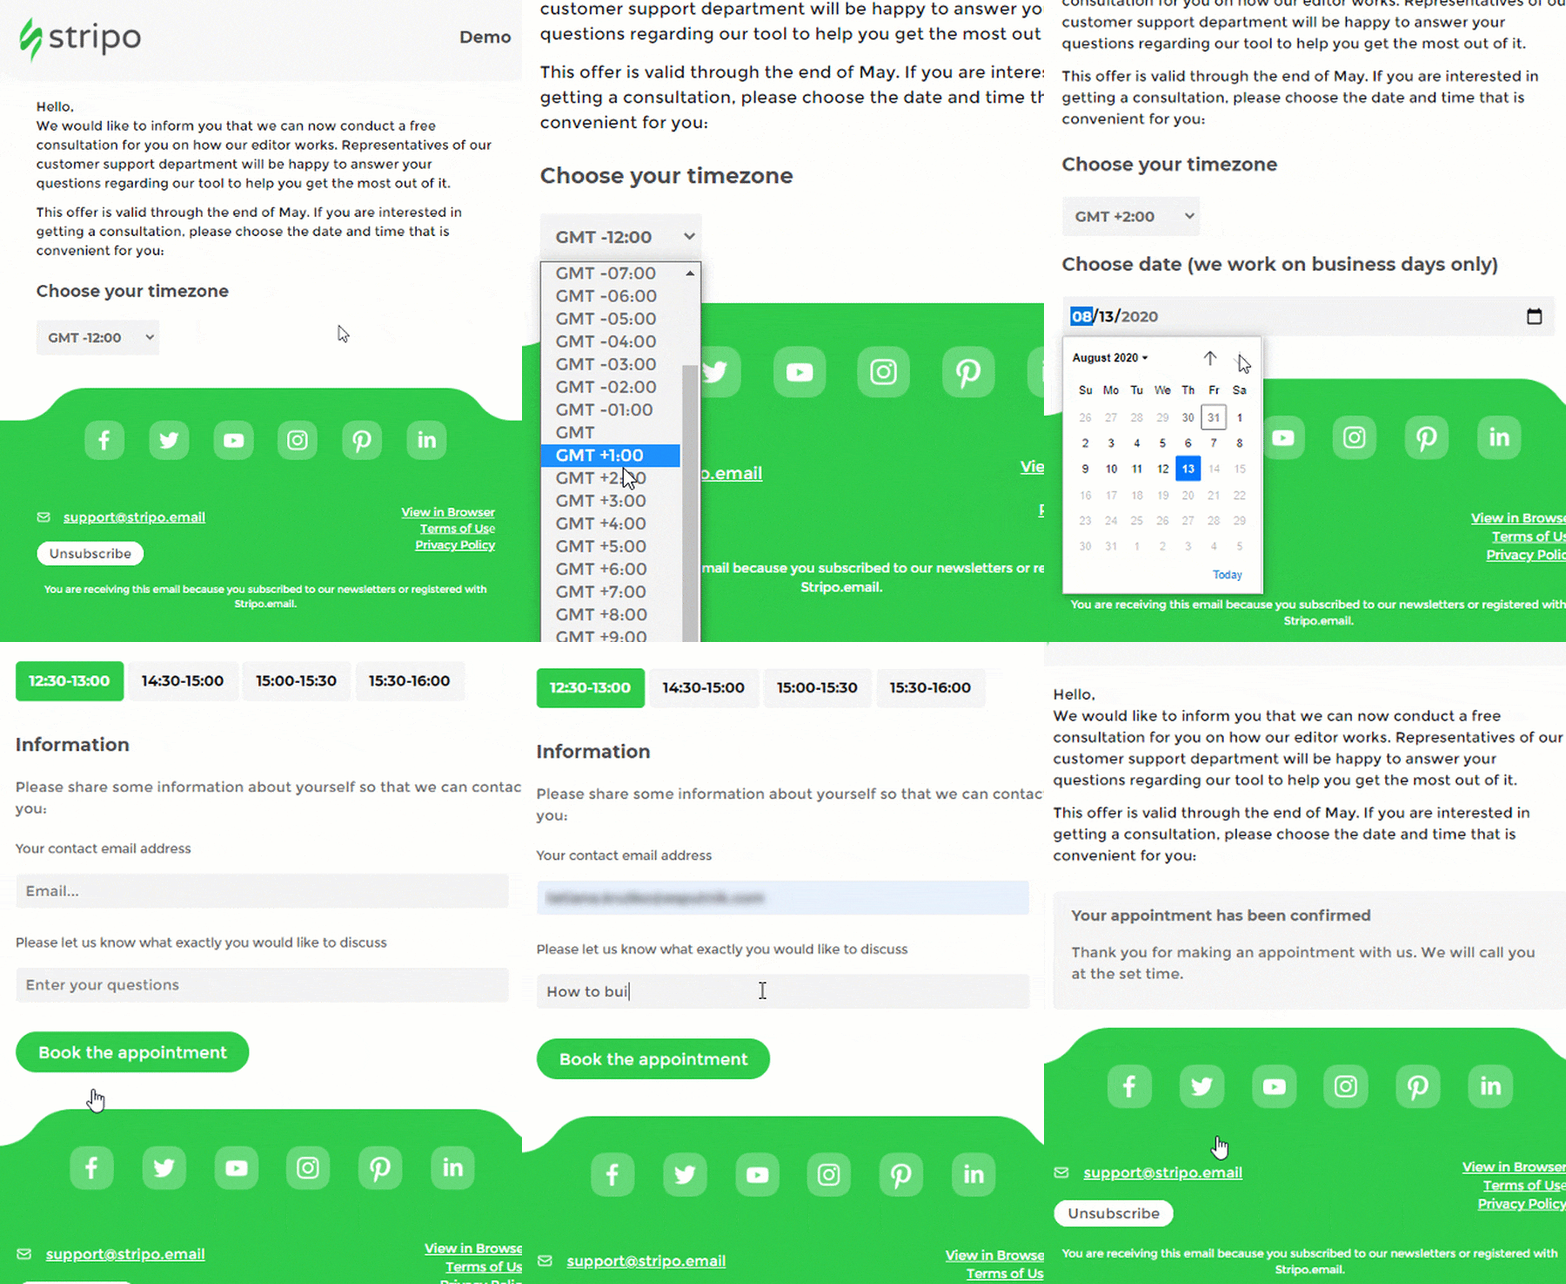
Need we say that these emails enliven your newsletters, look fresh and new in users’ inboxes, and as a result increase conversions, in some cases by 5 times?
But how do you build these emails?
Gmail in its AMP emails guidelines said that when building such emails, you will need to add some code elements, AMP components scripts to the email header and to its doctype! Stripo does it all for you.
Today, we’re gonna show you how to build an AMP email with Stripo — all steps from building to validating — that render correctly in email clients.
Easy ways to build amp emails with Stripo
Currently, there are six of them:
Way 1. By using Stripo's AMP blocks
To create an AMP email using this method, you don’t need any HTML skills.
Step 1. Dragging an AMP block into a template
You just drag a necessary block into your email template.
Currently, we offer three drag-n-drop AMP blocks:
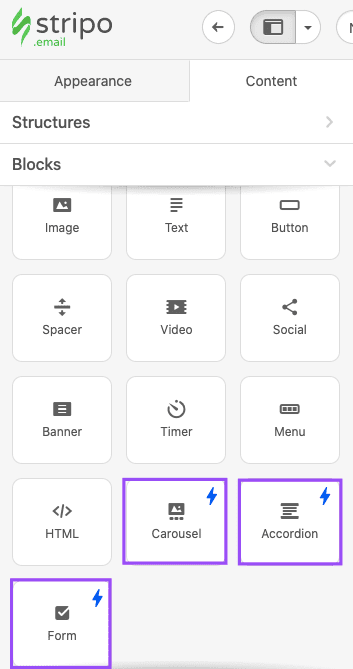
Important to note:
Any AMP block that you’ve added in your template is by default included in the AMP HTML version of your emails.
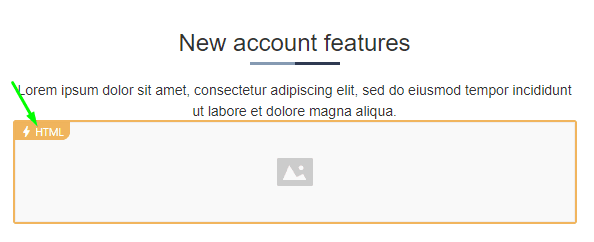
You don’t need to insert any scripts into the email code. As a result, this element will be shown only to those recipients whose email clients do support AMP for emails. We’ll provide the list later.
However, the rest of your email will render both in AMP HTML and traditional HTML versions of your emails
Step 2. Configuring the AMP block
What are these blocks and how to configure them?
1. Image carousel
Image carousel allows placing a number of banners/images in one screen if you use carousel in sales emails.
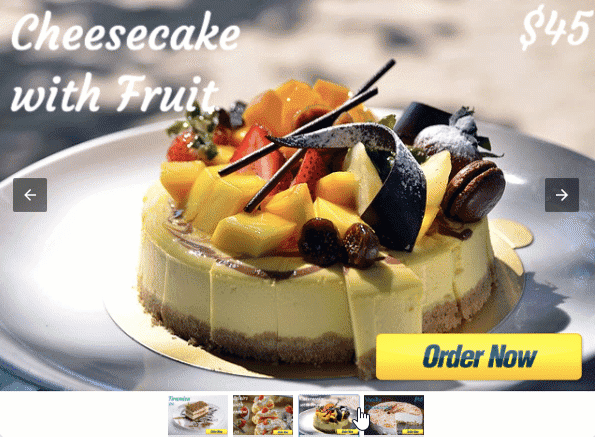
For details on how to configure Carousel, please refer to our dedicated blog post, or watch our short video.

Also, you can upload small parts of images to carousels to let users rotate them so they make a big picture with them; we recommend that you use it in gamification or teaser emails.

For details on how to build such mazes with the AMP carousel, please refer to the “Building mazes and puzzles” blog post.
2. Accordion
Accordion reduces scrolling needs on mobile devices. You hide email content in collapsible and expandable sections. Users see the content outline and go to a necessary section.

You can put text, images, CTA buttons, and even videos in these collapsible sections.
For details on how to design accordion with Stripo, please refer to the “How to build AMP accordion for your emails” blog post, or watch our short video.

3. Open form
Forms embedded in emails allow leaving comments and submitting feedback in emails.
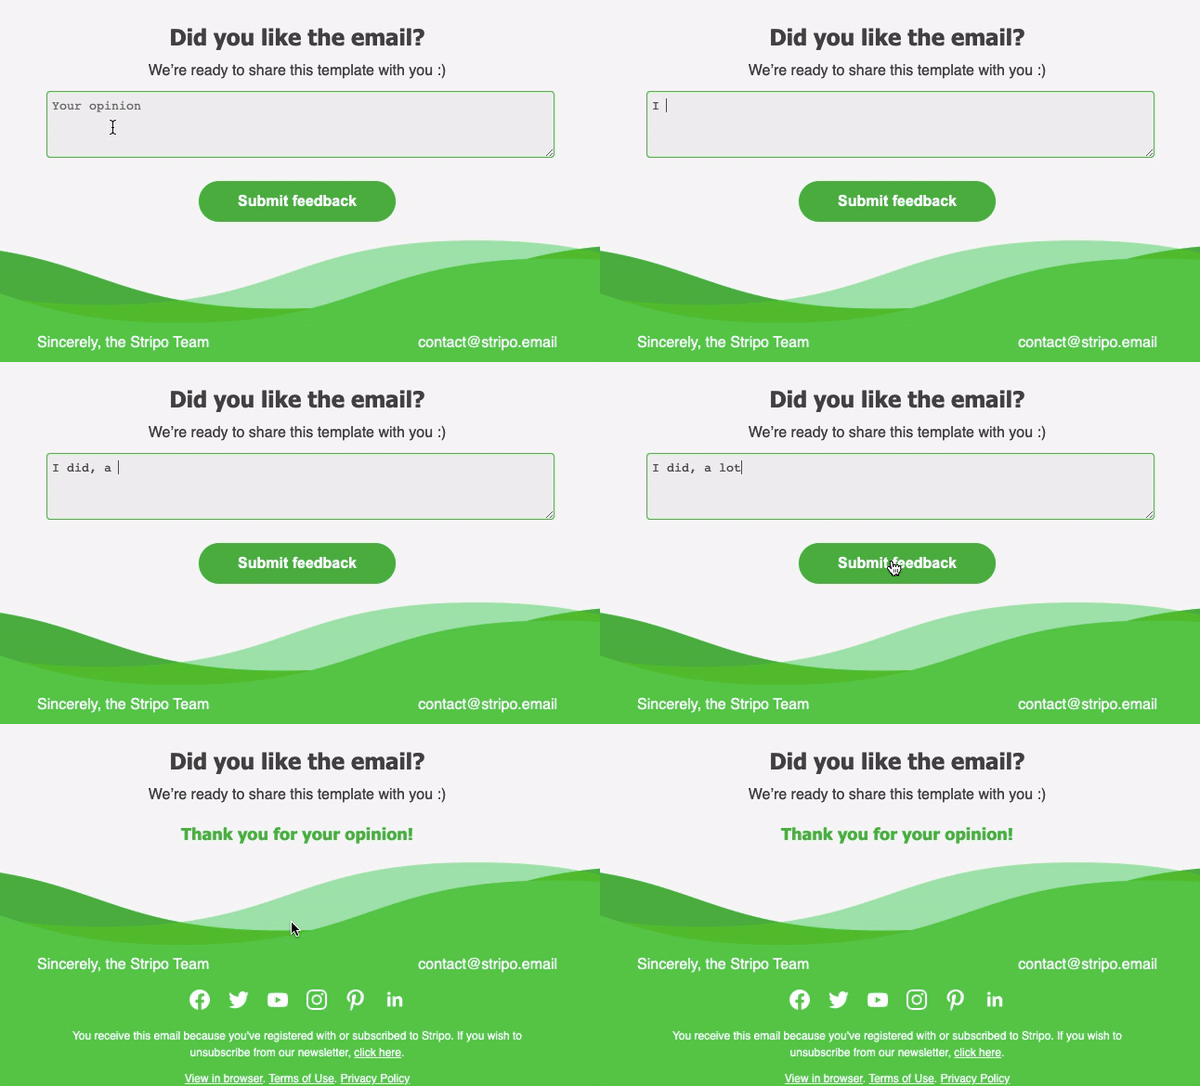
In 2020, we ran an A/B test. In a regular HTML email, we added a link to a Form on our site, asking users to leave the email to fill it out. In an AMP HTML email, we added the AMP Form, so users would leave comments without leaving the email. The AMP Form generated 5X times more feedback than the classic form on our site. Why so? We believe it is about saving time. The fewer actions it takes a person, the more chances he/she will do it.
We now add the AMP form in all trigger and promo emails of ours. It generated 11 000 responses since August 2020.
For detailed information on how to configure the AMP form for your newsletters, please refer to our “AMP Form” blog post, or watch our short video.

Important to note:
You will need to connect your forms to any data storage — either Stripo Data Service, or Google Spreadsheets, or your custom ones via Zapier — to receive and store users’ responses. See how to connect emails to data storage.

Step 3. Building a fallback
Given that AMP elements display only for those users whose email clients support AMP for email, we need to build a fallback for those whose email clients do not support AMP yet.
The kind of your fallback will depend on the block that you’ve used.
Of course, it is totally at your discretion. But here are the most common fallbacks for your emails:
-
For AMP Carousel — banners; multiple product cards.
-
For Accordion — bulleted lists; multiple rows with content, and multiple product cards.
-
For AMP form — a link to an external Form if you need comments; or a rating similar to NPS if you need just a rating.
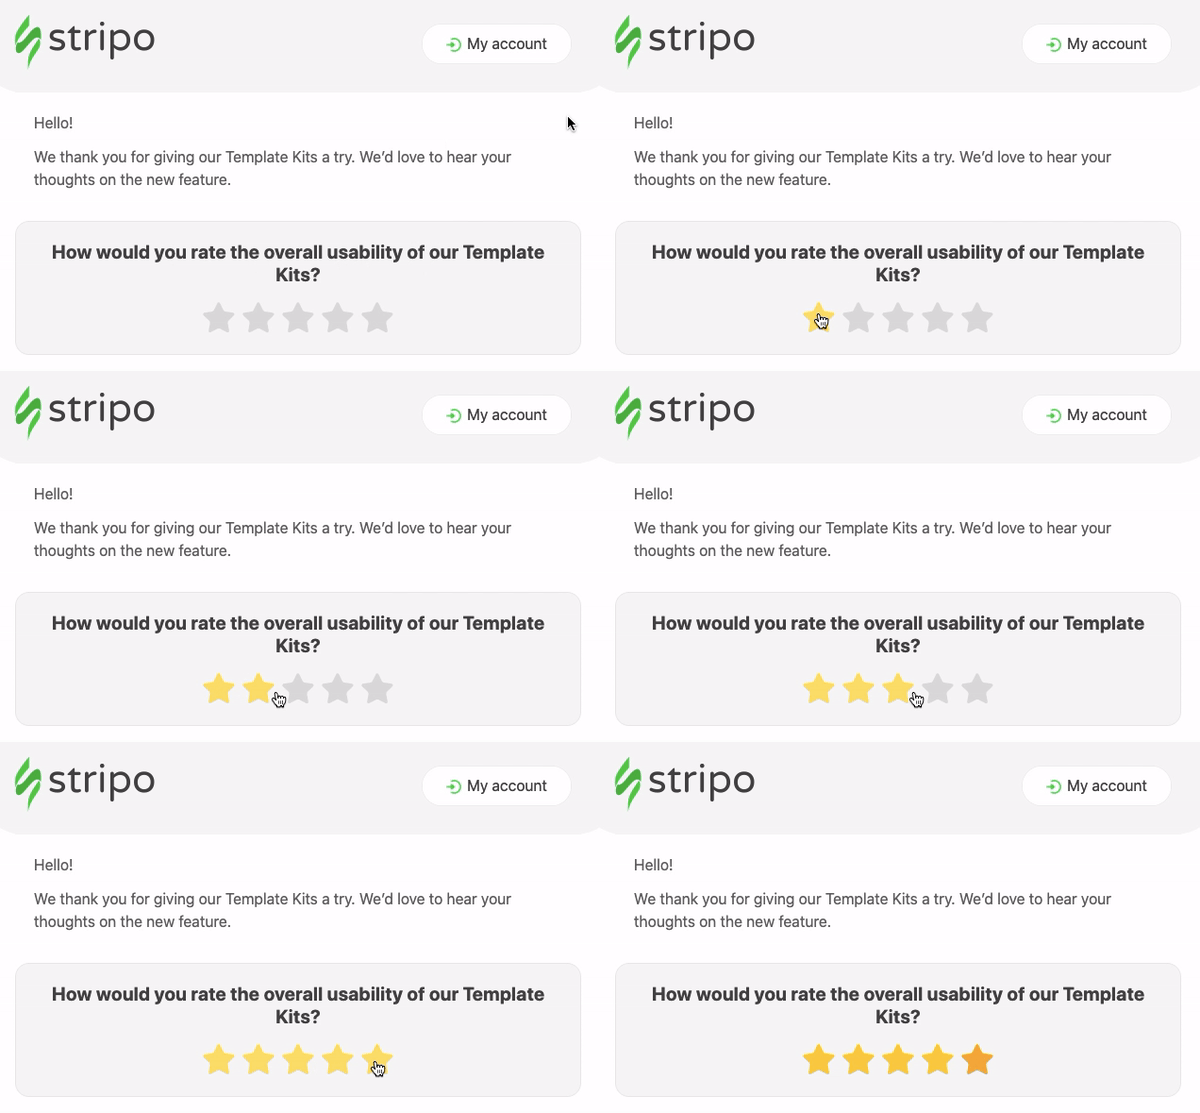
Here, we show how to build this one. It is compatible with all major email clients.
To add a Fallback to your email, you need to:
-
drag a new structure in your template. The number of columns in it depends on your goals;
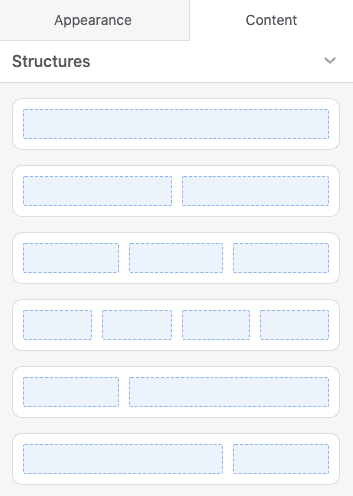
-
configure it according to the current campaign’s needs;
-
enable this element for the HTML email only by clicking the “Include in HTML only” button.
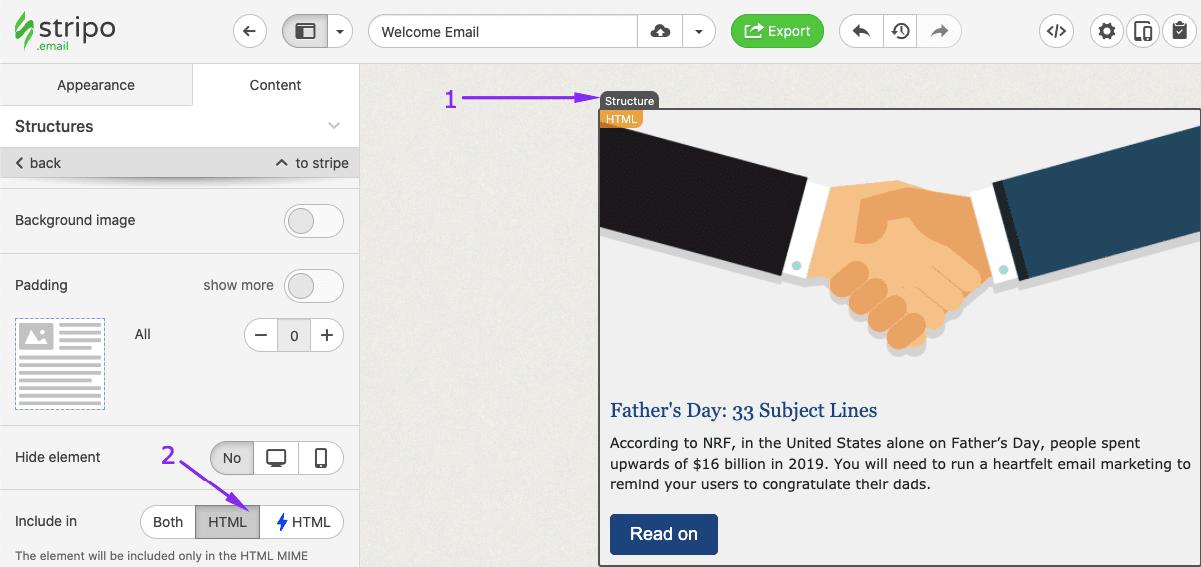
That’s all.
Important to note:
In the Stripo editor, you can easily see which elements are enabled for the traditional HTML version of your email, which elements are enabled for the AMP HTML version, and which will be shown in both versions.
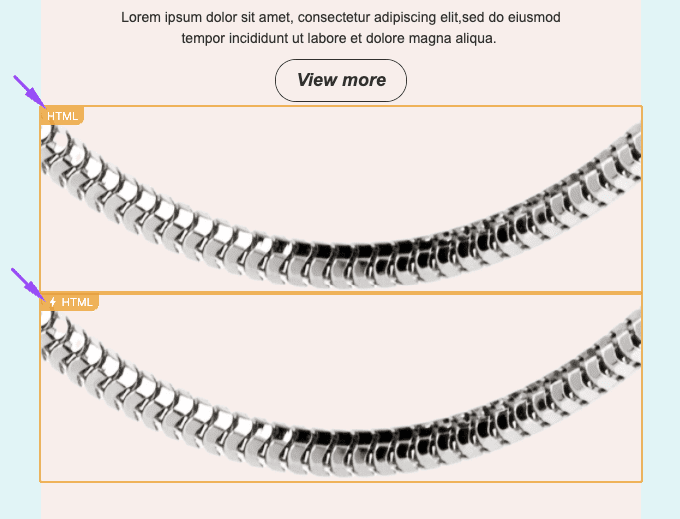
(HTML — product snippet; AMP HTML — carousel with a number of product snippets)
Containers/elements marked as “HTML” will be shown only to those recipients whose email clients do not support AMP for Emails. While elements with the ⚡HTML sign will display only to those recipients whose email clients do support AMP.
Elements/containers that have no marks, will work for both versions of the email.
Way 2. By using Stripo's prepared AMP templates
Stripo offers a number of ready-to-use AMP email templates. They contain modules with AMP carousel, with AMP accordion, AMP forms, and templates with gamification elements.
Building AMP emails with our templates
Step 1. Picking the right template
-
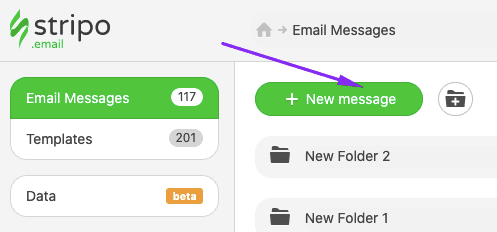
pick the one that meets your current campaign's needs best. To do so, you need to click on the “+ New message”;
-
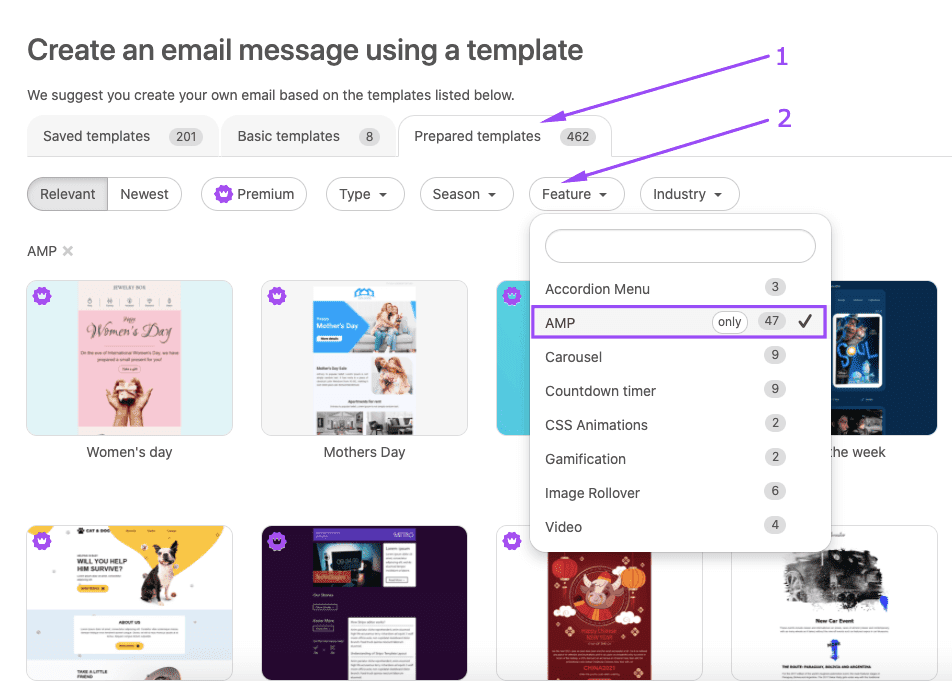
enter the “Prepared templates” tab;
-
in the “Feature” filter enable only AMP templates;
-
edit this template.
Step 2. Editing the template
There are three different types of templates — those which you can edit through the visual editor, those with dynamic components to edit through the HTML code editor; and those combined. We have to describe them separately.
AMP emails to edit through the code editor
Those emails contain carousels and accordions, we’ve described them above.
To edit them, you will need to work only in the visual editor only. No need to deal with the code:
-
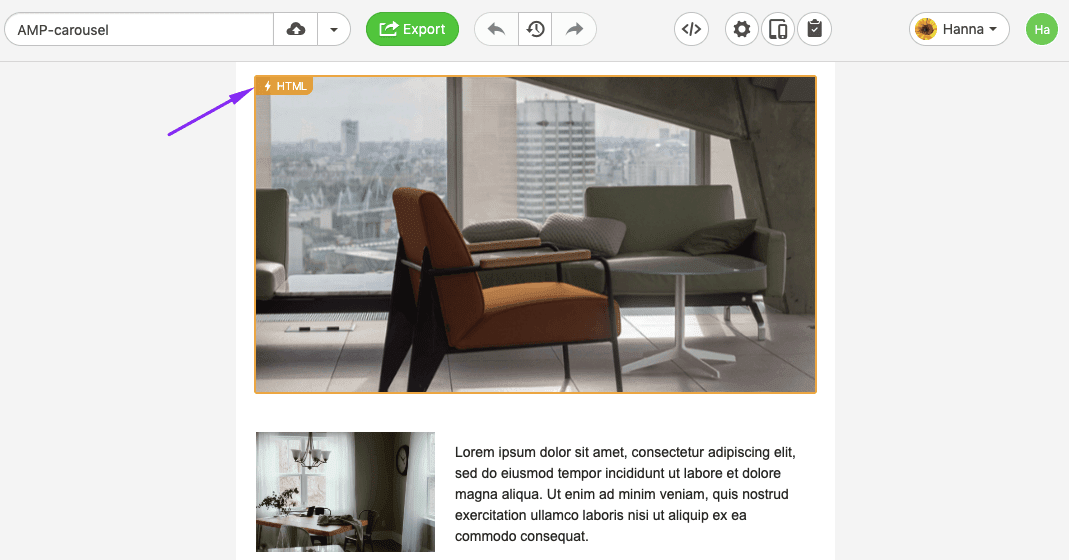
click the AMP HTML element in the template;
-
replace the images with yours (applicable for carousels), and work on the design and content, etc. (applicable for accordions).
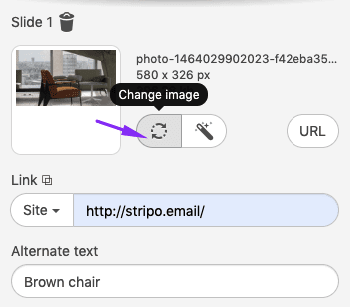
(editing carousels)
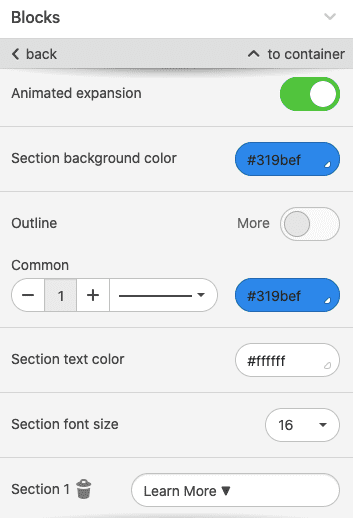
(editing accordion’s design in the settings panel)
(editing accordion’s content in the template)
AMP emails to edit through code, and visual editor
Most often, those emails contain forms — we’ve described them before.
a) you edit the design of these forms in the settings panel
Here, you’ll work in the Settings panel:
-
click on the stripe with AMP form in the template to activate the settings panel for the particular element;
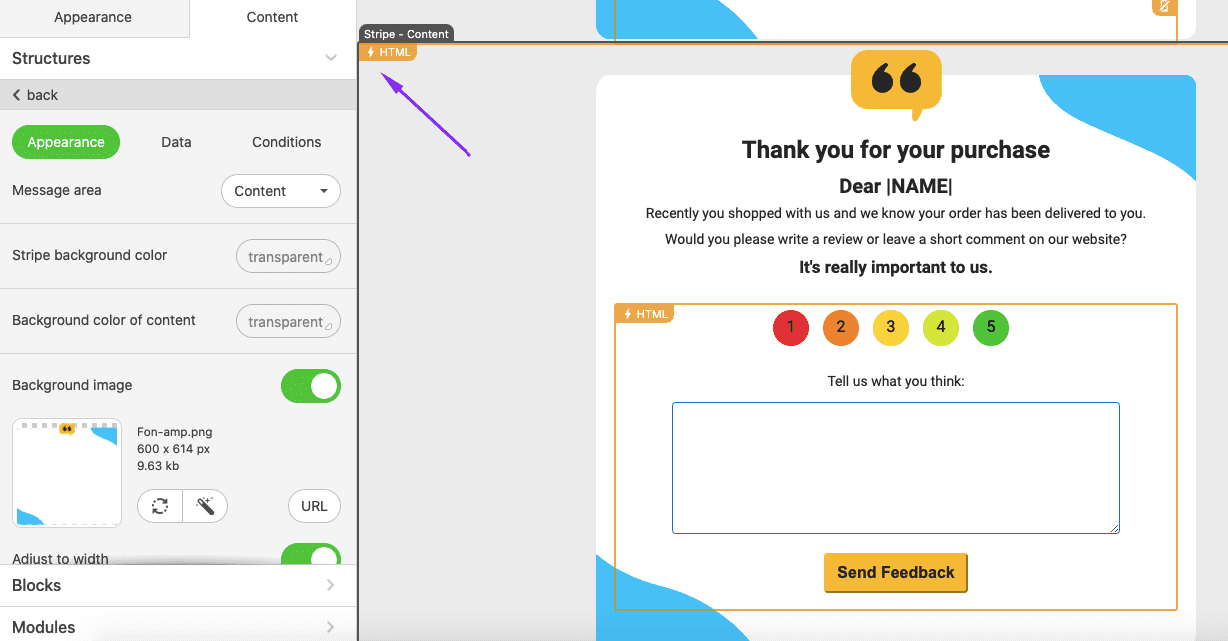
-
in the settings panel, you customize the form.
b) connect the form to your data storage
Here, you’ll work with the email code and the data storage — you’ll have to paste an endpoint into the code of your template:
-
click on the block with the form in the template;
-
in the code editor, which opens automatically upon a click, paste your endpoint.
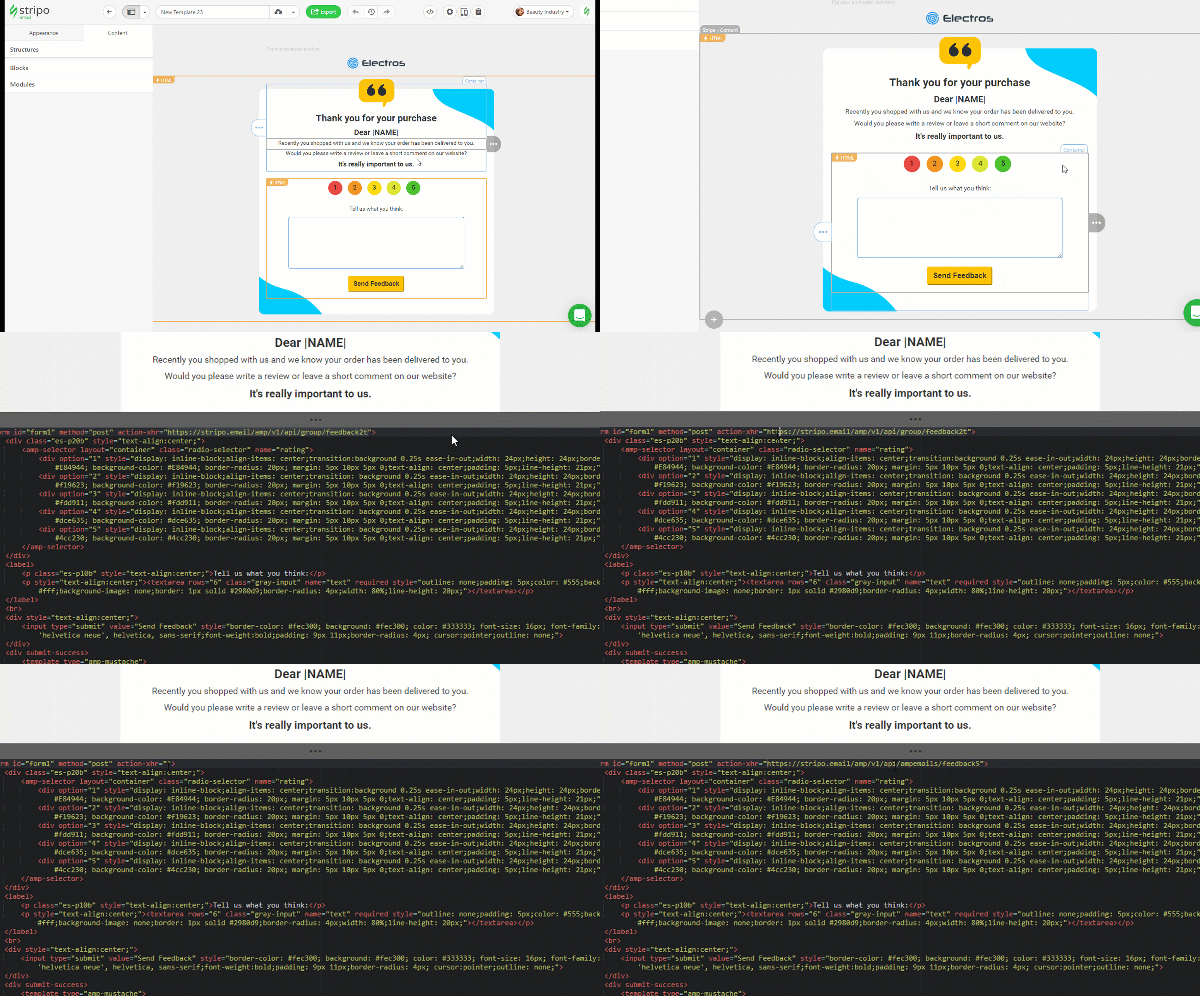
Where do you create this endpoint? — You may ask your programmers to build one on your side, or you may connect forms to the Stripo Data Storage, or connect your custom one (like Google Spreadsheets) via Zapier. In our "Data Service" blog post, we show you how to connect emails to Google via Zapier or the Stripo data service.
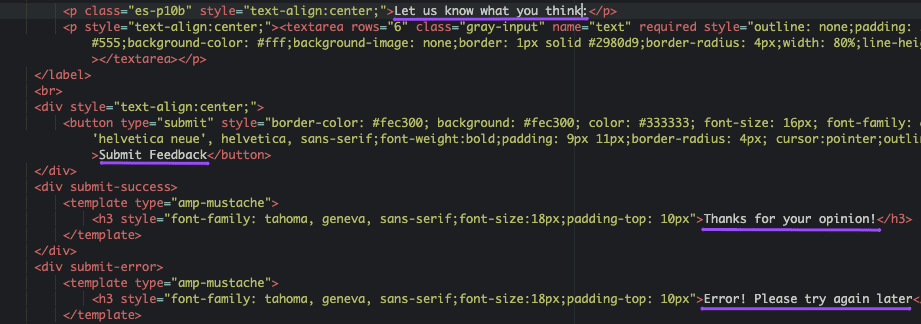
c) edit the content of the form
Here, you may customize the button text and the success notification message (“Thank you for your opinion”, and “Error! Please try again later”) — text that users see after submitting their feedback.

-
click on the form in the template to open the code editor;
-
edit text that goes in white;
-
design styles, like button colors, font sizes, and types you set here — in the code.
If you chose the form with rating, colors of the rating buttons are to be edited here, in the code editor, as well.
AMP emails to edit through code only
We’d like to divide these email templates into two groups:
-
group A — those that do not require any connection with the Data source, and do not contain any JSON code;
-
group B — those that require to be connected to Data Sources and include JSON.
Group A
Email details you can edit for these emails are as follows: design styles, text, font colors and sizes, images, etc.
-
click on the row/stripe with the AMP element;
-
replace our links to images with links to your images;
-
edit colors, if necessary, and text.

In our AMP email builder, the text always goes white in the code — easy to notice it.
Group B
Code of such emails is pretty complex, and requires some programming skills, as it is connected to JSON and Data Sources…
Hence, it is impossible to show here in a few sentences how to work on these emails. So you better use them (meaning the AMP elements) unchanged or ask your programmers for help.
Step 3. Building a fallback
Email templates with carousels, accordions, and forms already have a fallback. So, you will only have to edit the fallback, as well to have your email ready.
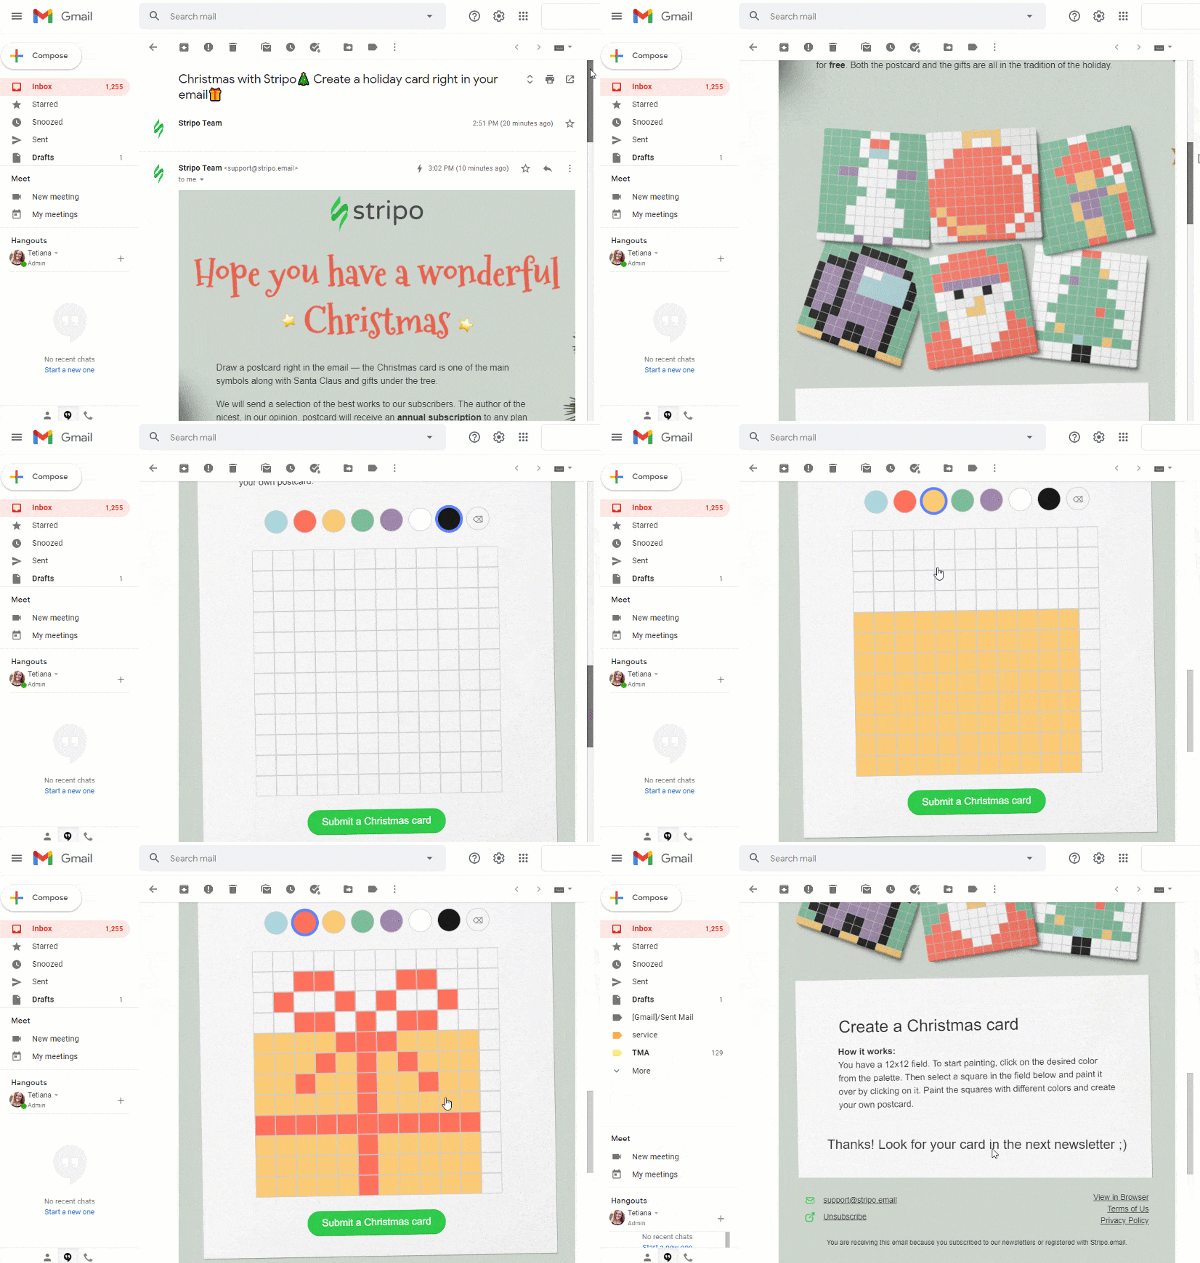
For emails with gamification elements, or with real-time content in emails, you need to insert a link to the Web version of your AMP email in the HTML email. Be sure to explain to recipients why they need to see the web version and include this CTA into the HTML only. Or add an element similar to the AMP one, and ask users to email their correct answers if we’re talking about quizzes and puzzles.
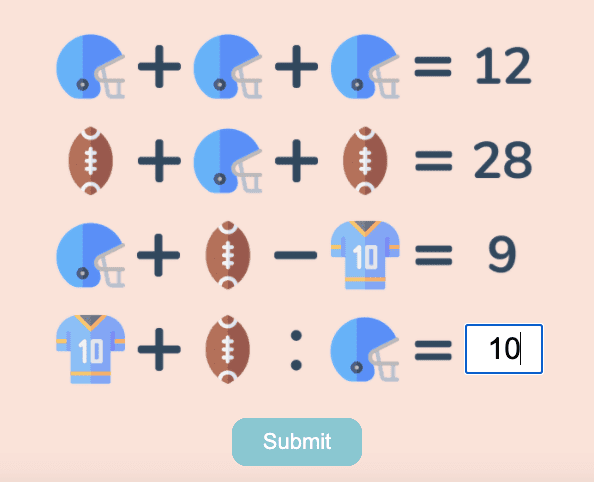
(AMP HMTL email element)
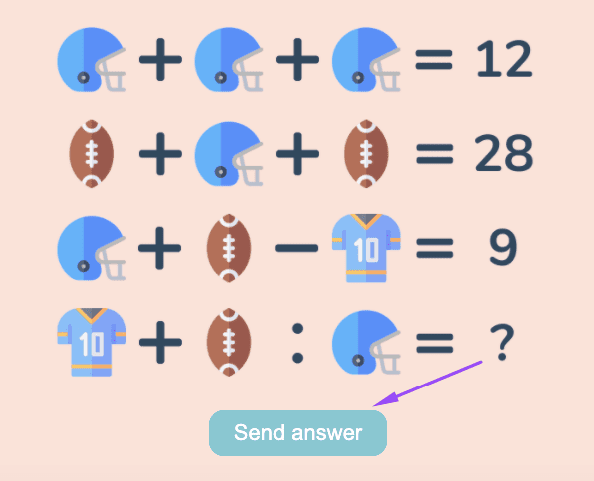
(HTML fallback)
Way 3. By using Stripo’s prebuilt AMP modules
It is very easy to build an AMP email by using our AMP modules. You simply drag one into the template you are working with. And our editor will add a necessary script of a respective AMP component.
Step 1. Picking the right module
-
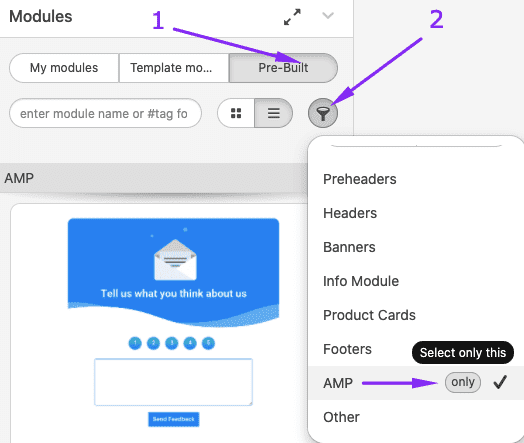
enter the “Modules” tab in the settings panel;
-
go to the “Pre-Built” section;
-
activate the “Filter and Grouping” option;
-
enable “AMP” only;
-
drag it into your template.
Step 2. Configuring the module
-
regular HTML part of the AMP module should be edited with the tools from the side panel;
-
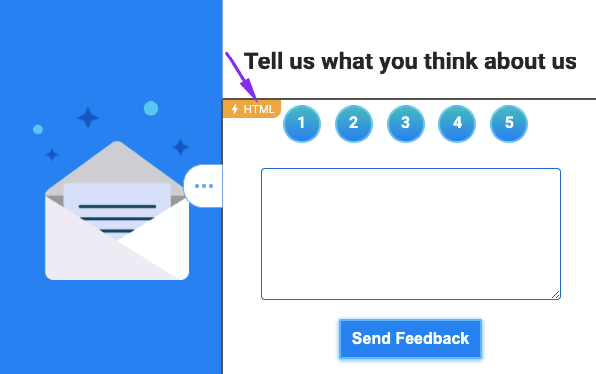
AMP elements from the module should be edited via code only. To open the code of this particular AMP element, just click the AMP HTML sign in the template.
Step 3. Building a fallback
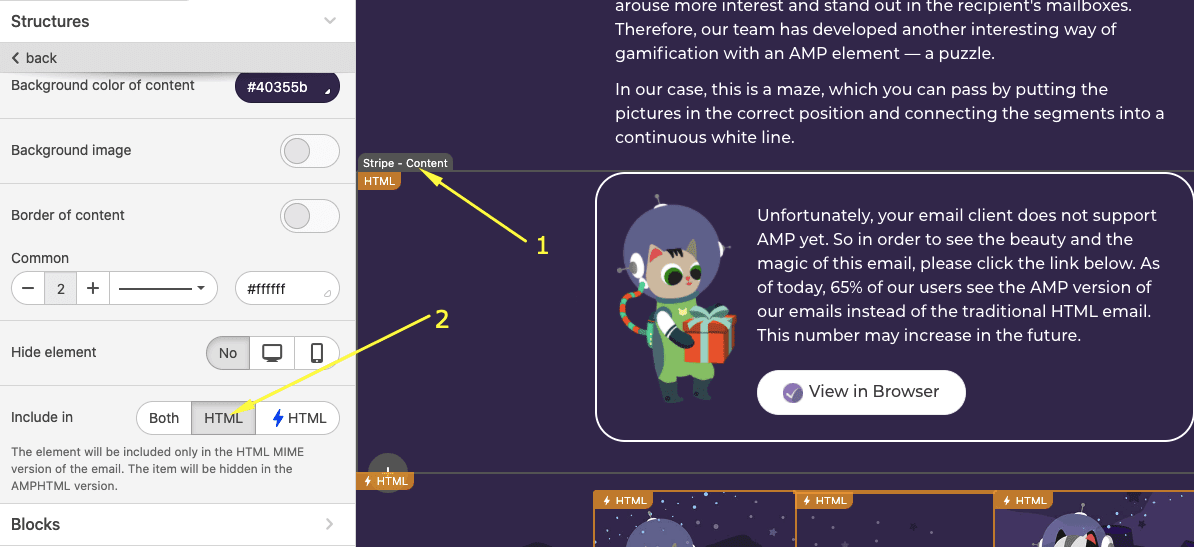
By default, this module is included in the AMP HTML version of your template only. So, we need to build a fallback.
Above, in the Way 1 section we showed how to build fallback for carousels, accordions, and forms.
If your AMP module contains gamification elements, just be sure to add a “Web version” link in the email. And include this element in HTML only.
Way 4. By using code from Gmail Playground
This way requires just a few steps:
Step 1. Building a traditional HTML email template
To do so, you may either build one from scratch by dragging blocks, or you may use any of our 500 ready-to-use email templates
Step 2. Building AMP element for emails with Gmail AMP for Email Playground
Google offers a wide variety of prepared AMP elements.
We’re going to use the AMP-carousel element:
-
in the Gmail playground, click the dropdown menu to choose AMP-carousel;
-
once you’ve clicked it, to the left in the code editor, you will see the AMP-carousel code. Find the following line in the code:
<amp-img src="https://www.google.com/images/background/p1.jpg" width="800" height="600" layout="responsive"></amp-img>
-
now, in this code sample, please edit the image width, that was set by default, from 800 to 600 pixels as this is the most common width size;
-
change the height from 600 to 480 pixels to save the image ratio;

-
now, replace all the links wrapped in the <href> attributes with the links to the necessary images you host on your website or any other image hosting site;

-
copy the embed code with 4 images in AMP-image carousel;
<div class="images">

    <amp-carousel width="600" height="480" layout="responsive" type="slides">

       <amp-img src="https://image.freepik.com/free-photo/school-backpack-school-supplies-with-chalkboard-background_53476-528.jpg" width="600" height="480" alt="a sample image"></amp-img>

       <amp-img src="https://image.freepik.com/free-photo/stylish-teenage-workspace-with-yellow-backpack-reading-lamp_23-2147878350.jpg" width="600" height="480" alt="another sample image"></amp-img>

       <amp-img src="https://image.freepik.com/free-photo/father-leads-little-child-school-boy-go-hand-hand-parent-son-with-backpack-back_90791-15.jpg" width="600" height="480" alt="and another sample image"></amp-img>

       <amp-img src="https://image.freepik.com/free-photo/rear-view-group-diverse-kids-wearing-backpack_53876-75383.jpg" width="600" height="480" alt="and another sample image"></amp-img>

   </amp-carousel>

</div>
Step 3. Pasting the embed code in Stripo
In Stripo:
-
drag the 1-column structure in your prepared template;
-
drop the HTML block in it;
-
double click it to open the “HTML code editor”;
-
replace the “Insert your HTML code” with the embed code;
-
in the setting panel, in the “include in” section, set “⚡HTML”;

This means that the AMP image carousel will be shown only in those email clients that support AMP.
In Google Gmail Playground:
-
copy the script that specifies what AMP element you’re about to use. It’s located in email head below the <style> attributes before the closing </head> tag;

-
if you, like us, are going to use AMP-carousel, here’s the script to embed:
<script async custom-element="amp-carousel" src="https://cdn.ampproject.org/v0/amp-carousel-0.1.js"></script>
-
open HTML code editor of the entire email template by clicking the “Code Editor” button above the template;
-
insert the embed script right above the closing </head> attribute;

-
close the code editor.
Finish your template by adding elements like footer, header, contact information, etc.
Step 4. Building a fallback
Those recipients whose email clients support AMP will see this AMP image carousel, while others — will not. Hence, we need to create a perfect banner for them, too, as a fallback.
To do so, you need to:
-
drag the one-column structure into your template;
-
in the settings panel in the “Include in” section, choose the “HTML” version of your email;

Way 5. By pulling information from Google Spreadsheets
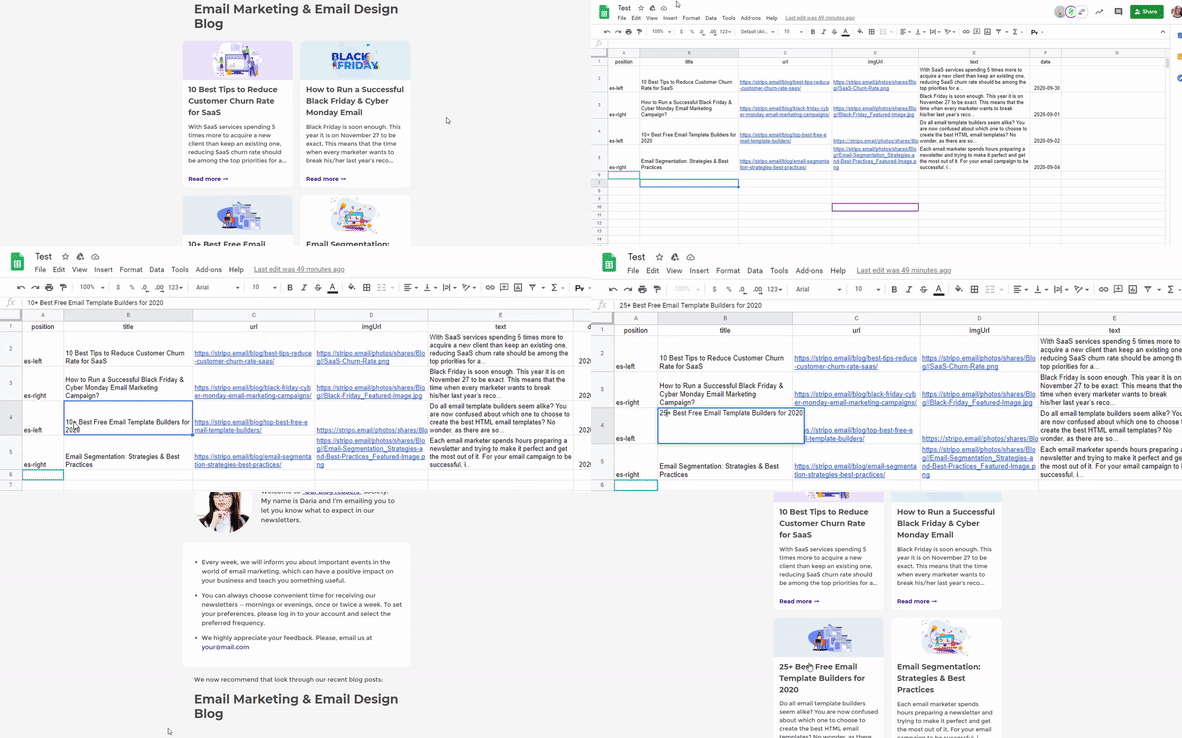
Connecting email content with Google Spreadsheets — you get real-time content updated in emails after they were sent. As a result, users always see only products’ actual prices, and descriptions no matter when they open the email.
You do not need to design these emails every time when launching a new campaign. You build them once, save this element to your personal Content Modules library.
When building a new email, you just pull this Module into your template and update information on the products/blog posts/recent videos in your Google Sheets. And the info in the email gets updated automatically.
Given that this is a complex process and requires a number of steps, including building a JSON file and building an endpoint, we will not describe it here. However, we are convinced that the results of campaigns with real-time content will be beyond expectations.
For more information on how to connect emails to Google Spreadsheets, please refer to our blog post, or watch a short video.

Way 6. By coding emails on your own with guides
We've shared 5 different ways to build AMP emails. The 6th one's not the easiest as it requires custom code. But it's worth giving a try. Why?
First, we provide step-by-step guides to help you with building them. Second, they are mostly used in gamification, which as know, enlivens our newsletters:
-
building quizzes — run various quizzes, questionnaires. Used mostly in gamified emails;
-
building digests with the content that gets updated in emails after they were sent to provide users with fresh information only. Used mostly in welcome emails;
-
building mazes — to utilize gamification in emails. Used in promo, and holiday emails.
Many more guides to come. We are currently working on several of them.
The Stripo Data Service
Stripo Data service was designed for storing all users’ responses from AMP forms/ratings embedded in emails, and all information which users share with you via those forms, including their email addresses, phone numbers, their preferences, and your NPS.
Like we said above, you may connect your custom storage, including Google Spreadsheets, via Zapier by using our Data Service. This prevents you from needing to set CORS on your side and build a custom endpoint with the help of your programmers and with no coding skills at all. Saves you lots of time.
Data service is also used for lots of gamification elements where an action in emails sends a request to a server.
To connect Stripo Data Service to AMP forms, you need to:
-
create your data service;
-
copy the endpoint;
-
paste it in your template if you are working with prebuilt modules or templates;
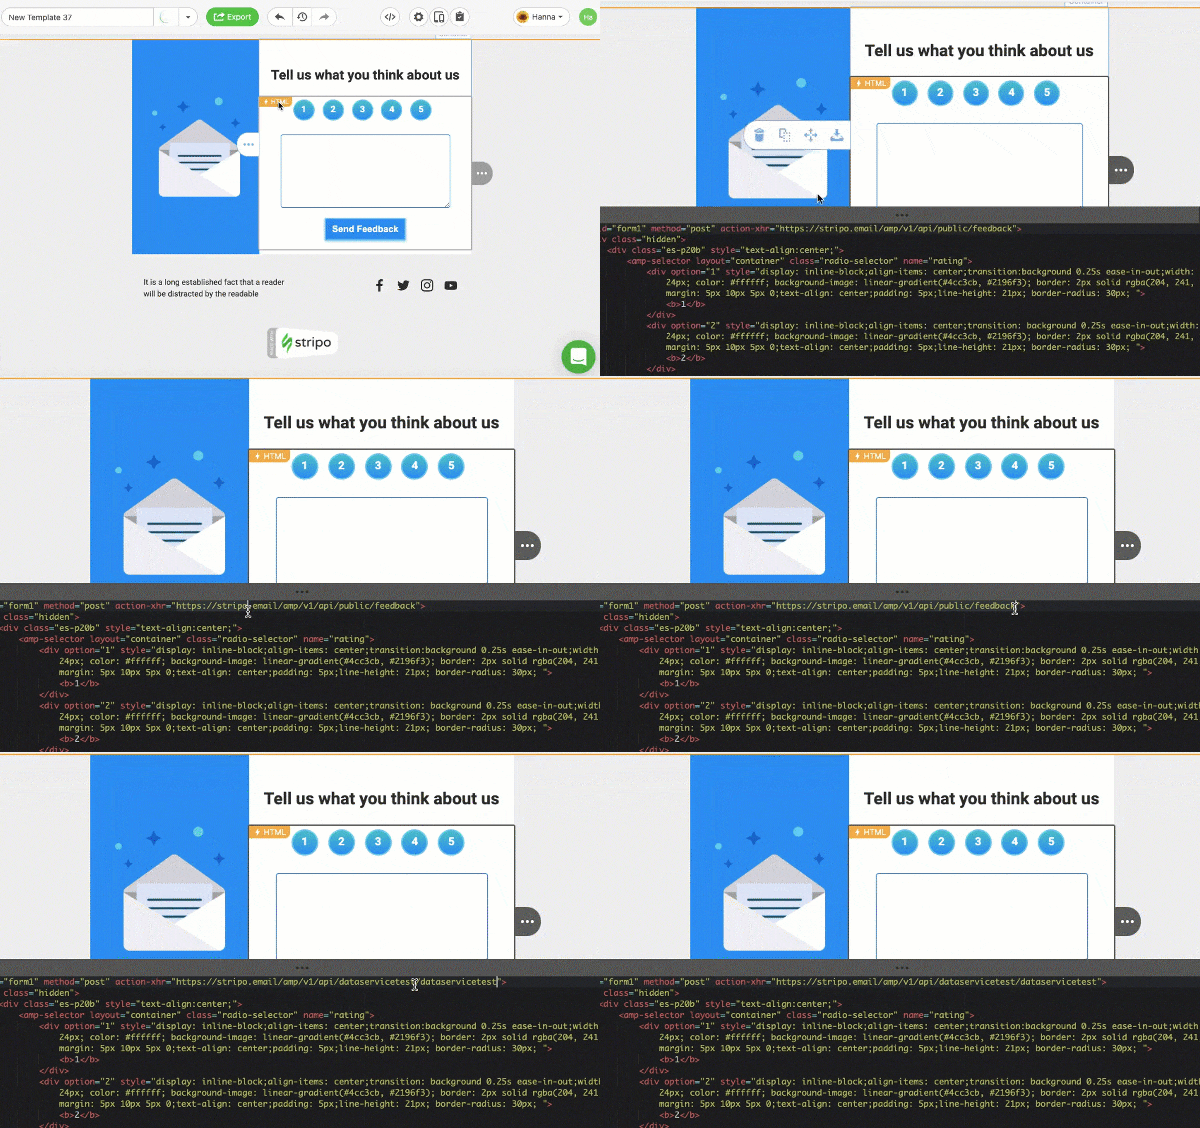
-
or just choose a necessary “Service for data collection” when configuring the AMP form block. Which is why we recommend that you give them clear, descriptive names, maybe even with dates if you plan on asking users for feedback often.
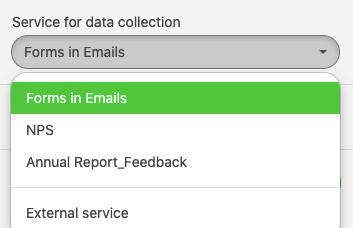
For more information on the Stripo Data Service, please refer to our dedicated blog post.
The Stripo Data Source
Another tool to let you get the most out of AMP for email technology.
To enable real-time content, updates in emails after they were sent, gamification — you need to use the amp-list component. It provides a way to update content. In cases with gamification, shows users his/her results right away, aka feedback system, and enables the next step of the game.
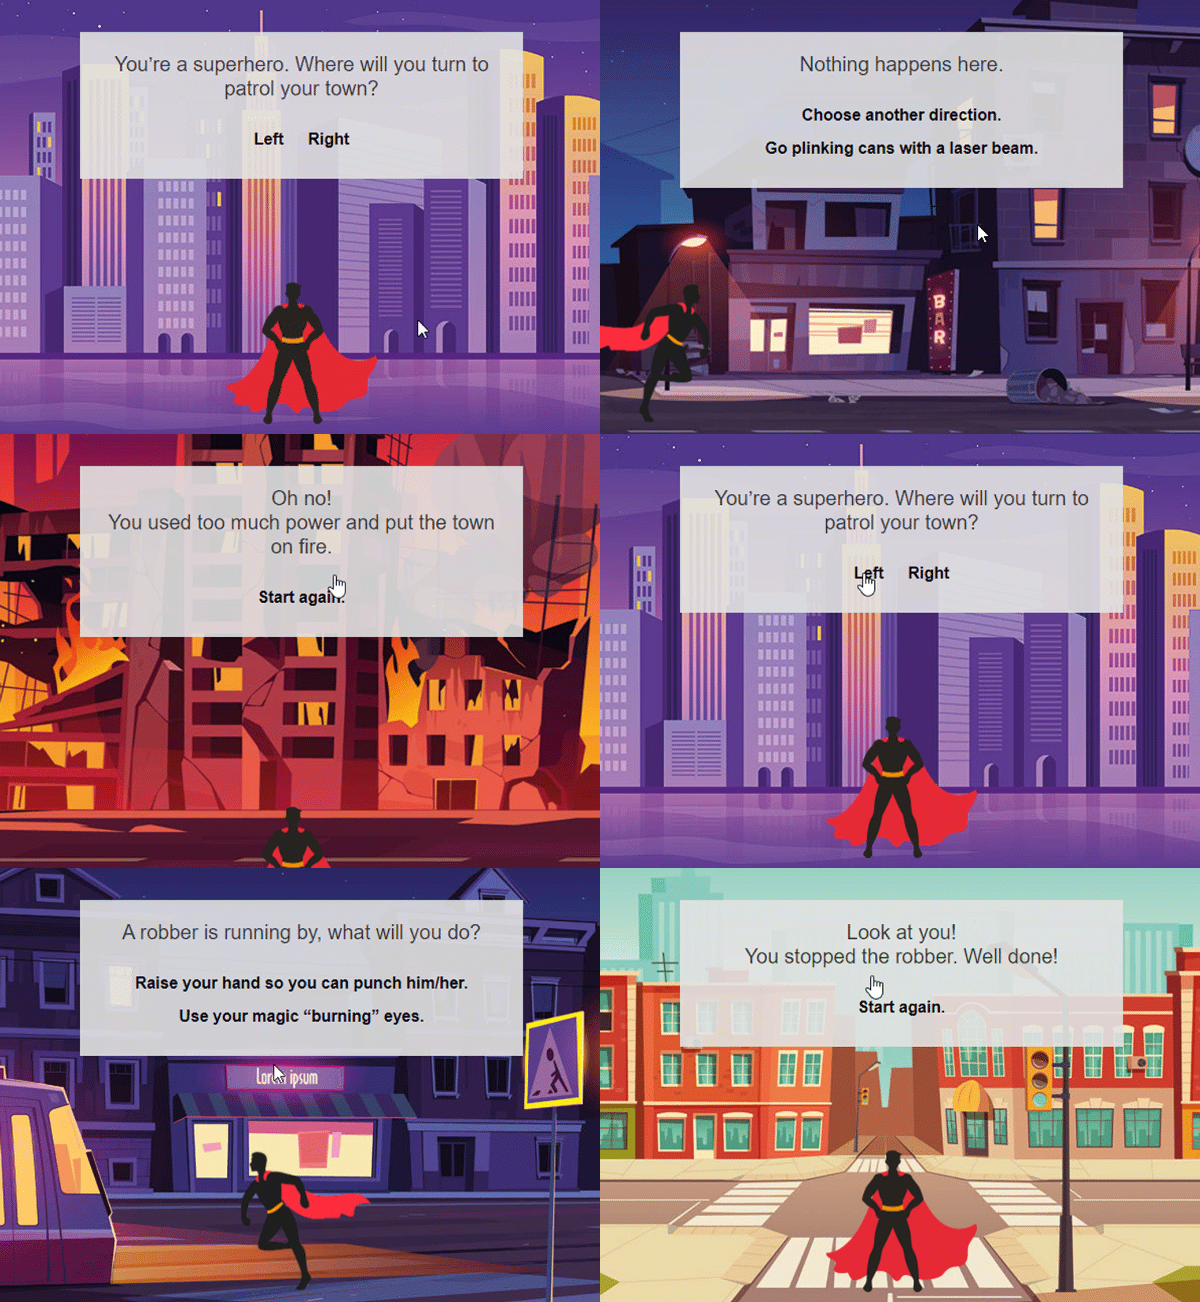
And this component requires to be connected to a Data Source.
Of course, you may use yours. But the Stripo data source:
-
sets appropriate CORS headers which are vital for AMP emails;
-
creates an endpoint for each email campaign with AMP components.
We do it all to help you build AMP emails way faster. Our Data Source saves you hours, if not say days, on building AMP emails.
Currently, there are two ways to use our Data Source:
-
connecting JSON files to emails — for detailed information on how to connect emails to a JSON file, please refer to a dedicated blog post of ours;
-
connecting emails to Google Spreadsheets — for detailed information on how to connect emails to Google spreadsheets, please refer to this blog post.

How to preview AMP emails with Stripo
This is a very essential step at building any kind of emails: both AMP HTML and traditional HTML emails.
-
to preview AMP HTML email with Stripo, click the preview button above the template;
-
in the settings panel in the preview email mode, click the necessary version of your email;
-
to check out the other version of your email, just switch the button;
-
if you see an Error notification, like the one below, this means there’s an error in your email code;

-
click the notification to see what errors are there are in your code;
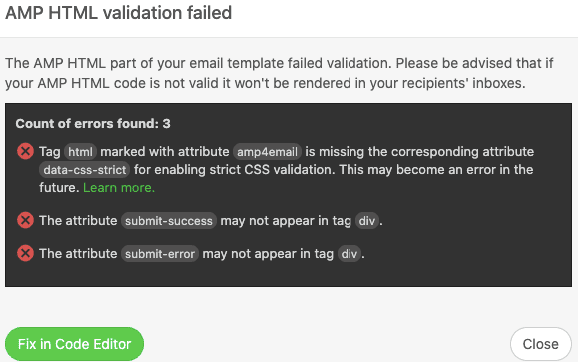
-
fix those bugs. To go back to the email’s code, just click the “Fix in the editor” button;
-
once those bugs are fixed, validate your email code once again by clicking the “Error” notification message right in the editor, and repeat check.
(My check in the GIF still shows three bugs ‘coz I did not fix anything ;) )
How to test AMP emails with Stripo
Given that AMP emails are dynamic, and we need to check if they work well, running a screenshot test will not be enough. So we need to send test emails to our email addresses and open those emails both on mobile and desktop devices.
To be able to send test emails from Stripo to Gmail, you need to enable us to send test emails to your account.
If this is your personal account, you need to:
-
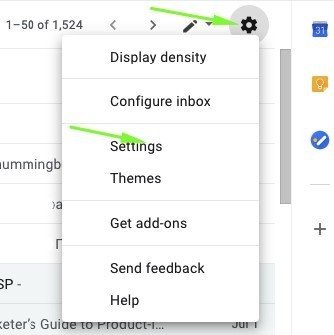
in Gmail, go to the settings panel — click the "Settings" icon;
-
in the dropdown menu, click the "Settings" section;
-
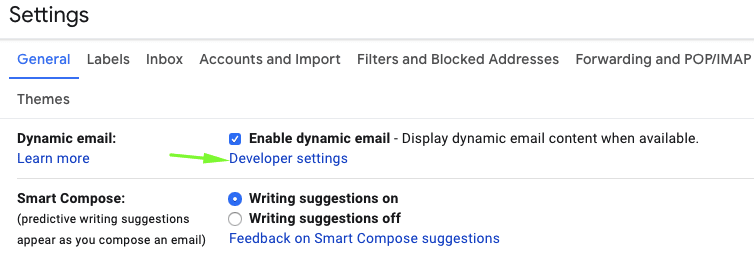
in the new window, in the "General" section, find the "Dynamic content" and open the "Developer settings";
-
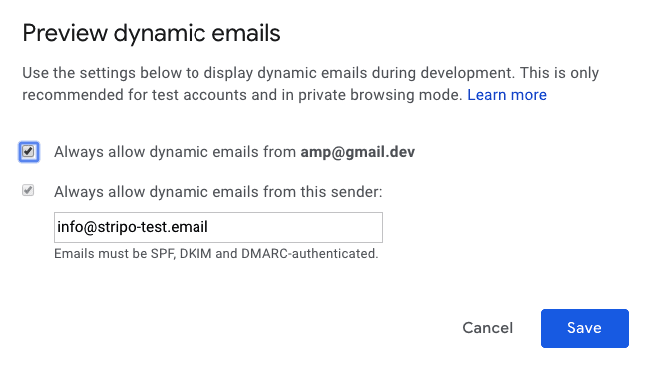
paste this email address info@stripo-test.email;
-
click save.
If this is your corporate account with Workspace (formerly G-Suite), you need to:
Ask your manager to enable "Dynamic emails" for you. And then you will only need to add our address to receive test AMP-powered emails from Stripo.
Please, be advised: The changes come into effect within 24 hours.
How to export AMP email to your ESP
Stripo allows exporting emails directly to certain ESPs. You just export them as regular emails.

If your ESP does support AMP, but we have not enabled direct export of AMP emails, you just may download your email as the AMP HTML file. And open it in your ESP.

Those recipients whose email clients do no support AMP will see the traditional HTML email; while those whose email clients do support AMP, will see your sophisticated emails. Remember, we learned to hide AMP-elements in regular emails.
Word of advice
Here's just a friendly reminder. To be able to send AMP content, you need to:
-
get whitelisted with Google and Yahoo. You now can do it by submitting just one short form;
-
fix all the bugs if any occurs. You will see them in the Preview mode (otherwise users will see HTML email);
-
add the fallback — HTML version — in this email;
-
make sure that your ESP/CRM is capable of sending AMP emails;
-
keep in mind that currently Gmail, Yahoo are capable of rendering AMP emails both on the web and on mobile apps;
-
AMP emails lose their AMP components if you forward them.
Find more ways and ideas on how to use AMP in emails in our dedicated blog post or check out our 8 examples of interactive content in emails.
If you have any questions, please ask in the comments below.



5 comments